But since it is a study note, of course it must have a beginning and an end. I must start sharing it systematically to be worthy of my friends who follow me.
So, today we will start with the installation of SD. "From now on, SD will stand for Stable Diffusion. It's better to have fewer words, after all, your hands will be tired."
For a specific introduction, you can actually refer to Midjourney"Hereafter referred to as MJ", but MJ is paid online, and SD can be installed on your own computer for free "but the computer configuration requirements are a bit high"; well, MJ is relatively simple to operate, and the operating threshold of SD is higher.
Well, how should I put it? Taking the martial arts secrets as an example, the mental level of SD is higher than that of MJ. The more energy you put in, the greater the reward. Compared with MJ, SD is more varied, and you never know where the potential of SD lies.
Enough of words, let's get straight to the point. You can experience it for yourself later!
—
If you want to experience SD, there are three main ways:
Solution 1: Deploy on your own computer (basic computer configuration required).
Solution 2: Deployment on a cloud server "costs a little money, but is not expensive."
Option three: Get SD for free from online websites.
The above three solutions each have their own advantages and disadvantages. After I finish introducing them, you can choose the one that suits you best.
—
Solution 1: Local deployment (Windows version installed on your own computer)
Note: I don’t have a Mac, so I have no right to speak since I haven’t operated it, so I will mainly introduce the local deployment under the Windows version.
Configuration requirements:
-
The memory should be more than 16G, 8G is not recommended. 8G will cause lag when opening a few applications.
-
Graphics cards generally require N cards "Nvidia", A cards "AMD" are not recommended. Video memory should be 4G or more, the larger the better, especially when it comes to running large pictures and refining elixirs (which will be introduced later).
-
The CPU doesn't have many requirements.
-
It is recommended that the solid-state drive be 200G or larger, after all, a model takes up several GB.
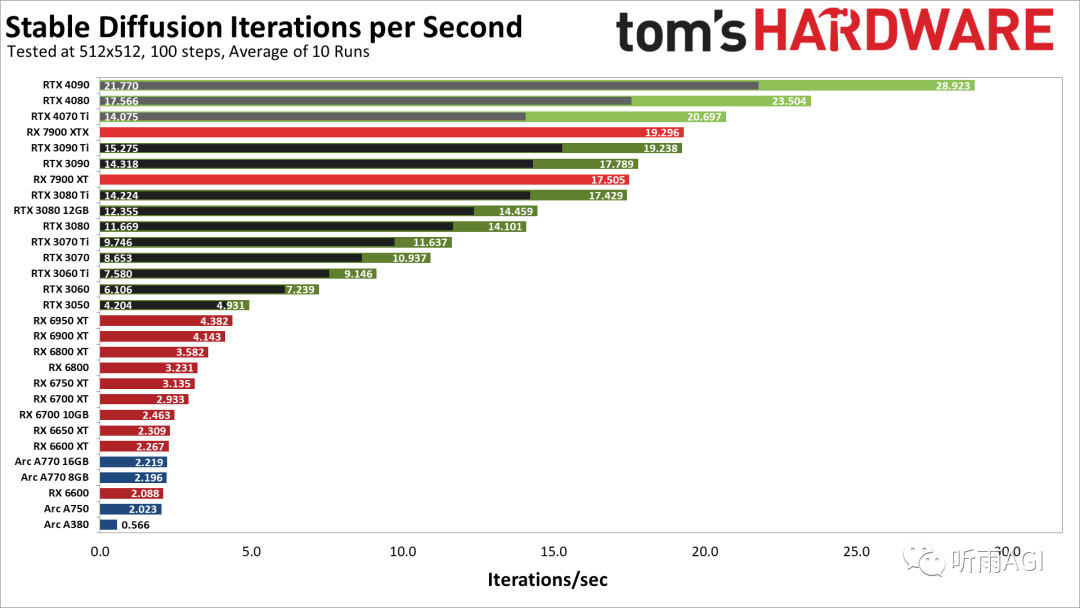
The following is a performance comparison of graphics cards when running SD. You can feel it intuitively and then choose the graphics card that suits you. I use the RTX3060 12G version of the graphics card, which is an entry-level configuration. "Basically, you can experience all the functions of SD, but it's a bit slow."
First of all, I would like to thank Qiuye from Bilibili for developing the SD one-click integration package, which saves us from trial and error step by step and scratching our heads. Yes, it is the legendary lazy integration package, familiar with it!
The following is the Baidu network disk link of the integration package:
https://pan.baidu.com/s/1ll4xB8MiaWD46k5Q0REO0A?pwd=byip
There are three files after downloading. First, click "Starter Runtime Dependencies" and click the installation steps to complete. I will not talk about the first file for now, as it is not used for the time being.

Then the second step is to unzip the "sd-webui-aki-v4.1.zip" file. Now it has been updated to version 4.2, and the operation is the same. The version in Baidu Netdisk is 4.2.

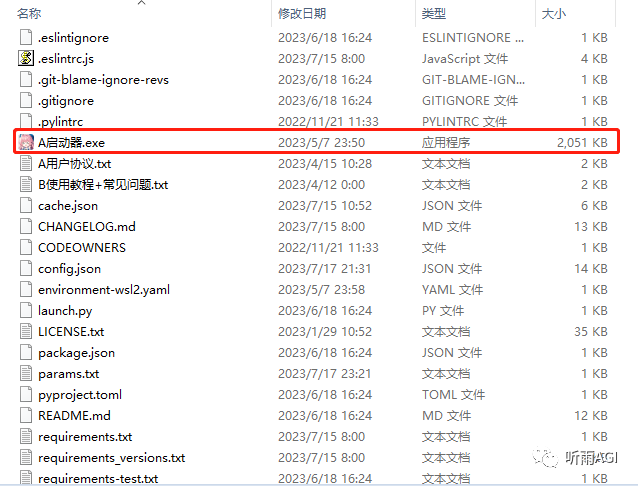
After decompression, it will look like this. Just click "A Launcher.exe".
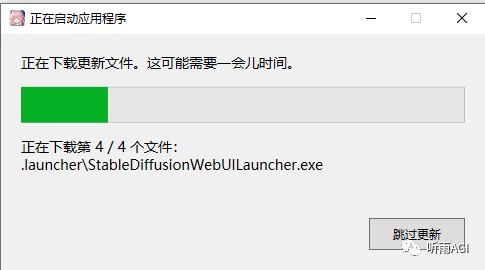
It is normal for this page to appear, just wait for the update to complete.
This is the startup page, just click "One-click Start".
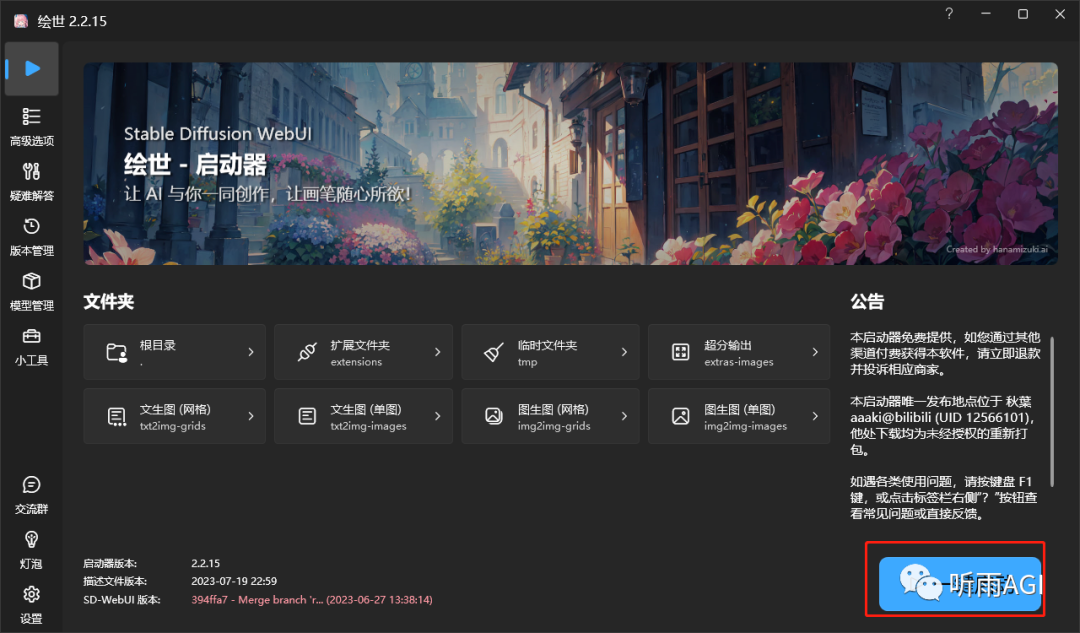
After waiting for the startup to succeed, if this page pops up on your default browser, it means the startup is successful and you can have fun!
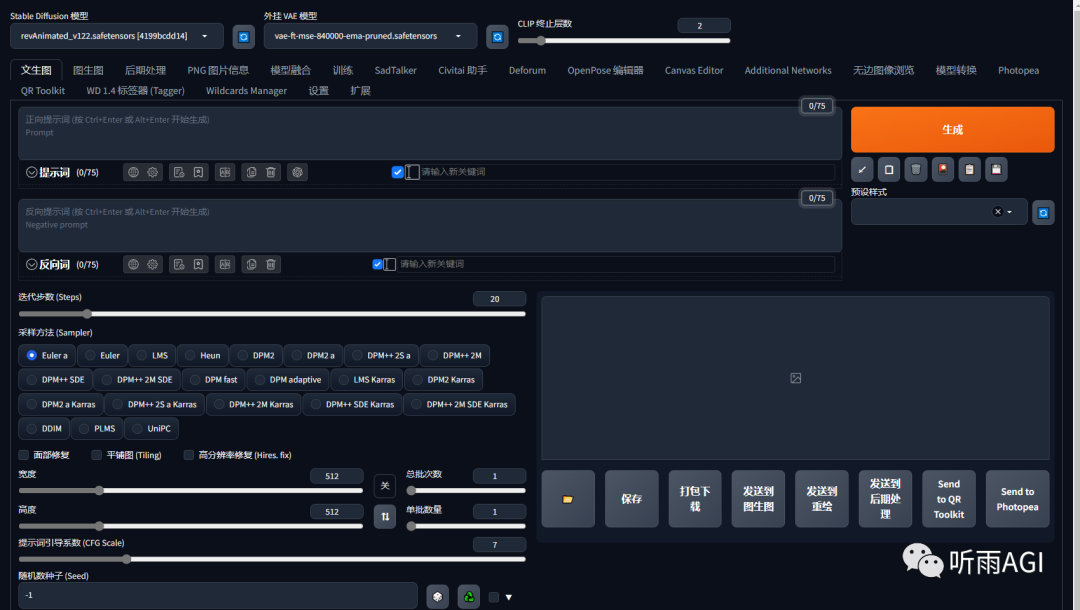
—
Solution 2: Cloud deployment
What if your computer configuration is not good enough but you still want to play SD? There is a way. After all, all roads lead to Rome. Next, I will talk about how to deploy it in the cloud. It is actually very simple.
First of all, you need to choose a GPU cloud rental platform, because SD can only be deployed on the GPU cloud platform. I am using the AutoDL computing power cloud platform here, so I will use AutoDL to demonstrate it.
AutoDL website: https://www.autodl.com/home
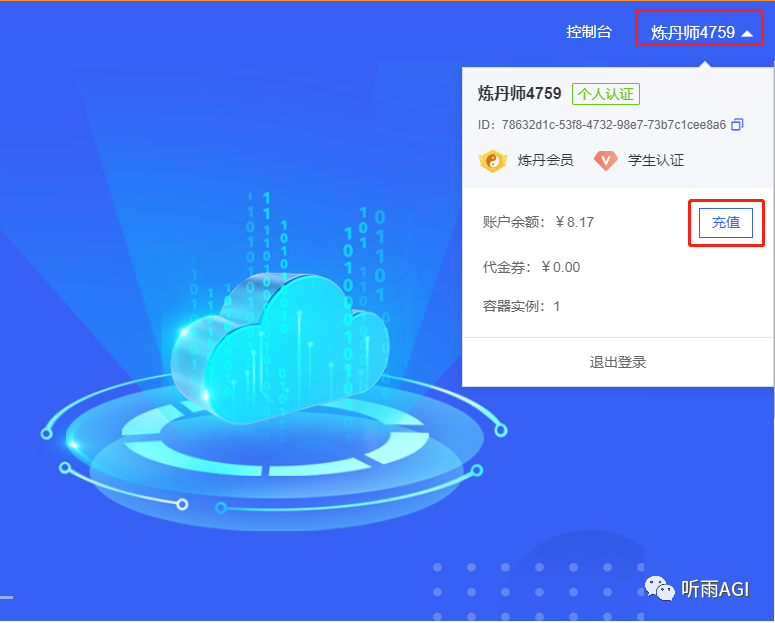
After registering and logging in, the first thing to do is of course to recharge money. Move the mouse to the upper right corner of the homepage, the following interface will pop up, just click recharge, and recharging 5 or 10 yuan is enough.
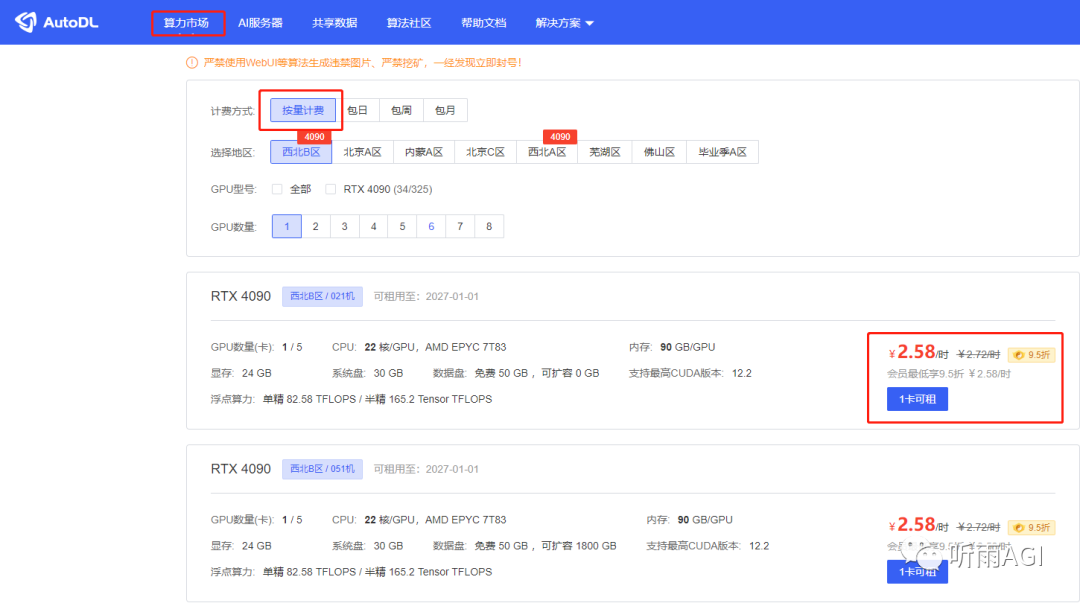
Then everyone chooses the computing power market. The default billing method is "pay as you go". We just use the default. The following are the prices per hour for different GPU models. Everyone can rent according to their needs. Anyway, I usually use RTX 3080, which costs less than 1 yuan per hour.
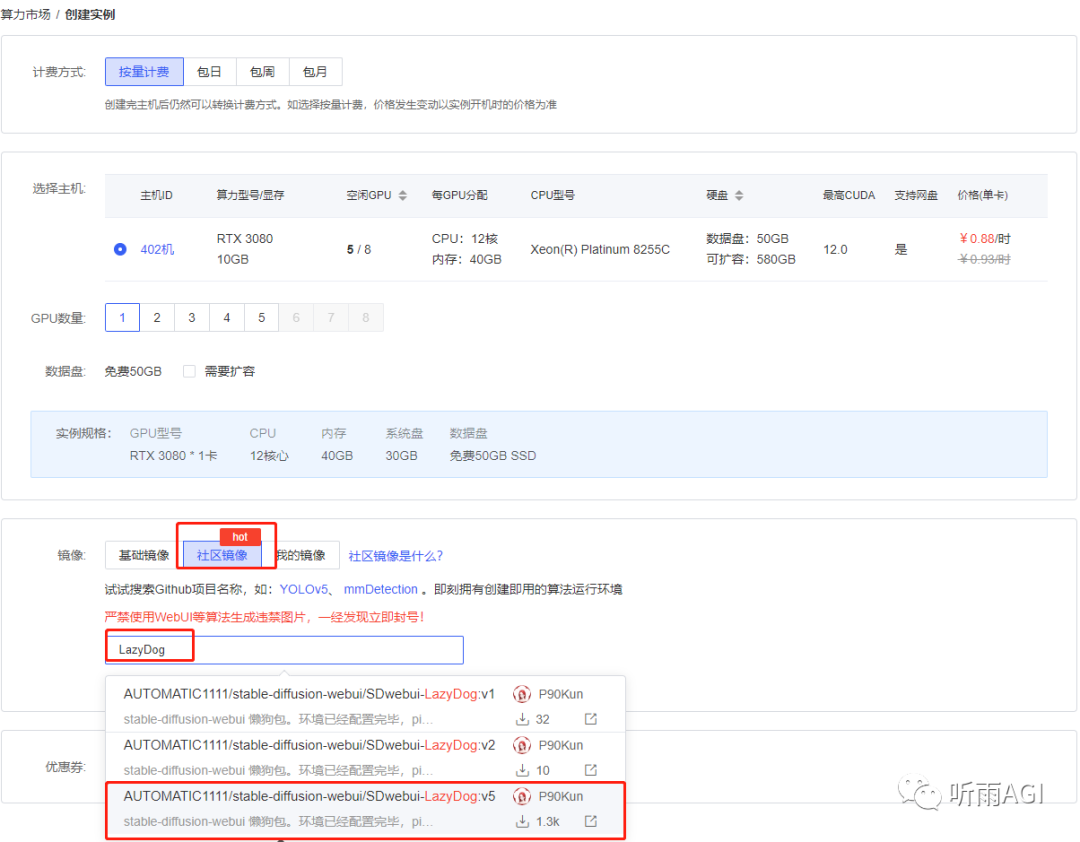
After entering this page, select Community Mirror, enter LazyDog, and select the latest version. Yes, there is also a lazy one-click package here, which is also a mirror that has been built for you by various masters, you can just use it directly. Leave the other parameters as default, and then click Create Now in the lower right corner.
Wait for the instance to be created and started.

After booting up, click "JupyterLab".

The following is the homepage. The master has written the instructions for starting SD for you. I will not repeat them. Just follow the instructions and start it.

The specific operations should be performed in the terminal.

Since the system image is generated in the system disk by default, but the capacity of the system disk is relatively small, you can migrate the entire SD folder in the system disk to the data disk. The data will not be lost when the service is restarted.

If the URL: http://127.0.0.1:6006 appears, it means that the startup is successful. Please remember to set up academic acceleration before starting the script. "Open and see me.txt first" is also in the instructions. I just want to emphasize it again.
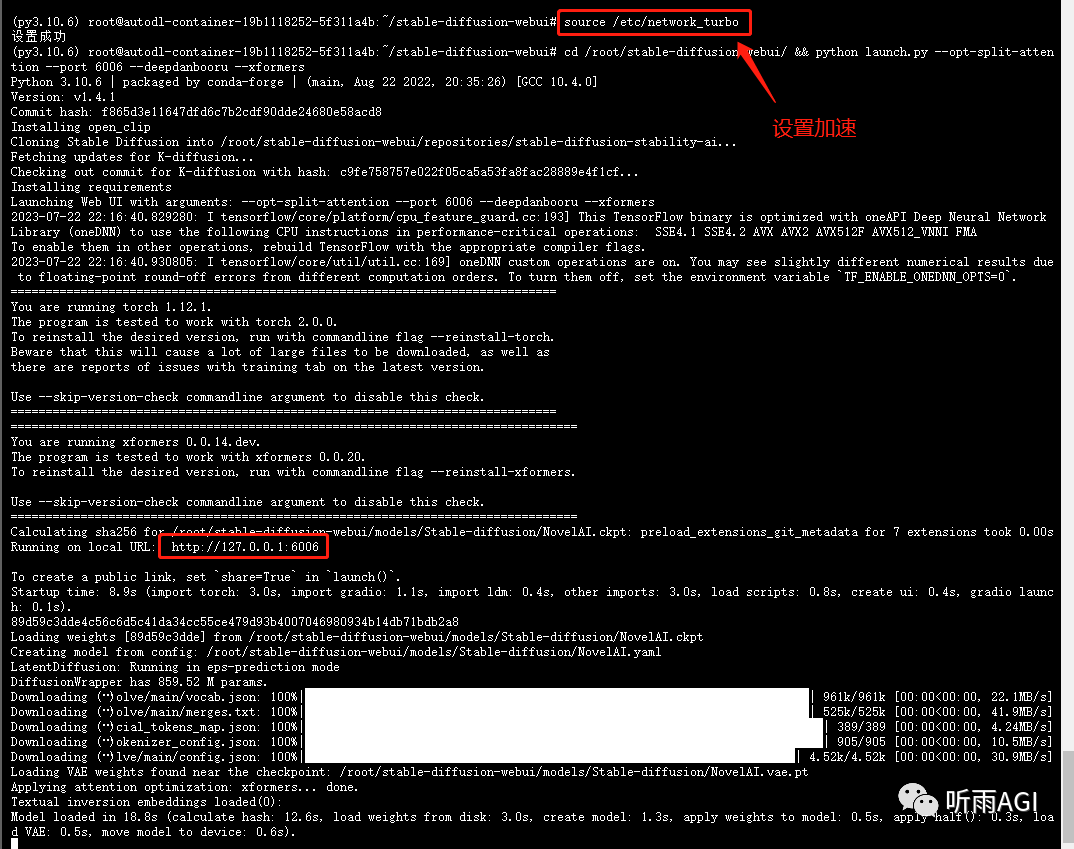
Then go back to our instance interface and click "Customize Service".

The following dialog box will pop up. Simply click "SSH Tunnel" and follow the official documentation.
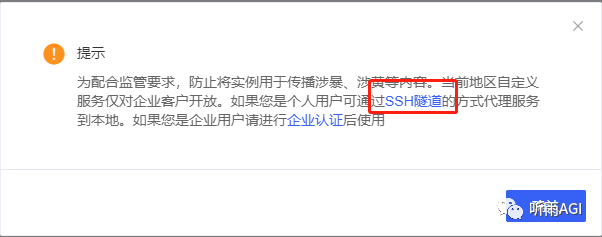
How to upload the models and plug-ins needed for SD? Select "File Storage" in the instance's running interface, then select the zone where your current instance is located, and click "Initialize File Storage".
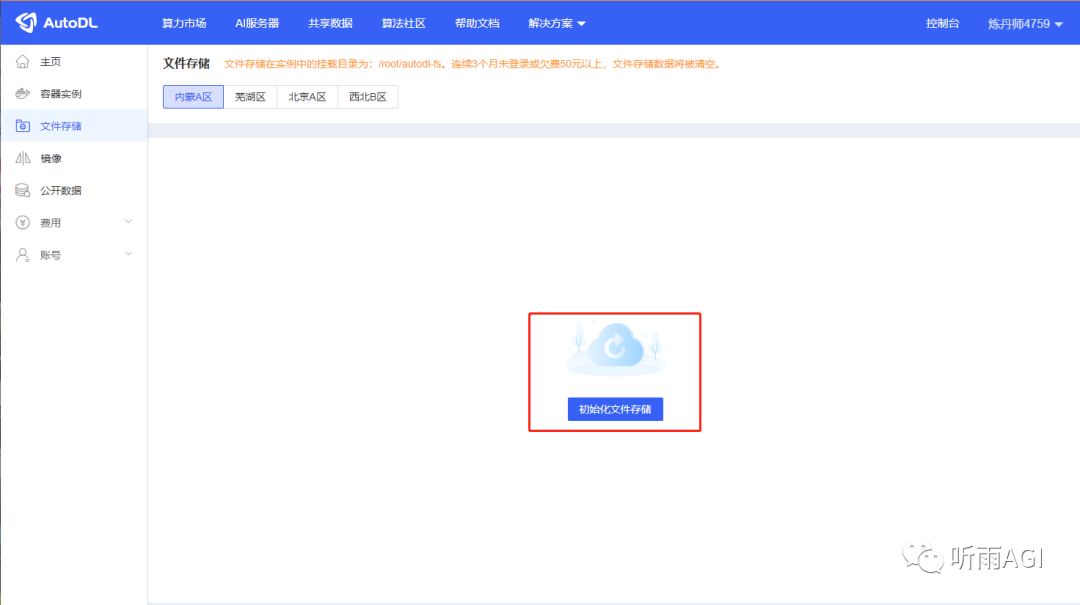
After the initialization is successful, the interface will look like this. Click "Upload" to upload your models and plugins. Please note that the free storage space is only 20G. If it exceeds this, you will be charged!
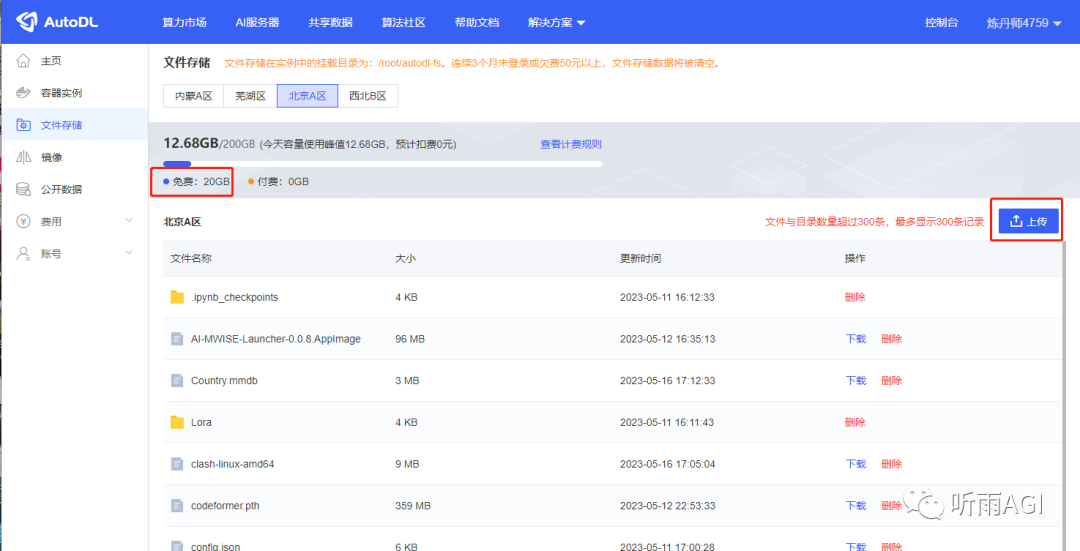
The uploaded files will appear in the /root/autodl-fs directory of your terminal. You can directly migrate them to the specified directory of your SD.

Or you can also bind your network disk to upload the model. For specific operations, please refer to the official documentation:
https://www.autodl.com/docs/nas/. If you encounter any problems, you can also read the official help documentation of AutoDL first.
Finally, I would like to remind you that you must remember to turn off the phone after use! Otherwise, the charge will continue to be deducted. So friends, try not to charge too much money. If you forget to charge 5 or 10 yuan, you don’t have to worry about it.

—
Option 3: Free online websites
Recommend an online free website, which is also a SD model download website:https://www.liblibai.com/
After logging in and registering, click "Online Stable Diffusion" in the upper right corner to have fun.

The official website has a tutorial for beginners. If you need it, you can read the tutorial before you start. Then, since it is free, a single account can only generate 100 pictures per day.

The above is all the content for today. I will not introduce the interface parameters of SD today, otherwise it will be too long and I am afraid that my friends will not be able to read it. Friends who are anxious can also learn about it by themselves first!
Today we mainly introduce three SD experience solutions, and you all have your own choices. But to be honest, if you really want to study SD in depth, Tingyu still recommends that you deploy it locally, after all, you can do whatever you want!