Recently, AI video modeling has been shared a lot, and graphical modeling has been shared a little less, and we haven't shared flux for a long time, so let's share flux today!
Today we're going to continue with flux acceleration techniques. We've covered a number of flux-accelerated graph acceleration techniques before, from Lora acceleration to torch.compile, and more recently TeaCache and WaveSpeed, to name a few.
With these acceleration techniques, flux can run locally with 4090, and it can already do 10s out of the map.
However, it is clear that the open source community is still not satisfied with this speed, and launched nunchaku, in the premise of not losing the quality of the flux map, hard to flux's speed continues to be compressed by a large part of the speed, to achieve 3s of the speed of the map. Thinking back to the speed of flux when it first came out, it really feels like a dream!
nunchaku has been out for a while, I think there are a lot of friends have been used, but there should be some friends still do not know, just take advantage of the recent nunchaku updated version 2.0, let's share a wave.
This update introduces the First-Block Cache acceleration module, which makes mapping faster and provides multi-Lora and ControlNet support.
Okay, without further ado, let’s get started.
First, let's look at the simplest flux of the text of the map operation, 1024 * 1024 resolution 25 steps, the speed of the map is basically maintained at 3s, which in the past completely unimaginable ah!

And the quality of the output is still online, on the left is nunchaku accelerated, on the right is the effect of flux natively without acceleration.

The workflow is as follows:
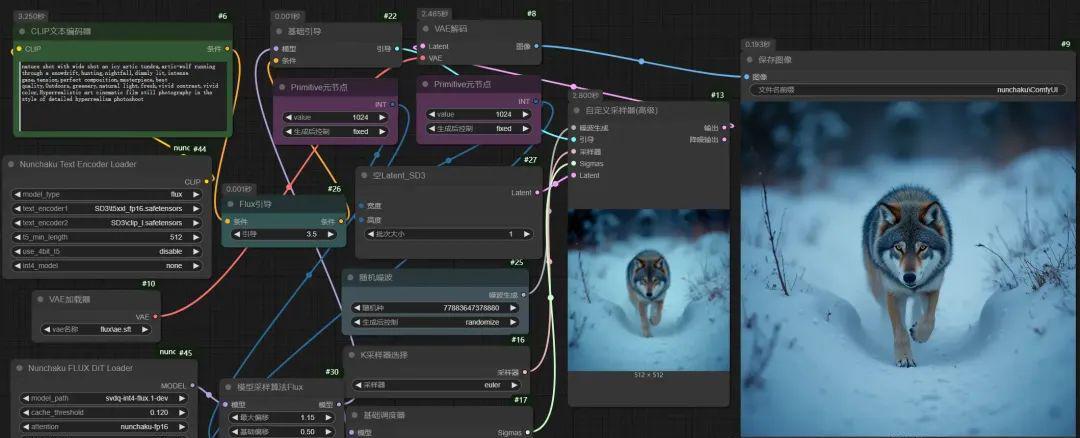
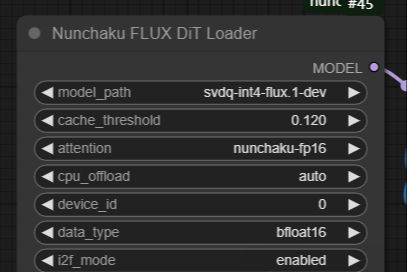
Let's look at this node, model_path is mainly used to switch between models, you can switch between flux-dev, flux-schnell and flux-fill.
cache_threshold is the acceleration node, the bigger the value, the faster the acceleration, we recommend using 0.12, if you feel that the quality of the image is reduced, you can reduce this value. If you think the quality of the image will decrease, you can reduce this value. Setting it to 0 is also possible, nunchaku itself is fast enough, without using this acceleration node, the image can be kept at 5s.
The other parameters will be fine by default, but remember to turn on the i2f_mode switch if we have a 20-series graphics card.
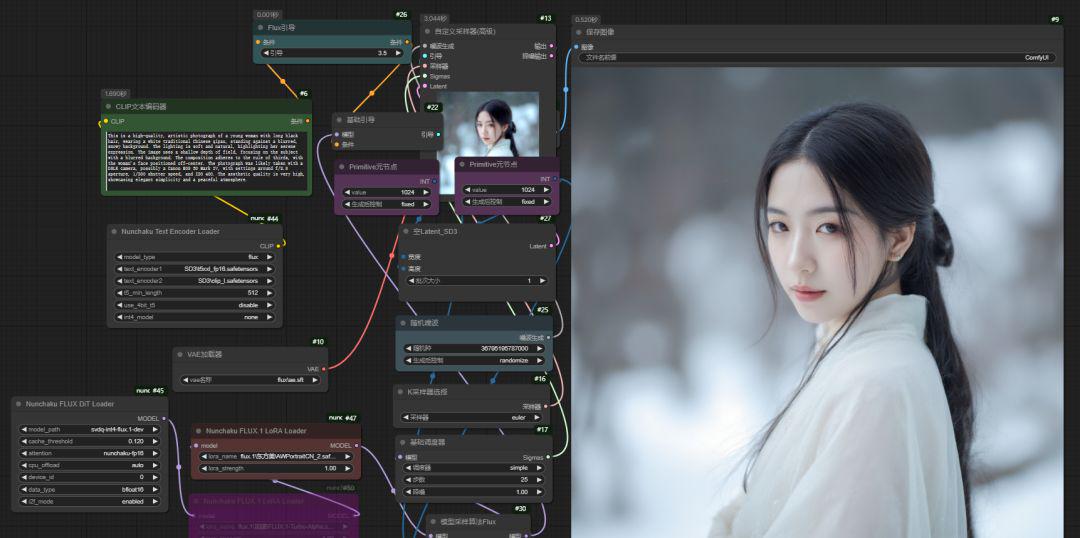
Lora using flux can be supported directly without special handling.
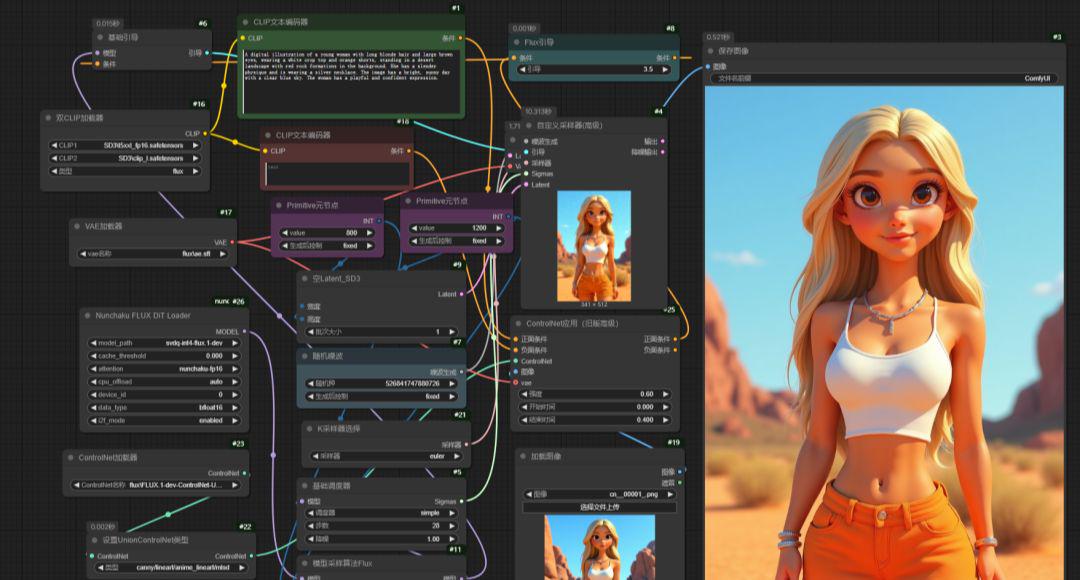
The ControlNet model can also be used directly, and the speed is quite fast, the graph can be produced in 10s.
Nunchaku also supports FLUX.1-tools full bucket, here's the flux-fill repaint workflow, which is still fast, 3 seconds.

flux-canny:
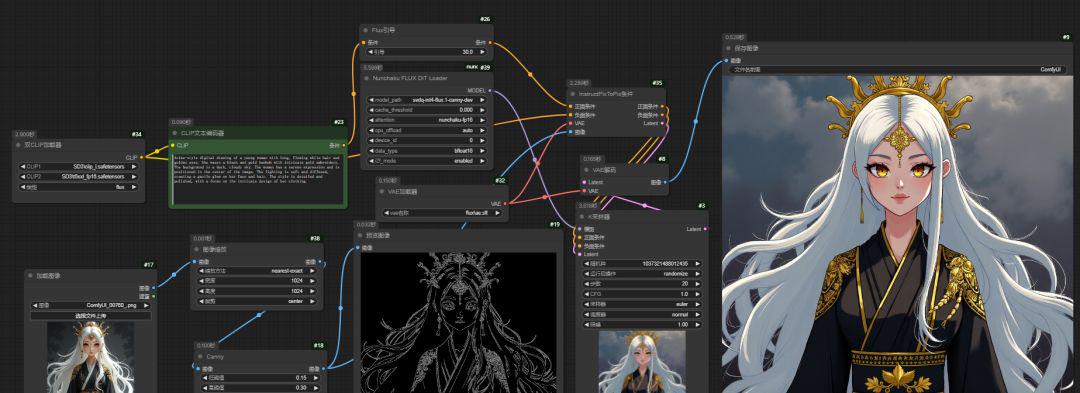
flux-depth:

Both canny and depth are also 3 seconds, and the most important part of flux, redux, is also working fine, with the same strong 3-second output speed.
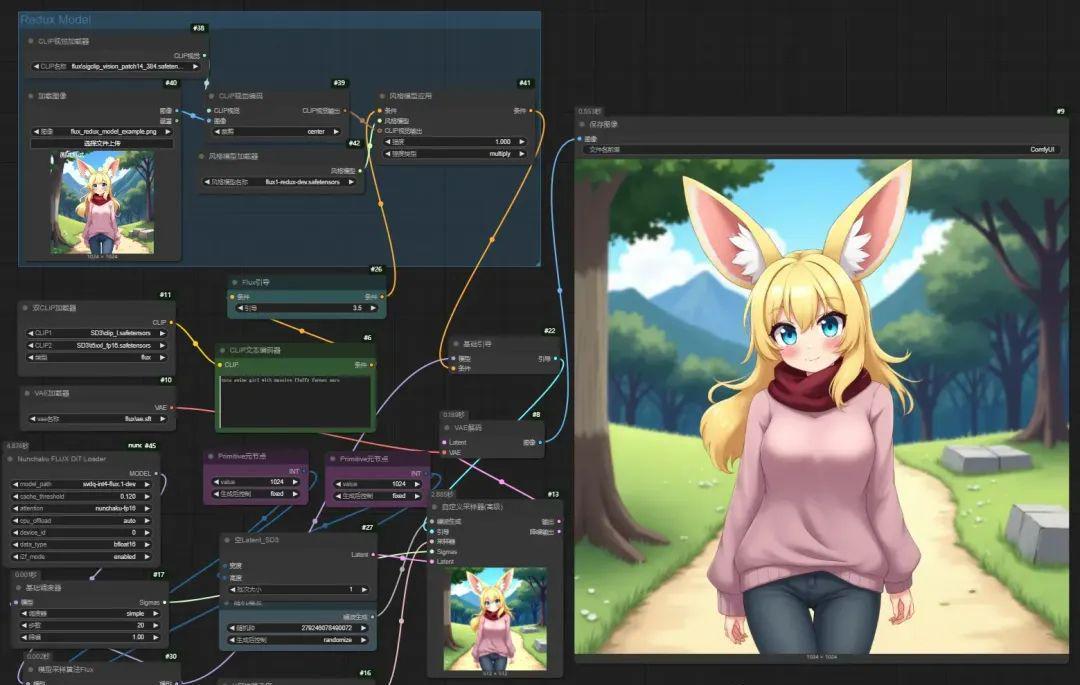
Regardless of the workflow, the acceleration is very noticeable and does not affect the output.
Let's see exactly how to install it. First we need to make sure we have PyTorch >= 2.5, which can be viewed in the comfyui backend after startup.

If the version is smaller than this one, you need to upgrade it. If you are using the Autumn Leaves launcher, you can upgrade the PyTorch version in Advanced Options - Environment Maintenance.
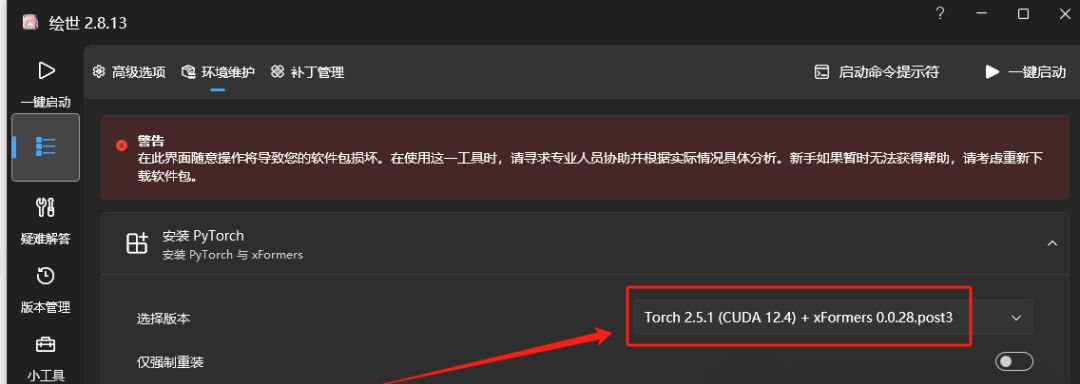
Before upgrading, remember to make a backup of your environment, so that if you have problems upgrading, you can switch to the old version. When installing plug-ins that you are not sure will damage your environment, you can also backup your python environment first, just in case!
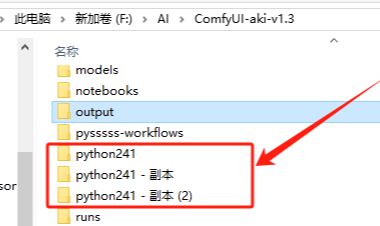
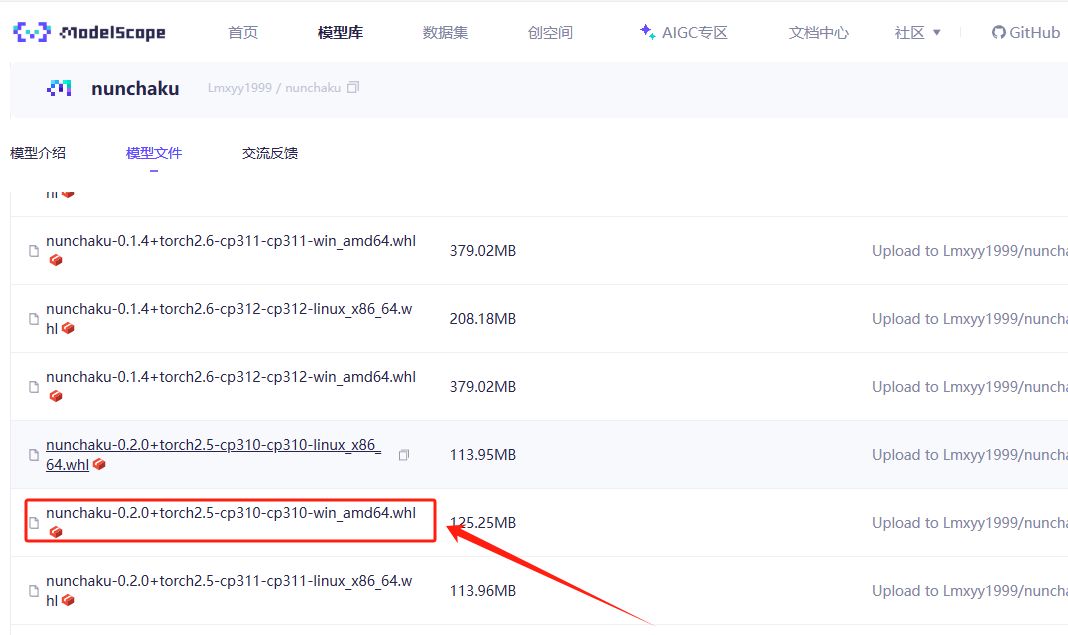
After upgrading your PyTorch version, you need to install the corresponding version of nunchaku's wheel:
https://modelscope.cn/models/Lmxyy1999/nunchaku/files
Listen to the rain here is PyTorch = 2.5.1, python version is 3.10, Windows version, then choose this version in the red box. According to your own version to select the corresponding wheel to download.
After downloading, you still need to install it directly. You can put the installer file directly into our python folder, mainly for convenience, but you can put it in any other folder as well.
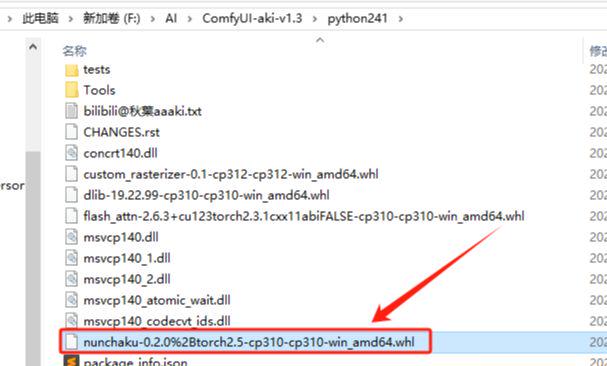
Then type cmd in the directory field of the folder, hit enter to open the Windows command prompt tool, type the following command and hit enter to install the environment:
python.exe -m pip install "nunchaku-0.2.0%2Btorch2.5-cp310-cp310-win_amd64.whl"
Installation files to their own downloaded file shall prevail, their own copy of the file name to replace the file name within double quotes listen to the rain oh!
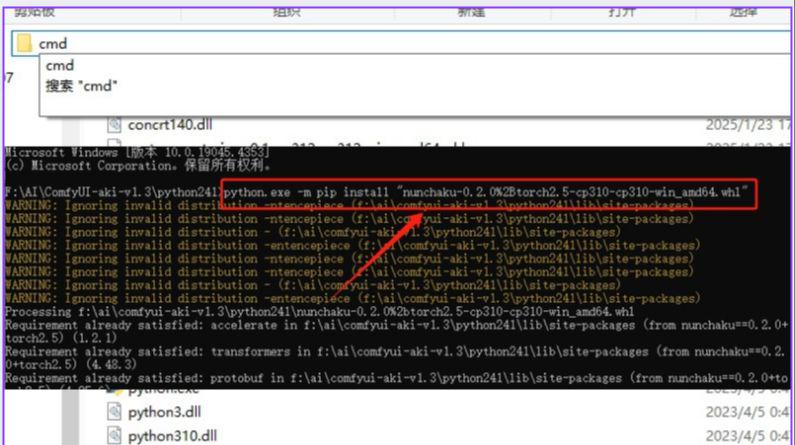
Next wait for the installation to complete on it, to here the pre-preparation work is completed.
Next we also need to install the plugin:ComfyUI-nunchaku, just install it directly from the comfyui manager.
Plugin address:https://github.com/mit-han-lab/ComfyUI-nunchaku
You also need to download the corresponding model, model listening to rain at the end of the article in the net disk, the need for small partners to take.
Then we can have fun! The pictures come out really fast! And the main thing is that the results are not discounted really well!
Okay, that’s all for today’s sharing. If you are interested, go and try it!
The model as well as the workflows are on the netbook, so help yourself if you need them:
https://pan.quark.cn/s/5ef5c8ddef77