Installation of the ControlNet plug-in can be slightly complicated, so we will help you through this section to ensure that you can follow through with a smooth installation.
I. Importance of ControlNet plug-ins
The ControlNet plug-in isStable DiffusionThis is a very critical tool that allows us to have finer control over the images we generate. In a follow-up, we'll dive deeper into the use of this plugin, so making sure it's installed correctly is crucial.
Second, plug-in installation steps
1、Extension tab page direct installation
1.1 Open the Stable Diffusion extension plugin interface
First of all, we need to open Stable Diffusion and enter the extension plugin interface. In the "Downloadable" section, we can directly search for "sd-webui-controlnet".

1.2 Identifying and installing ControlNet
Find the "sd-webui-controlnet" plugin, this is the ControlNet plugin we need. Click install, wait a moment, the system will show the installation is complete.

1.3 Apply changes and reboot
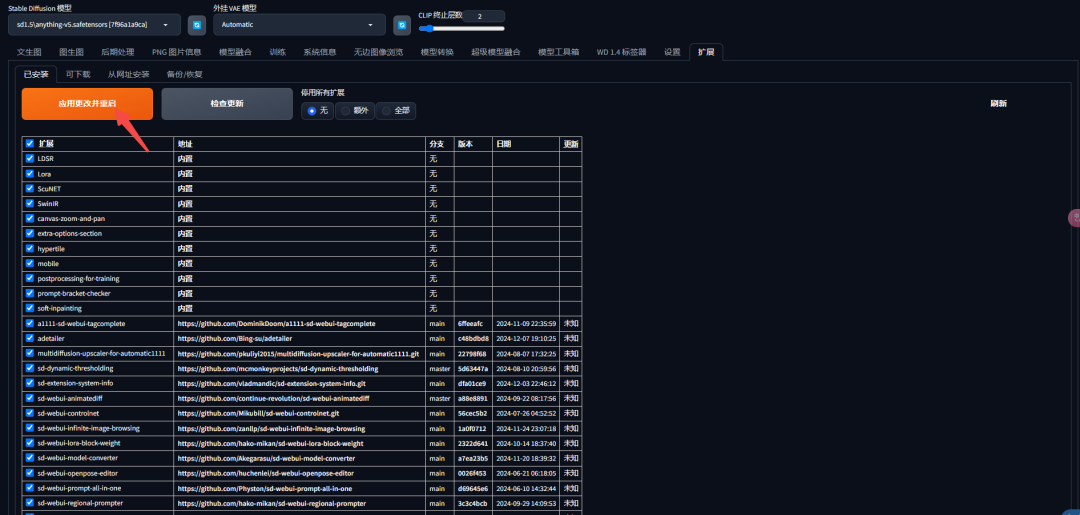
Once the installation is complete, go back to "Installed" and click "Apply Changes and Restart" to make sure the plugin is loaded correctly into memory.

2. Download and install from Github
2.1 Download the zip package
If the installation fails through the Stable Diffusion interface, we can go to GitHub to download the plugin. On the GitHub page, click the green "Code" button and select "Download ZIP" to download the plugin zip locally.


2.2 Unpacking the zip archive
Copy the downloaded plugin zip into the extensions folder of Stable Diffusion and extract it. In this way, the ControlNet plugin is successfully installed manually.

Precautions
This method of installation is not recommended and will result in the plugin not being able to be updated in the launcher screen.
3. Installation from a Web site
Another installation method is to install directly from the URL. Copy the URL of the plugin from GitHub to Stable Diffusion's installation screen, click Install, and the system will automatically download and install the plugin.

4. Installed ControlNet

III. Installation of models and dependent environments
The ControlNet plug-in requires additional models and dependent environments in addition to the main body for complete operation.
1、Download the model
On the ControlNet page on GitHub, we can find a list of models that need to be downloaded. Typically, these models are large files and may require a download tool such as Thunderbolt to speed up the download.


B station UP owner @ReliableXuanXuan provides a one-stop resource pack for newbies, which can also be downloaded here: https://pan.quark.cn/s/218e0e20a915
2. Installation model
Once the download is complete, copy the model files to the models/ControlNet folder in Stable Diffusion.

The launcher opens the webui page and you can see that the model is ready.

3. Installation of pre-processor
The ControlNet plugin may also require a preprocessor for its use. If you encounter problems with model download failures during use, you can go to the GitHub page to find the appropriate preprocessor download link, or download directly from the network disk provided by B station UP owner @ReliableXuanXuan.

Precautions
After October 2023, Autumn Leaf Launcher has supported the Domestic Mirror Acceleration preprocessor, so manual installation of the preprocessor is no longer required.
4、Complete the installation
After completing the above steps, the ControlNet plug-in and its required models and preprocessors have been properly installed. Restart Stable Diffusion and you are ready to start using the ControlNet plug-in.
Try generating an image with ControlNet:


IV. Conclusion
Through this section, we have explained in detail the installation steps of the ControlNet plugin, including the download and installation from the Stable Diffusion interface and GitHub, as well as the installation of the model and preprocessor. In the next section, we will formally begin to explain how to use the ControlNet plugin.
I hope this article will help you to complete the installation of ControlNet plugin successfully.