There are three main ways to fix zoom in in the WebUI:
- Vincent Image - High Definition Restoration: The image is processed in two steps, first generating a low-resolution image, and then generating a high-resolution version based on the image and the enlargement algorithm. This can enrich the details without changing the structure of the image, which is simply to redraw the image.
- Image-SD zoom: Split the image into several small pieces according to the specified zoom factor, and then redraw them with fixed logic, and then stitch them into a large picture. This way, you can draw large-size pictures with low video memory. In simple terms, it is to divide a picture into several small pieces and then stitch them together.
- Post-generation processing: Use an upscaling algorithm to perform a separate upscaling process after the image is generated, so that the image will have a higher resolution size.
Let’s stop talking nonsense and start today’s learning!
1. Hi-Res Fix - Vincent Image
existStable DiffusionSometimes, although the generated image is what you want, the overall viewing experience will be affected by the image quality.
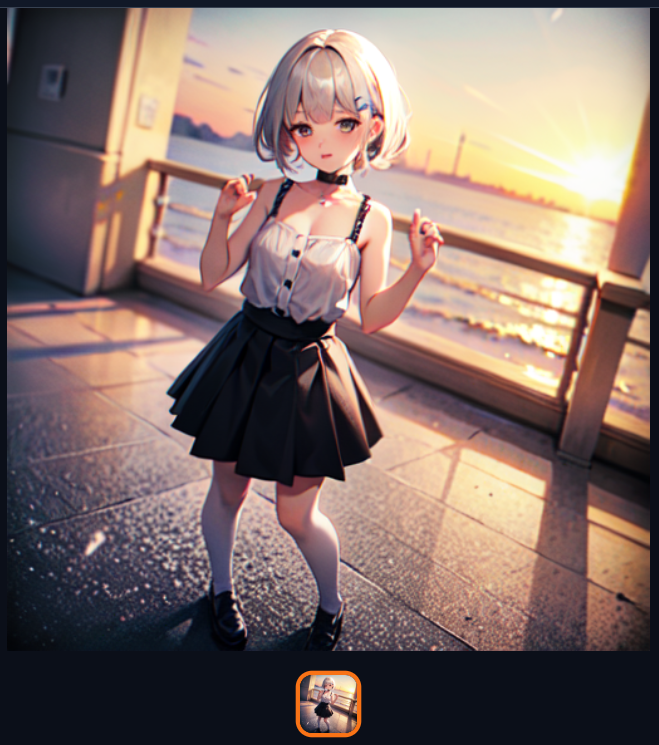
It looks OK but it feels a bit blurry
In fact, in Stable Diffusion, the processing method to make the image clearer and more detailed is relatively fixed.
There is an option in the interface of Vincent Image that can do this. There is an option called HD Repair above the adjustment of width and height.

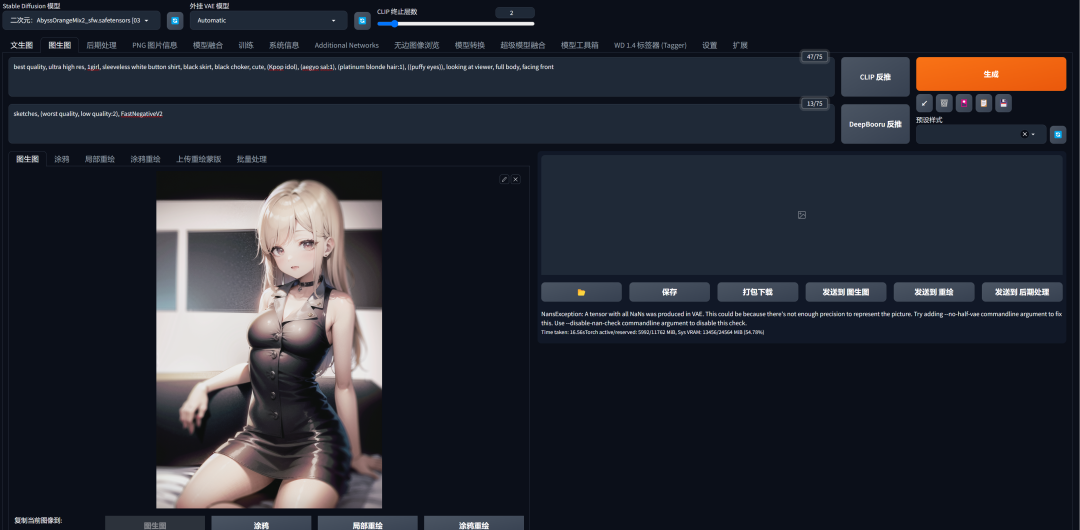
Before repairing, I will perform the steps of generating the Wensheng map again. Students who are interested can also try it themselves:
Positive prompt words:
best quality, ultra high res, 1girl, sleeveless white button shirt, black skirt, black choker, cute, (Kpop idol), (aegyo sal:1), (platinum blonde hair:1), ((puffy eyes)), looking at viewer, full body, facing front
Reverse prompt words:
sketches, (worst quality, low quality:2), FastNegativeV2

Next, generate the picture to see the effect:
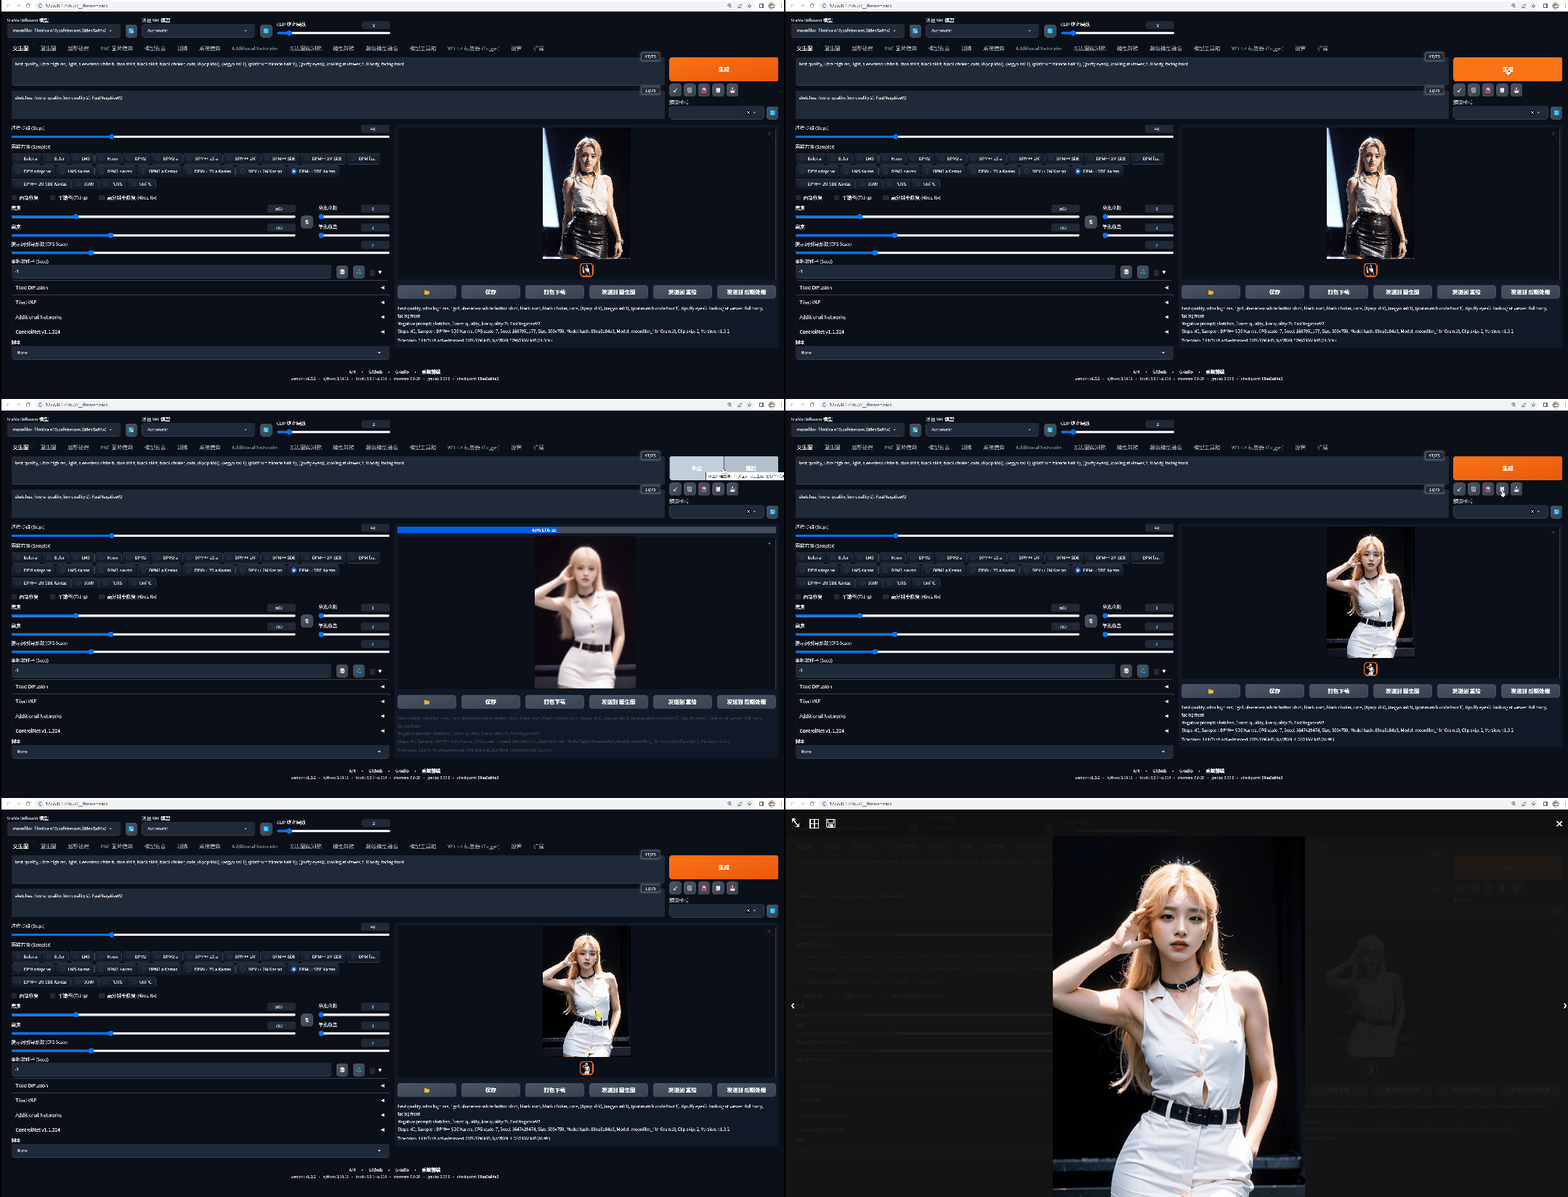
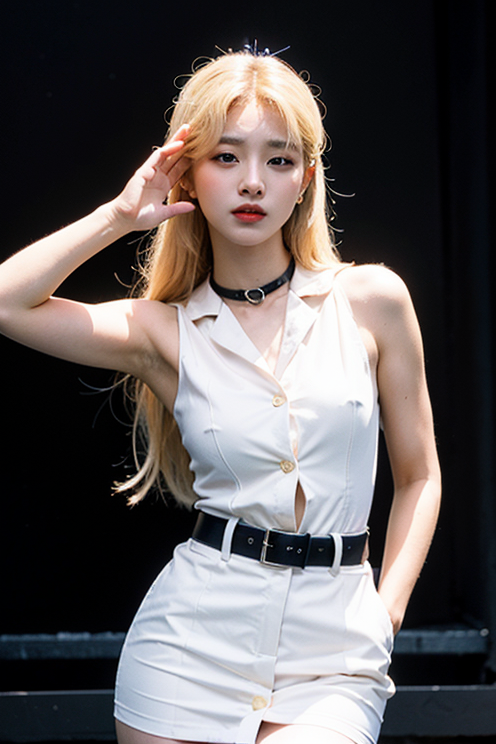
The quality of this picture seems good at first glance, but after zooming in, you can see that parts of the picture are a bit blurry and the skin does not look that textured.
This is a common problem when AI generates realistic images. When the drawing resolution is set too low due to hardware and other issues, AI does not have enough space to improve the image details.
It may not be so bad in two-dimensional pictures, at most the parts are blurry, but it is easy to see the problem in three-dimensional images that pursue reality.
Of course, some students with better hardware can directly and roughly increase the resolution, but this problem obviously does not apply to everyone, and doing so will cause the video memory to explode.
Another problem is that even if the graphics card is top-notch enough, the 4090 is the best graphics card that most people can buy. Even if you use the 4090 to run high-definition images, the final image generation will still have the problem of multiple heads and multiple people.
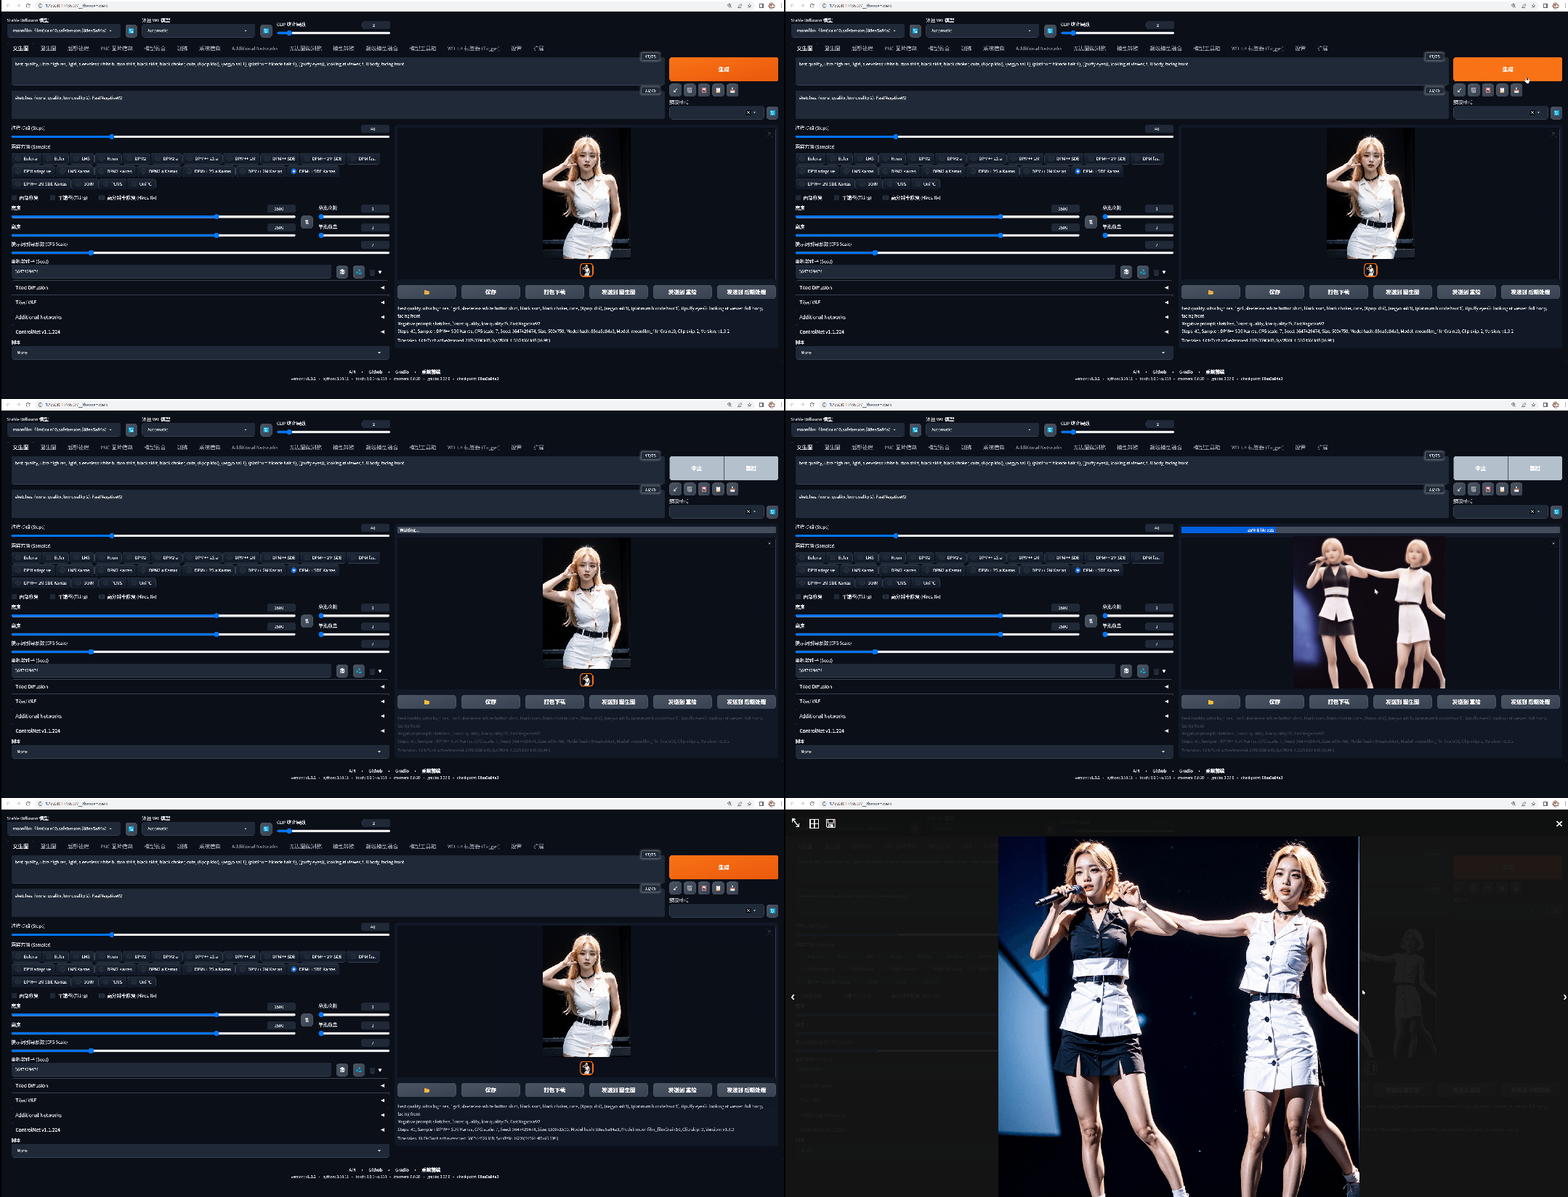
Here you can considerHD restorationfunction, check this option before making a Wensheng diagram, and then some additional parameters will appear:

The following three parameters:Magnification, Adjust Width to, Adjust Height to, these three parameters refer to how much the image is enlarged from its original resolution. This parameter can be set by multiples or by specific values.
AboveHigh score iteration stepsIn fact, it is equivalent to the number of sampling iterations, because this is also an option for redrawing the image.
Redraw AmplitudeThis is the redrawing amplitude in the image generation function, but it can be used in the text generation function here. If you want to keep the large structure of the picture unchanged, it is best not to exceed 0.5.
Upper left cornerAmplification algorithmThis is probably the hardest thing to understand.
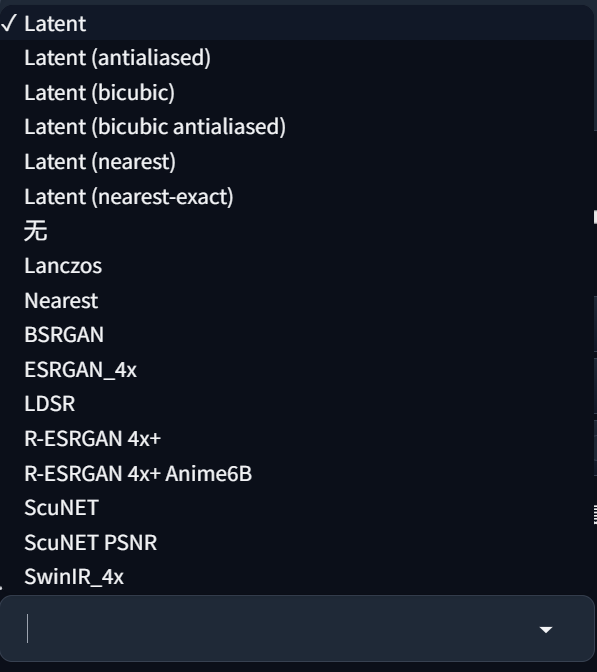
Select the first one hereLatent variablesThat’s it, you’ll know what it is in a moment.
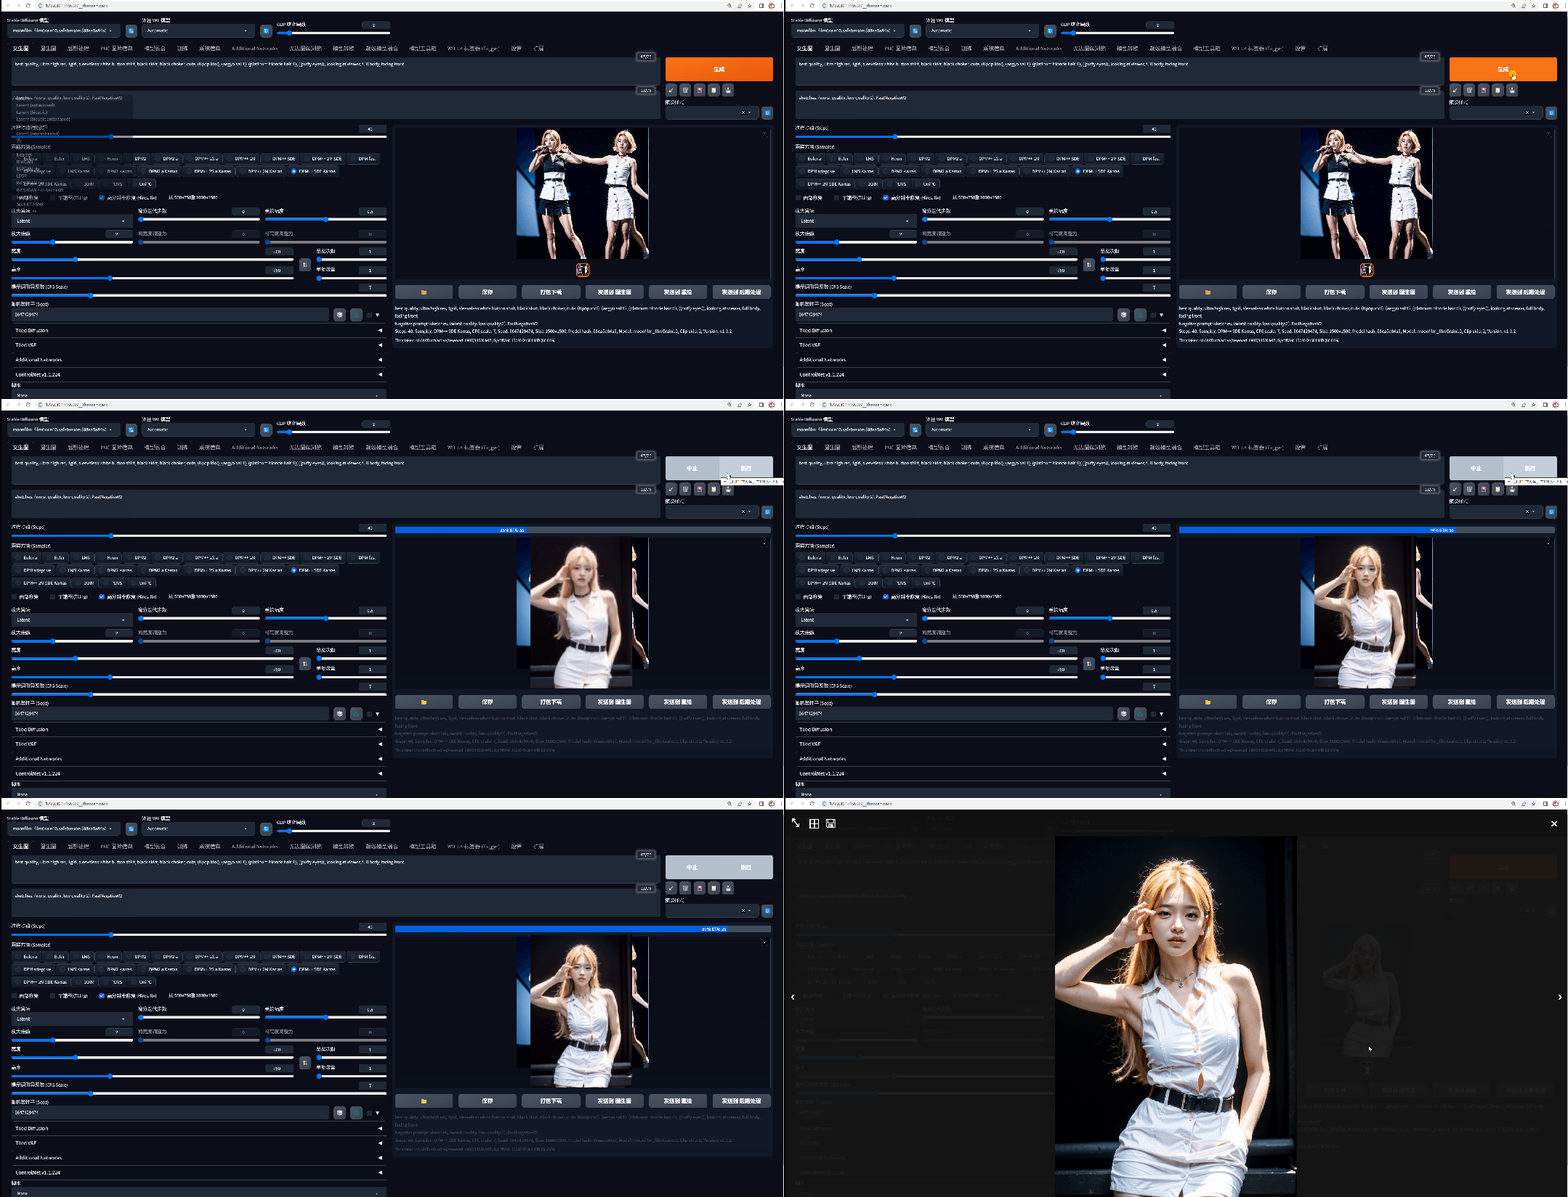
Here you can see that AI first draws a low-resolution image, and then draws a high-resolution version based on the low-resolution image. In simple terms, it is like a process of generating images from images.
This process is to generate a low-resolution image and then return it toPotential SpaceRe-denoise to create a larger image.
Before HD restoration:

After HD restoration:

Although the face of the character has been slightly altered, it is obvious that the details are much better after restoration. Whether it is the facial details, the hair tips, the texture of the clothes, or the details of the sunlight, it can be seen that the second generated picture is more realistic.
If you want a clearer Vincent Wen image and avoid the problem of generating multiple people and multiple heads, you can consider the high-resolution repair option. Of course, this option also has its so-called advantages and disadvantages.
Advantages:
- Does not change the picture composition (fixed by random seed);
- Stable overcoming the problems caused by multiple people, multiple heads, etc. due to resolution;
- Simple and clear operation, intuitive effect
Disadvantages:
- Still limited by the maximum video memory;
- Relatively slow calculation speed
- Occasionally, extra elements may appear (elements that do not match the picture)
Therefore, the best way to use this function is to draw cards repeatedly at low resolution until you have drawn the desired picture, then fix the random seed and perform high-definition restoration.
However, if additional elements appear or the AI arbitrarily changes certain screen elements, you can reduce the redrawing amplitude to improve this problem. If you just want to enlarge the image, 0.3-0.5 is the safest. If you want to let the AI play a role, 0.5-0.7 is best.
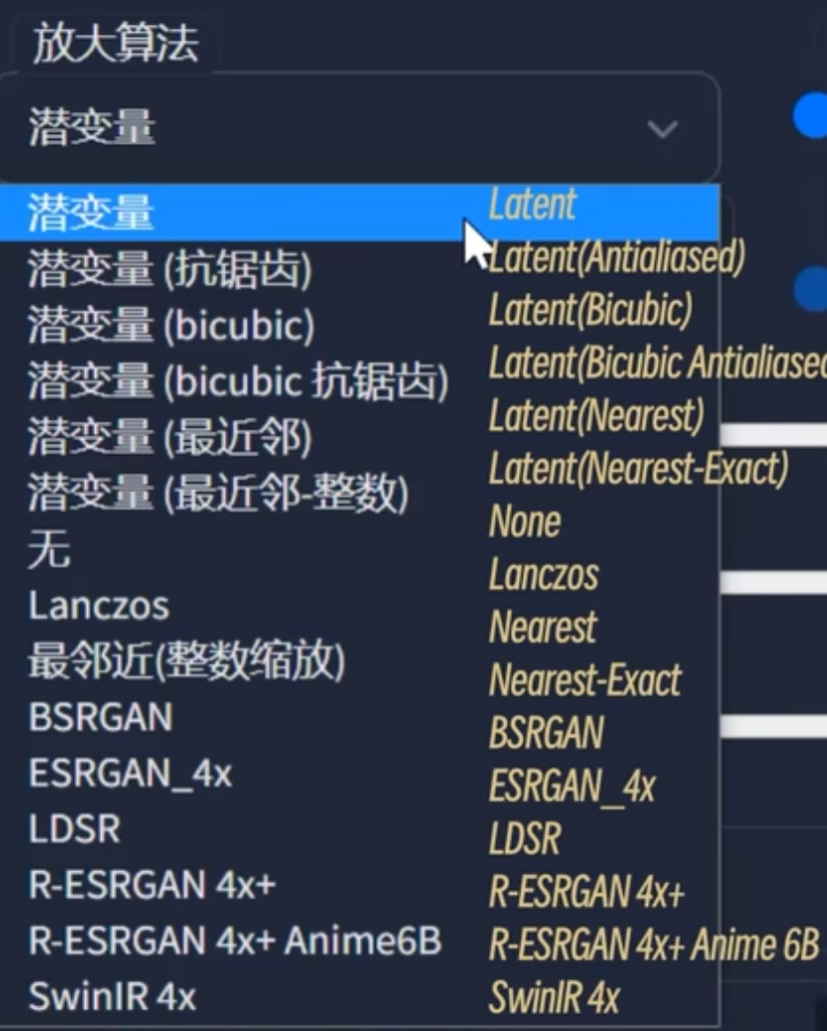
Back to the redrawing algorithm just mentioned above, this algorithm is actually the same as the sampling method selected above, which determines how the AI will operate when "sending back to redraw" the low-resolution version.
I looked at the UP of the original tutorial and tried each algorithm separately. To be honest, there is no obvious difference, at least not a big enough difference.

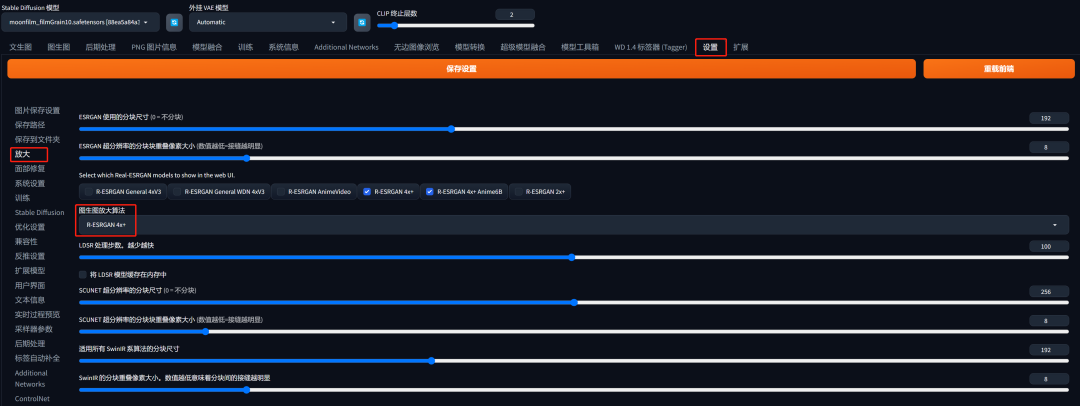
However, the original textbook mentioned that there is a saying on the Internet that as long as high-definition restoration is used, it is recommended to useR-ESRGAN 4X+If it is a two-dimensional painting, useR-ESRGAN 4X+Anime6BOf course, this still depends on your own needs and it is better to make a decision that meets your expectations after trying it.
However, for some models, the author will also recommend the magnification algorithm to choose when downloading. You can decide for yourself.
2. SD Upscale
After learning the HD restoration method of Wensheng images, we came to the part of Tusheng images. However, as mentioned above, the Tusheng image process itself is a bit like the process of "HD restoration".
Therefore, if the resolution of the original image is relatively low, you can directly put it into the original image, increase the width and height parameters, and then generate it to achieve high-resolution restoration.
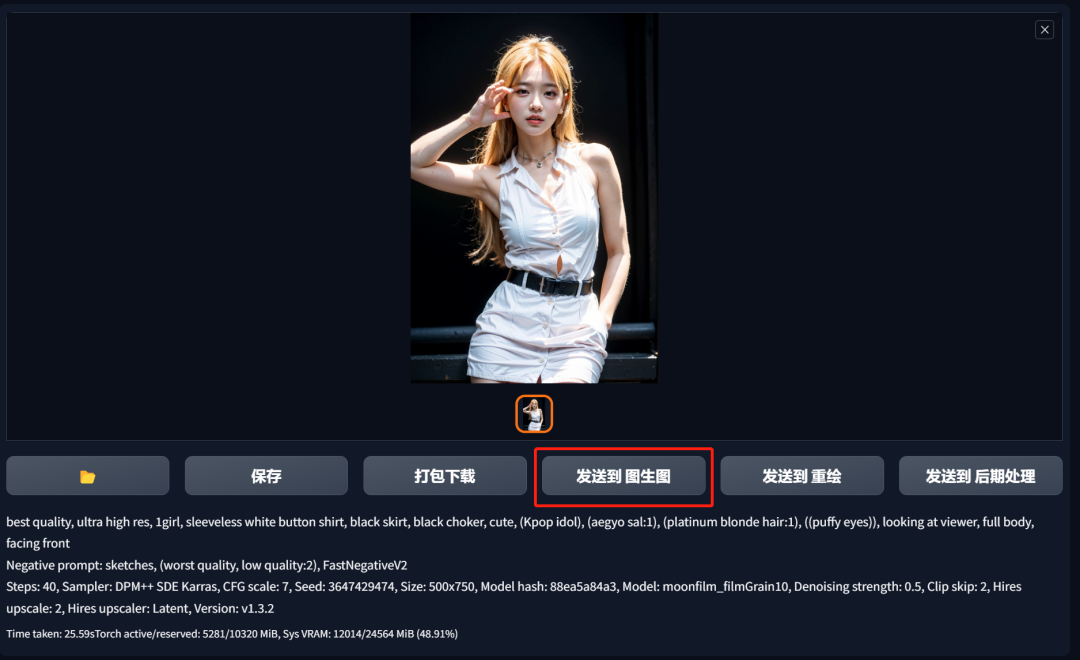
In the text map, each time a map is generated, you can directly choose to send it to the map function to open it, and it will directly copy a copy according to the prompt words, parameters, and models entered at that time.

Then you just need to enlarge the image proportionally and control the redrawing amplitude to make the image clearer.
existset upInenlargeYou can also find the enlargement algorithm of the self-defined image in the parameters. Remember to click the save button above after changing it.
The above two methods are relatively simple and direct ways to enlarge the image clearly. Of course, there is another more commonly used method, which is the Upscale enlargement script.
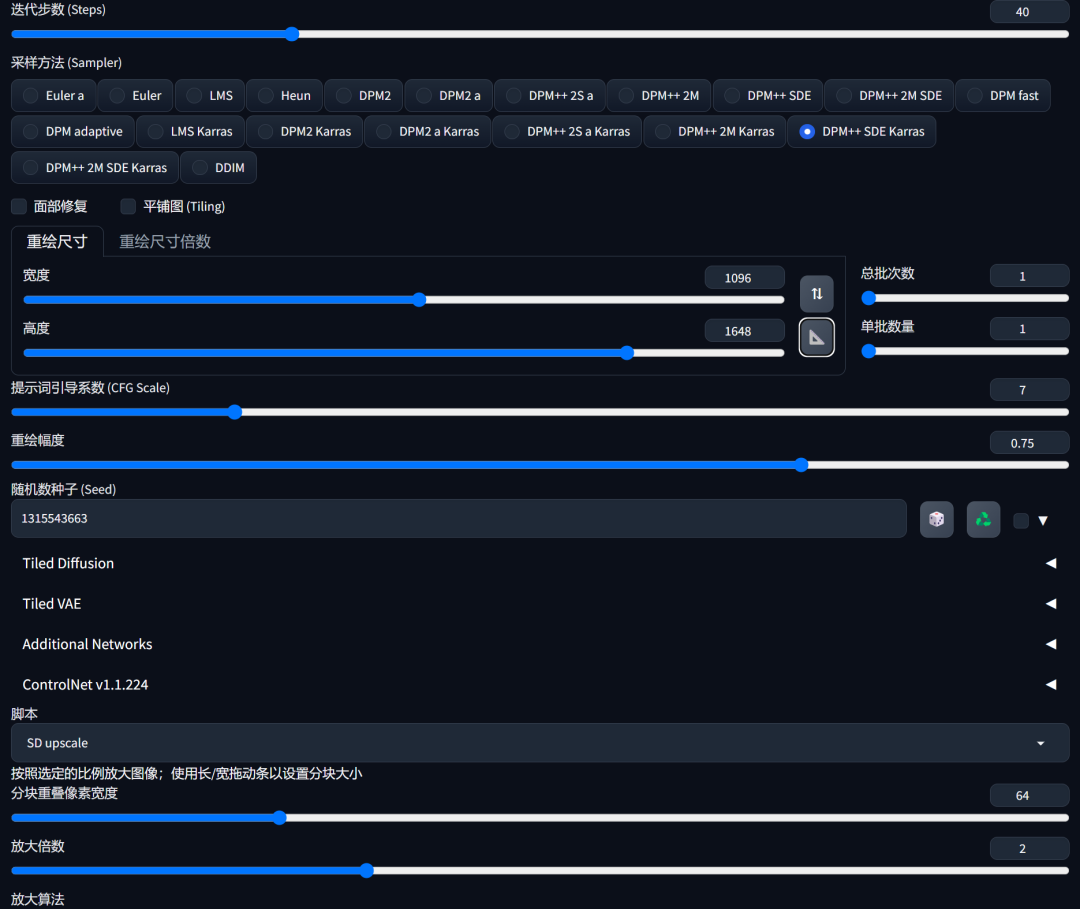
Click on the script option at the bottom to see many options:

Thanks to Qiuye for putting all the scripts into the integrated package, the launcher comes with
Here we choose to use SD upscale and you can see many parameters appear below.

The zoom factor here is equivalent to the magnification in the Vincent diagram. Setting it to 2 means that it is magnified to twice the original value. The algorithm is similar to what I mentioned above. Since I use a two-dimensional image to generate it this time, I will chooseR-ESRGAN 4x+Anime6B.
As forReset pixel width in blocksDon't worry about it for now, just use 64, then add 64 to the width and height of the imported image redraw size.
Then click Generate to see the effect:

Here, I removed a lot of frames because it cannot be uploaded if it exceeds 300 frames.
It can be seen that the details are much richer. In the generation process, it can be found that the drawing on the right is to cut the entire picture into pieces and redraw it, while here ifReset pixel width in blocksA smaller number will result in a harsh transition edge at the seams between adjacent tiles.
The whole image can be considered as four pieces divided by a cross. If these four pieces are roughly cut, redrawn and glued together, it will be inconsistent. Tile Overlap, that is, the overlapping pixels of the tiles can form a buffer zone, making the image glue smoother.
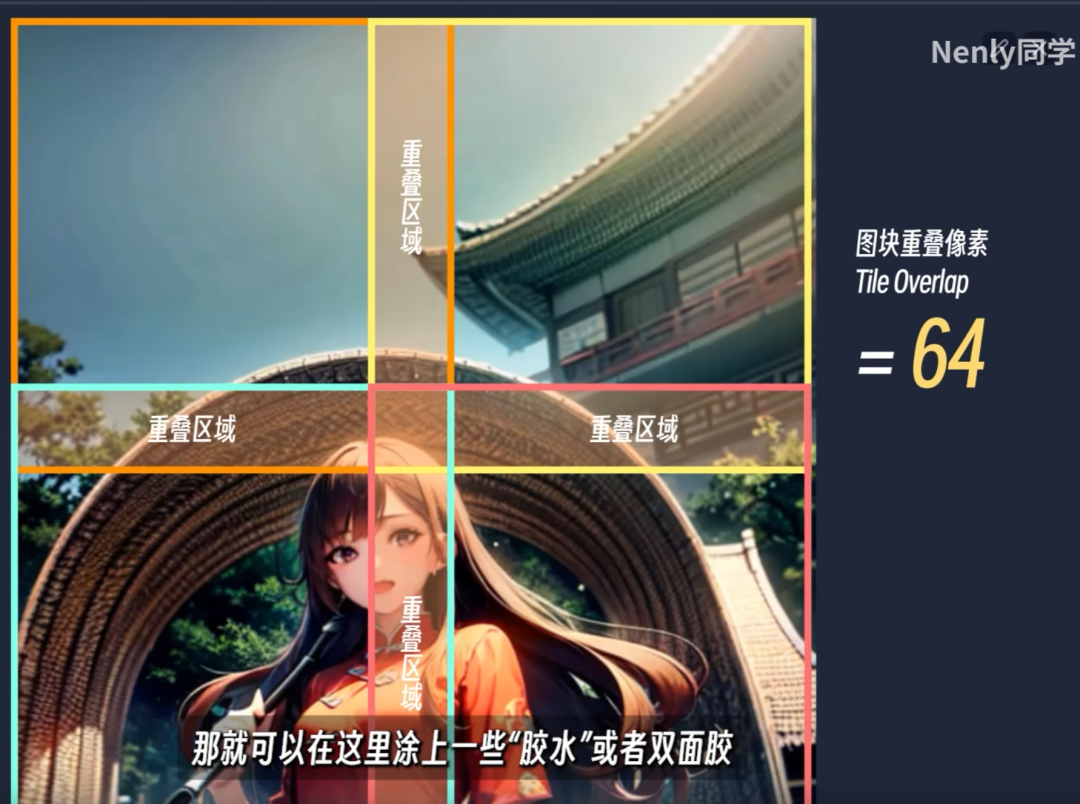
If you feel the transition is still abrupt, you can increase the recharge pixel width to 128. Then the redraw size above needs to be the original size with the width and height plus 128.
It should be noted that after turning on SD magnification, the final width and height = (set width and height - reset pixels) x magnification
This is why after setting the overlap pixel, you need to add the pixel value to the width and height.
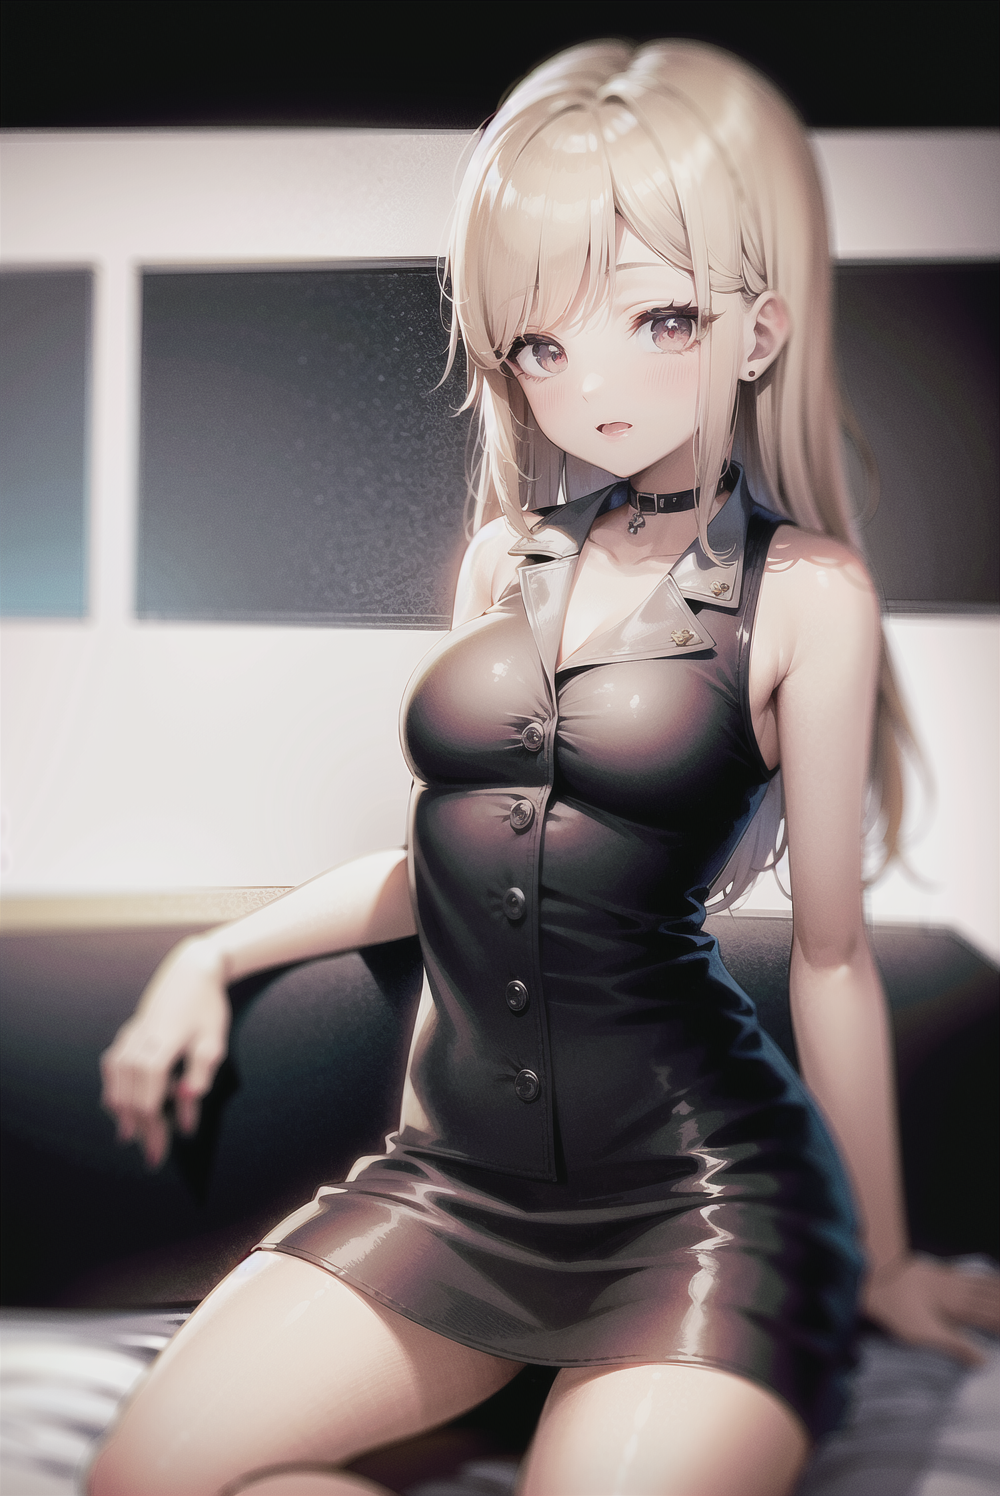
You can compare the pictures before and after zooming in.
Before SD enlargement:
After SD is enlarged:
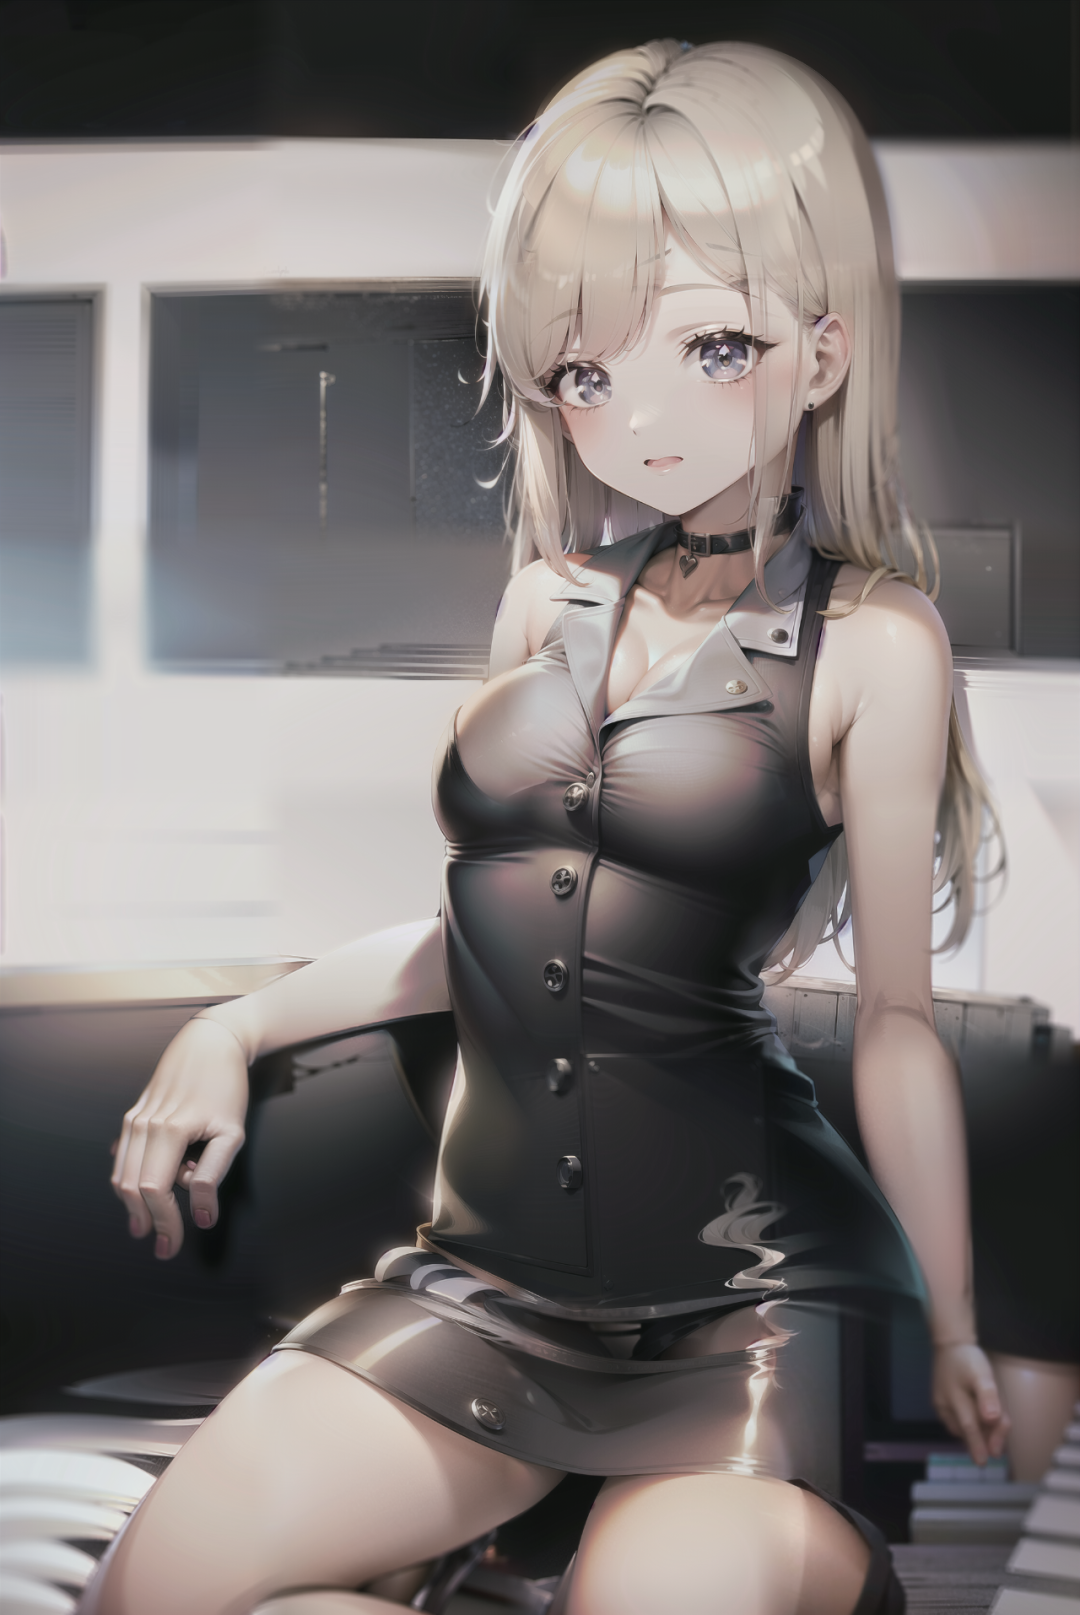
In general, SD upscaling puts less pressure on equipment than HD restoration, but it also has advantages and disadvantages.
advantage:
- Can break through memory limitations to get higher resolution (up to 4 times the width and height)
- The picture is highly refined and the effect of rich details is excellent
shortcoming:
- The process of splitting and redrawing is relatively uncontrollable
- Cumbersome and relatively unintuitive operation
- Occasionally, there will be inexplicable extra elements
However, when the picture is enlarged 4 times, AI will cut the original picture into 16 pictures and redraw them. The prompt words used in this process may not be placed by AI in the right place, which may cause confusion in the picture.
Moreover, when faces or some key elements are placed on the cross dividing line, this may cause the final output image to produce an unharmonious picture. The solution is to reduce the redraw amplitude and increase the overlapping pixels (buffer area) of the blocks.
3. Post-processing/additional functions (finished product images)
In addition to text-generated images and picture-generated images that are set before drawing, there is also a method to process already generated images.
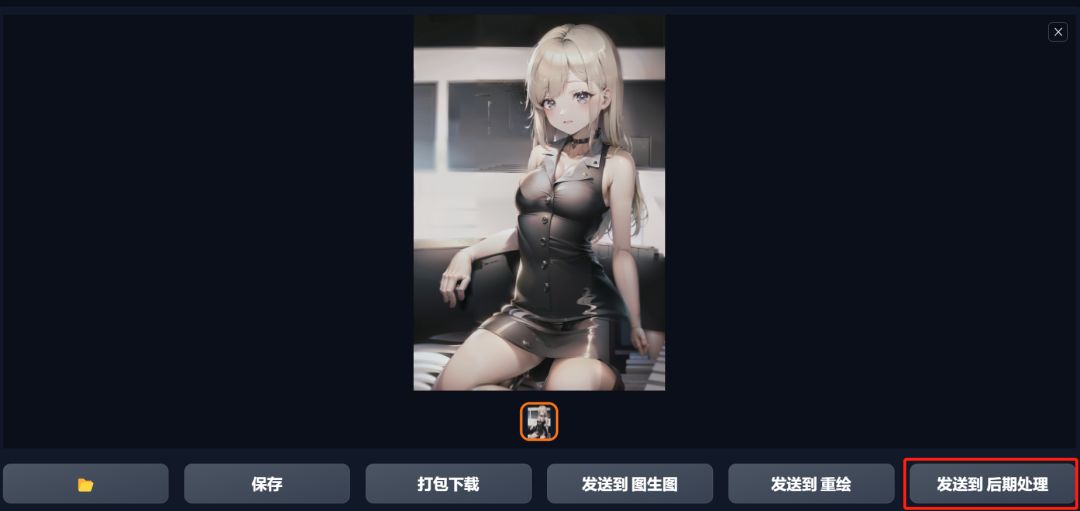
You can enter this function by clicking Send to Post-Processing after the generated image, or by directly clicking the Post-Processing button on the right side of the generated image.

This function is simply a high-definition restoration with a redraw amplitude of 0. Its principle is similar to the application principle of most AI photo restorations on the market. Because it does not involve the process of re-diffusion, it runs very fast and is completed in a few seconds.
The method is also very simple, just choose the multiple and algorithm.
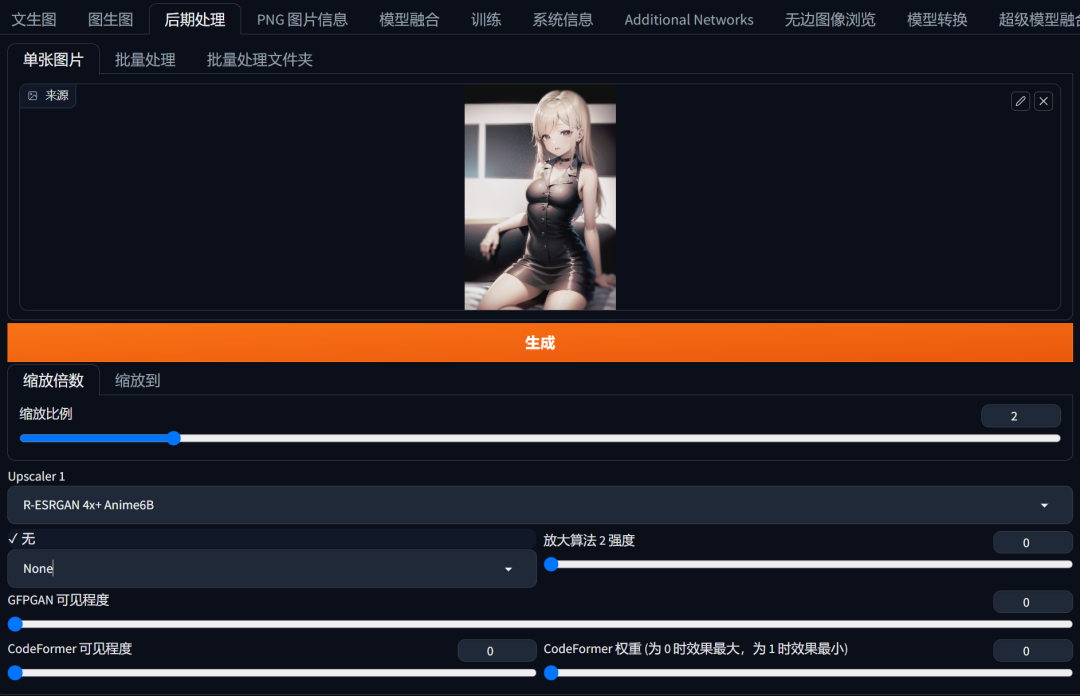
However, the difference is that it supports two algorithms running at the same time, and the visibility of algorithm 2 (value 0-1) is actually the meaning of weight. For other options, a novice like me can just maintain the default.
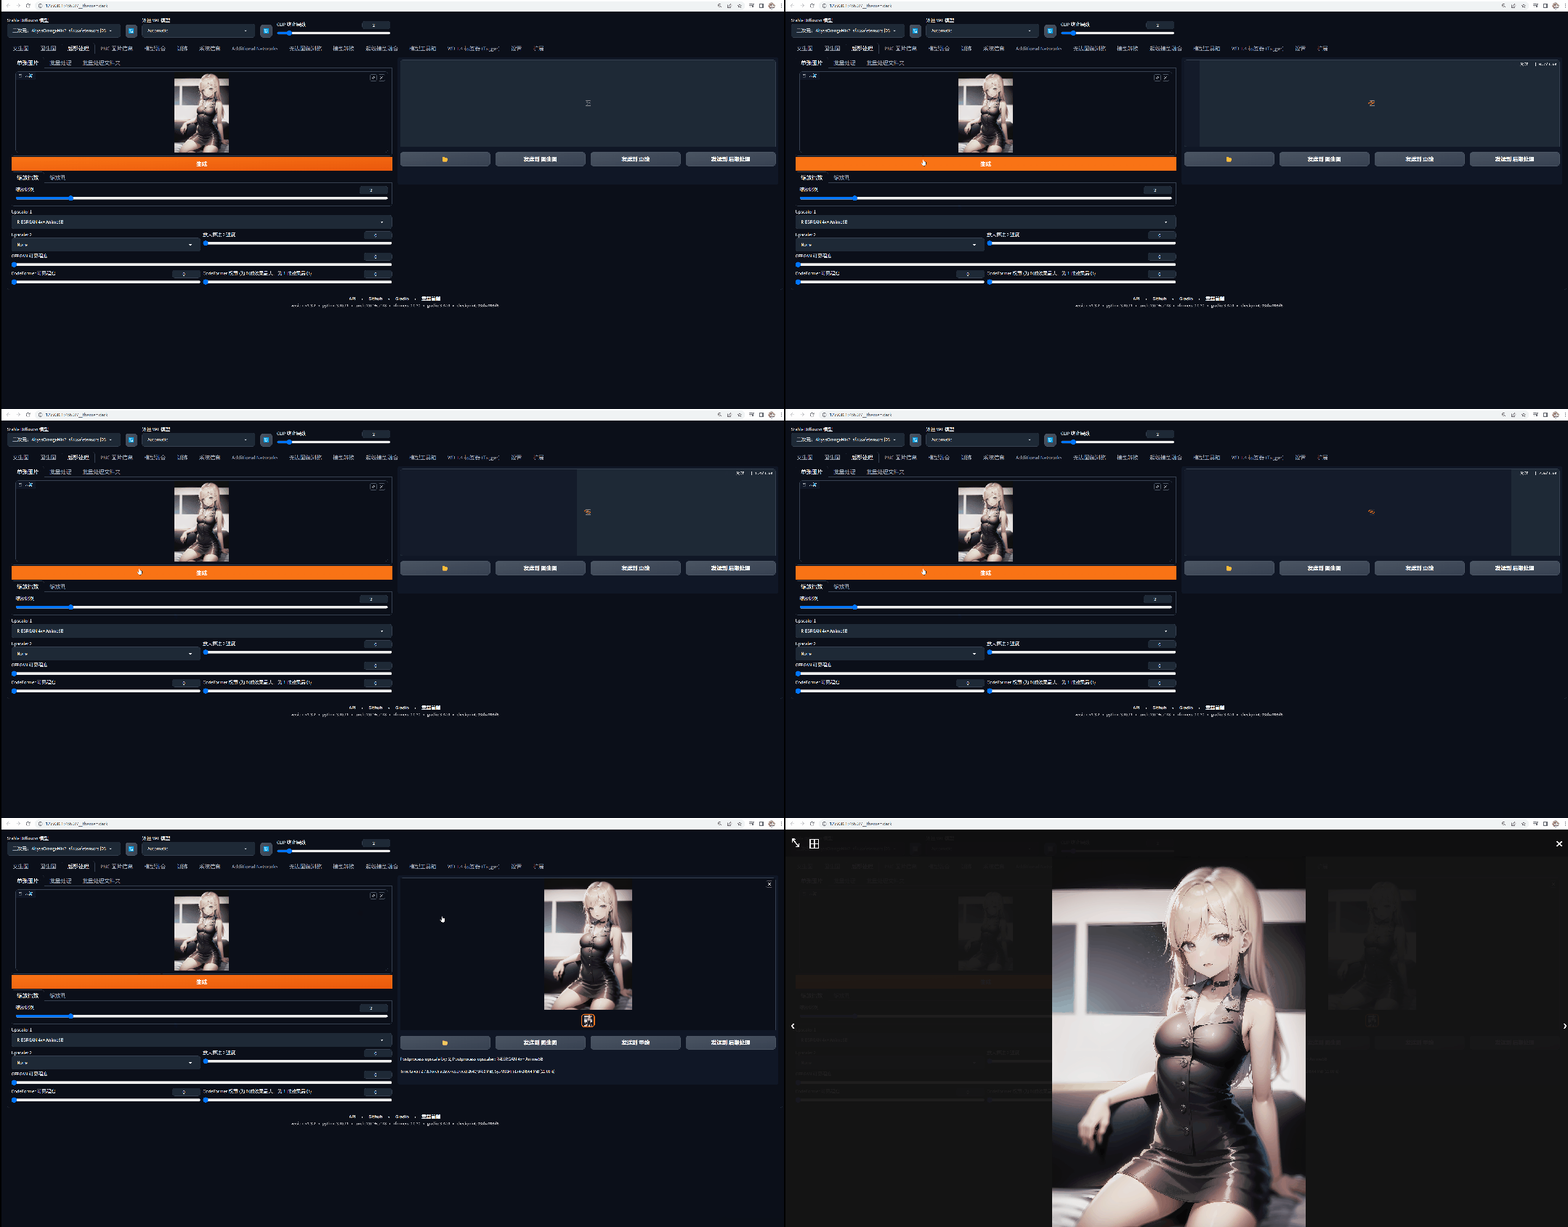
It can be seen that the size of the image is doubled after running, but the change between the two images is not obvious. This algorithm actually just smoothes the blurred areas of the lines and color blocks in the process of stretching and enlarging, and the overall refinement and delicateness are not as good as the first two methods.
The advantage of this function over the previous two is that it is simple and convenient, puts little burden on the equipment, and can be called at any time. The disadvantage is that this function does not obviously improve the clarity.
That’s all for today!
I didn’t expect that this knowledge point is quite useful. At least it provides a good solution for a novice like me to generate blurry portraits at the beginning.
Of course, these functions have some requirements on the hardware itself. Most of them can be used but it will take more time. I hope everyone will do it according to their ability.