Stable Diffusion Because of its controllability, it is being incorporated into the workflow of more and more designers. Take e-commerce as an example. Before the emergence of AI tools, the cost of photographing clothing was very high. Hiring professional models is charged by the hour. Hiring external models is even more expensive.
Nowadays, clothes can be worn by anyone, even plastic models. With Stable Diffusion, plastic models can be replaced with real models. As a result, the cost of photographing clothes is greatly reduced.
Compared with traditional PS cutouts, Stable Diffusion produces a more natural effect. And this process can also be applied to products. It is revolutionary for e-commerce.
Next, let's understand the implementation process through a practical case. Our goal is to replace the model below. In fact, this model can even be a plastic model. In this way, when shooting clothing, we only need to find a plastic model and then wear the clothing we want to show.

# Install plugin
First we need to install a plugin called "Inpaint Anything" for Stable Diffusion. It can use the most advanced image recognition algorithm to make masks for you. This masking process is much more convenient and faster than in Photoshop.
Of course, some users may not need to install it. For example, a cloud platform I use has a built-in Inpaint Anything plug-in.
In general, there are two ways to install this plugin.
1️⃣ Install via WebUI. This method is suitable for the local magic environment. https://github.com/geekyutao/Inpaint-Anything.git Copy this URL to the WebUI and click Install.
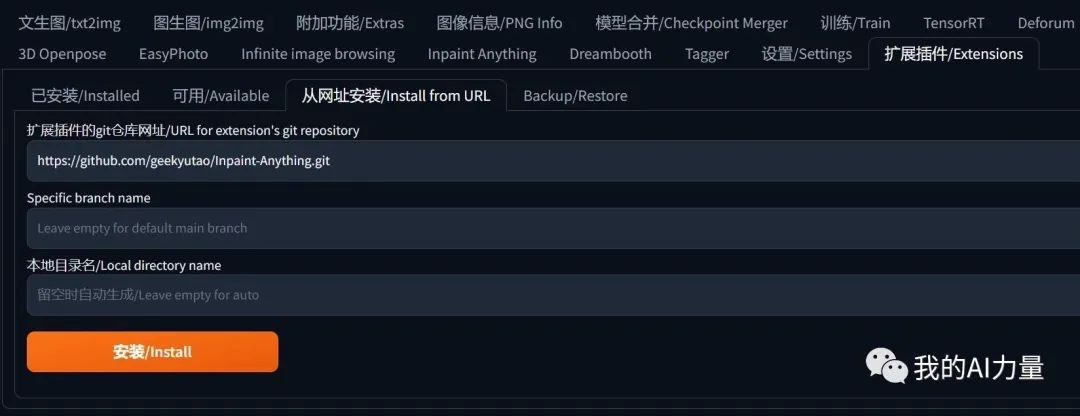
Next, click the "Installed" tab, then click "Apply and Restart UI".

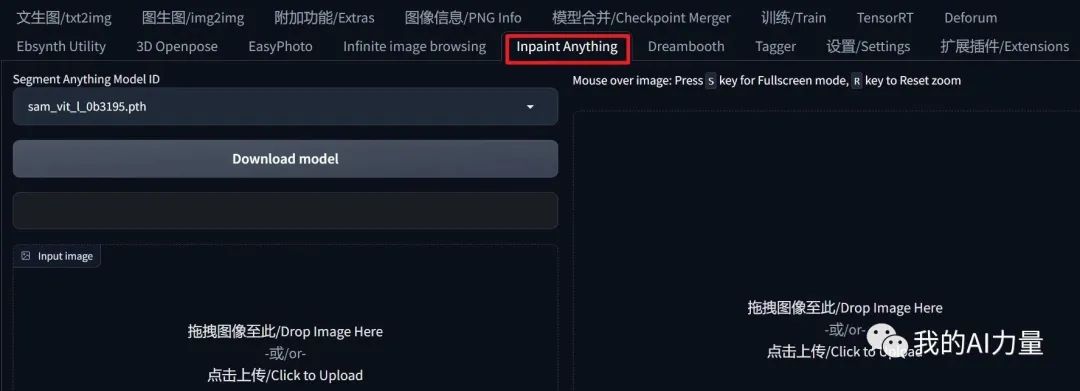
After restarting the WebUI, you can see Inpaint Anything appear in the WebUI tab.
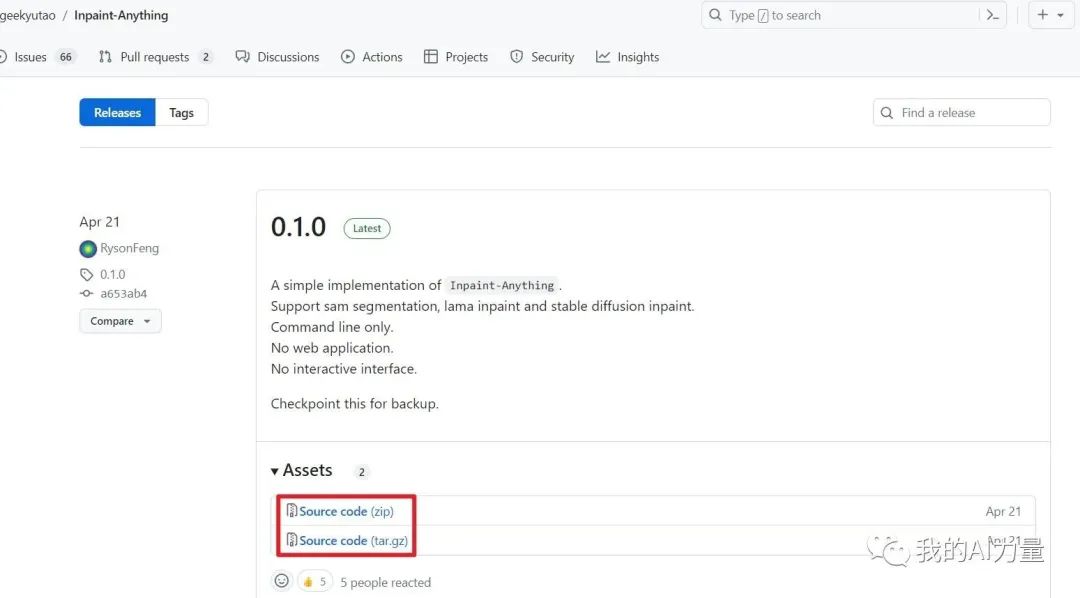
2️⃣ Local upload. Go to https://github.com/geekyutao/Inpaint-Anything/releases This URL, then select a compressed package according to your system, download and unzip it to the Extension folder of WebUI.
# Making a mask
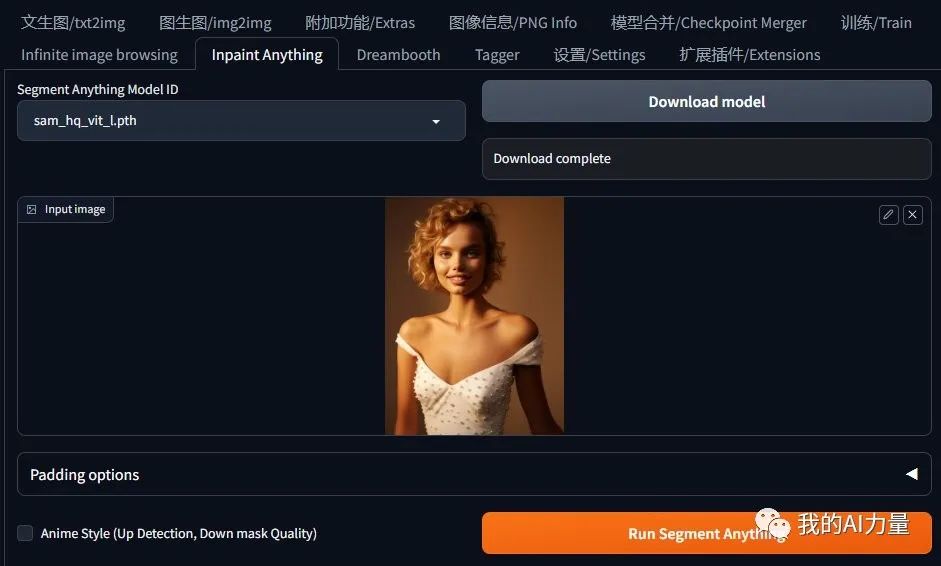
1️⃣ After entering Inpaint Anything, upload the image you want to modify. Select a model from the "Segment Anything Model ID" drop-down menu in the upper left corner. Click the "Download model" button on the right to download the model for image recognition. Finally, click the "Run Segment Anything" button in the lower right corner to start image recognition.
2️⃣ Use the brush tool to mark the mask area to be painted. Then click the "Create Mask" button, and a mask will be created.
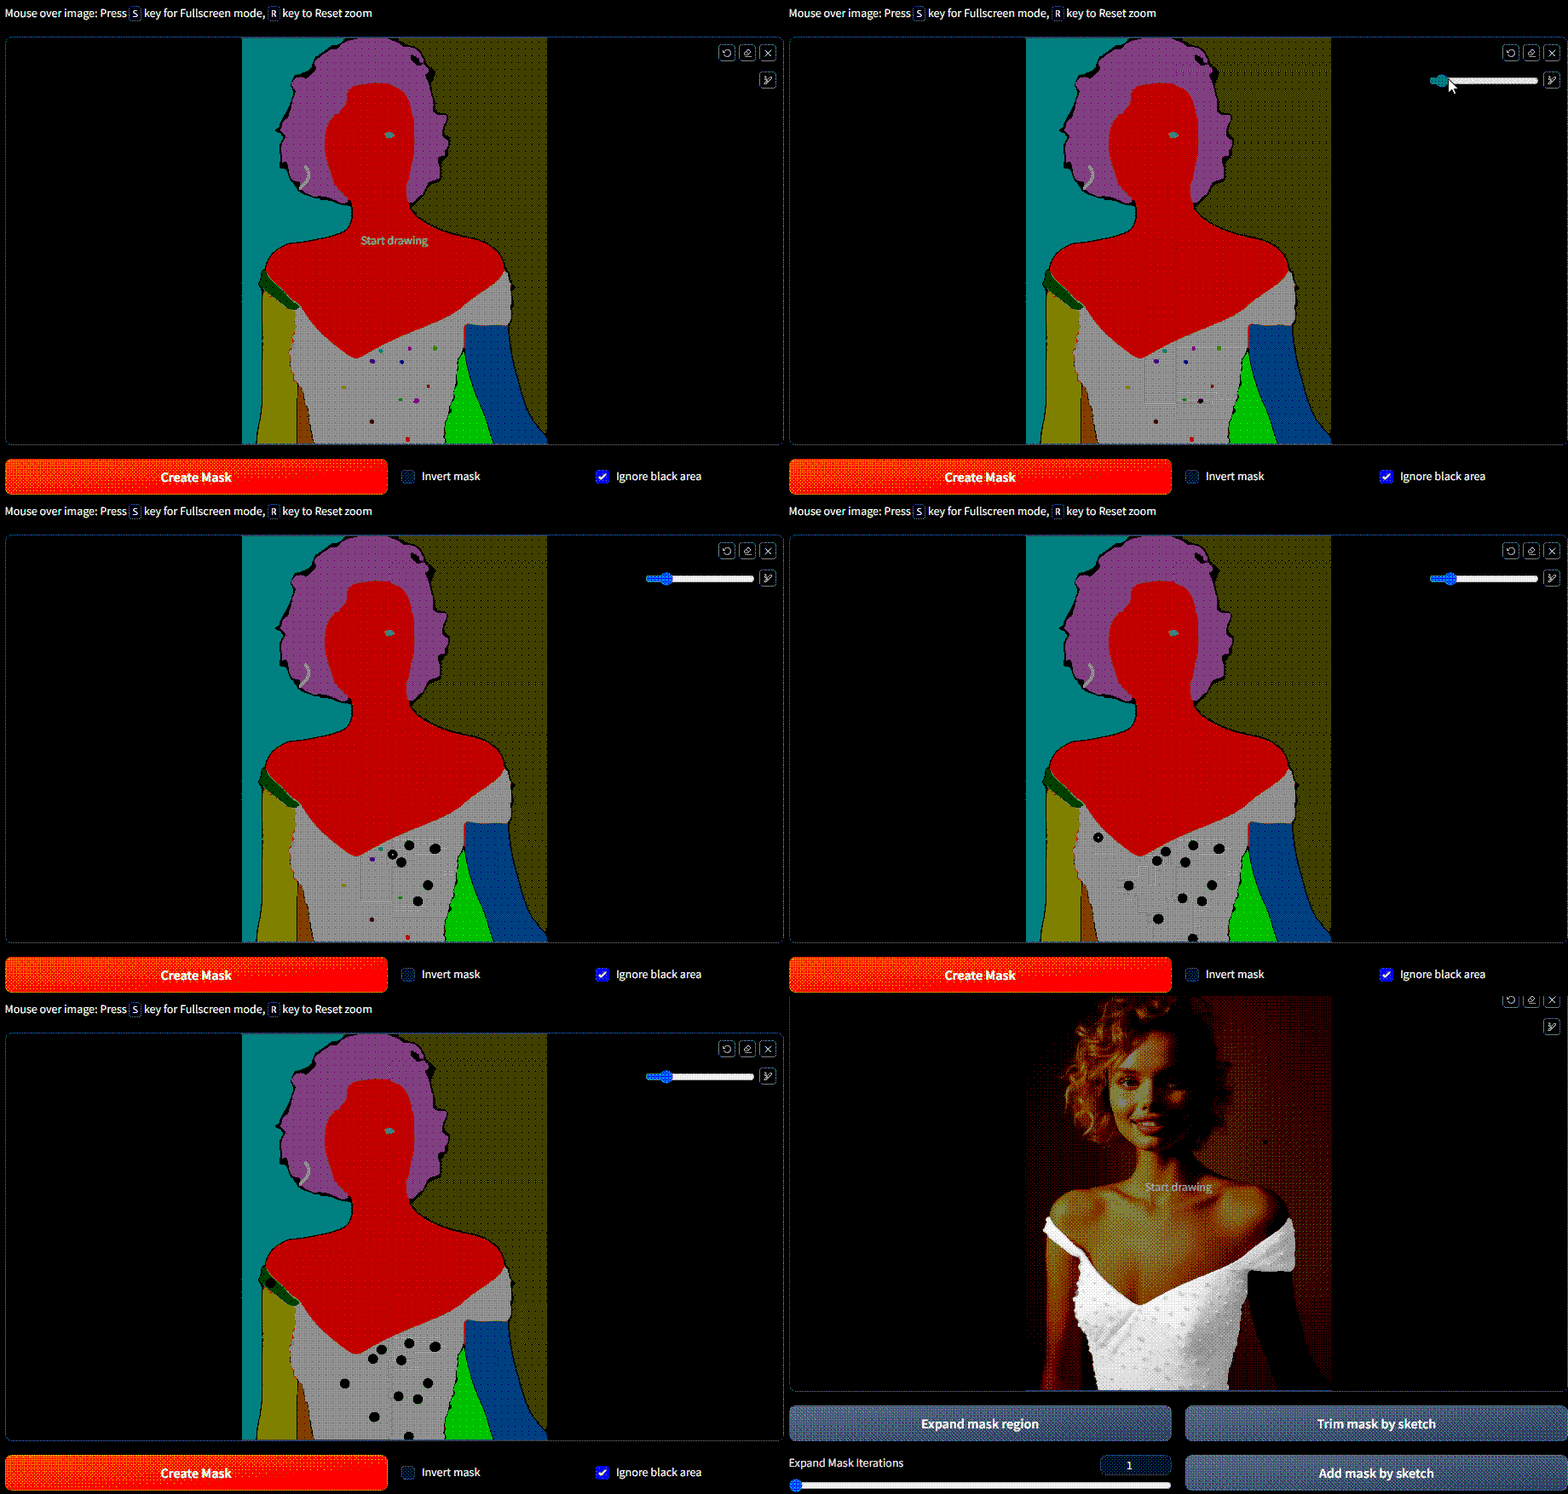
3️⃣ Then click the "Send to img2img inpaint" button to send it to the partial repaint of the original image.
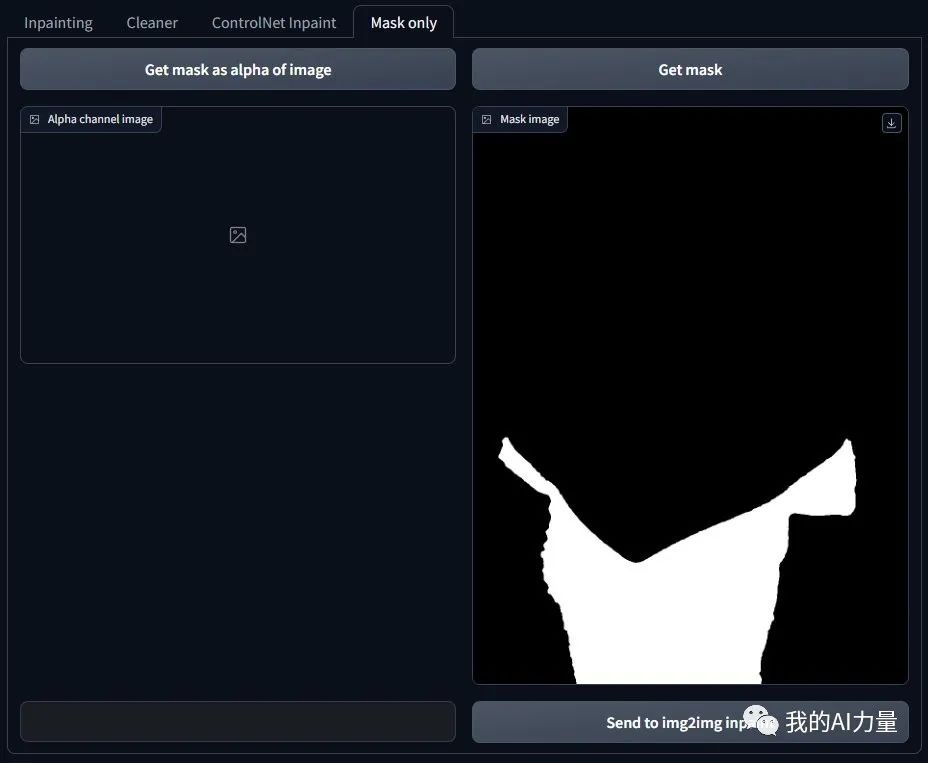
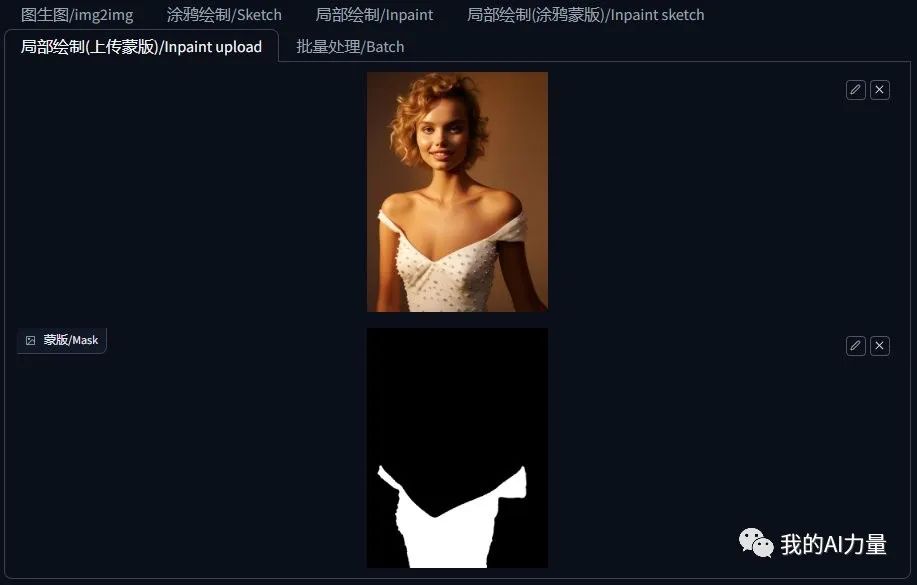
This mask is much more accurate than the hand-drawn mask in WebUI. It is also more convenient than making a mask in PS.
# Change Model
After having the mask, you can use the local redrawing in the original picture to change the model.
1️⃣ If you want to change an Asian model, you can choose the Maiju series model. If you want to change a European or American model, you can choose the RealisticVision series model. Select the model and adjust the parameters. You can refer to the settings in the figure below. The image size can be kept consistent with the original image. CFG and redraw intensity can also be adjusted accordingly as needed. Note: Because we need to replace the model, the "Mask Mode" is selected as "Draw non-masked content".

Then fill in the prompt words as needed and you can change the model.

# Change clothes
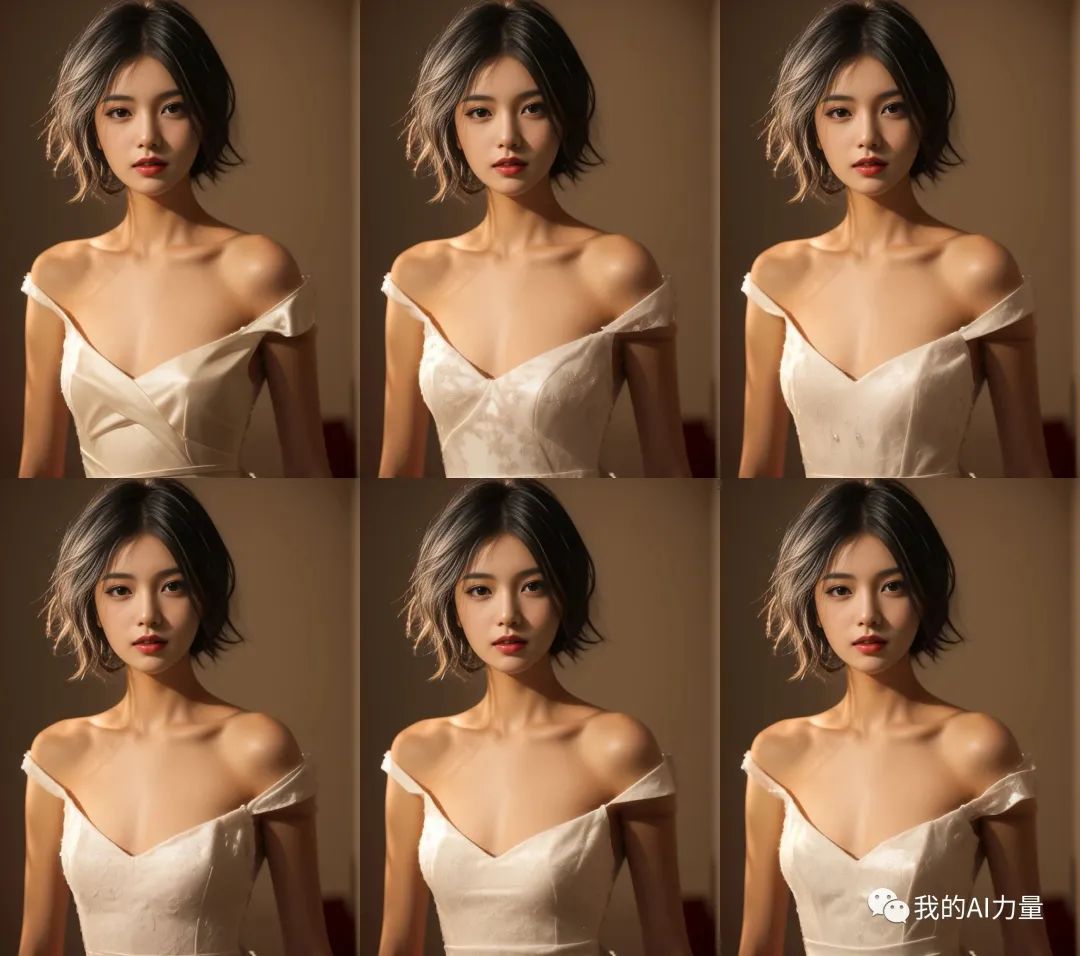
We can also change the look of the model's skirt.
1️⃣ Drag the generated image into the partially redrawn image area

2️⃣Switch the "Mask Mode" in the previous configuration to "Draw Mask Content".
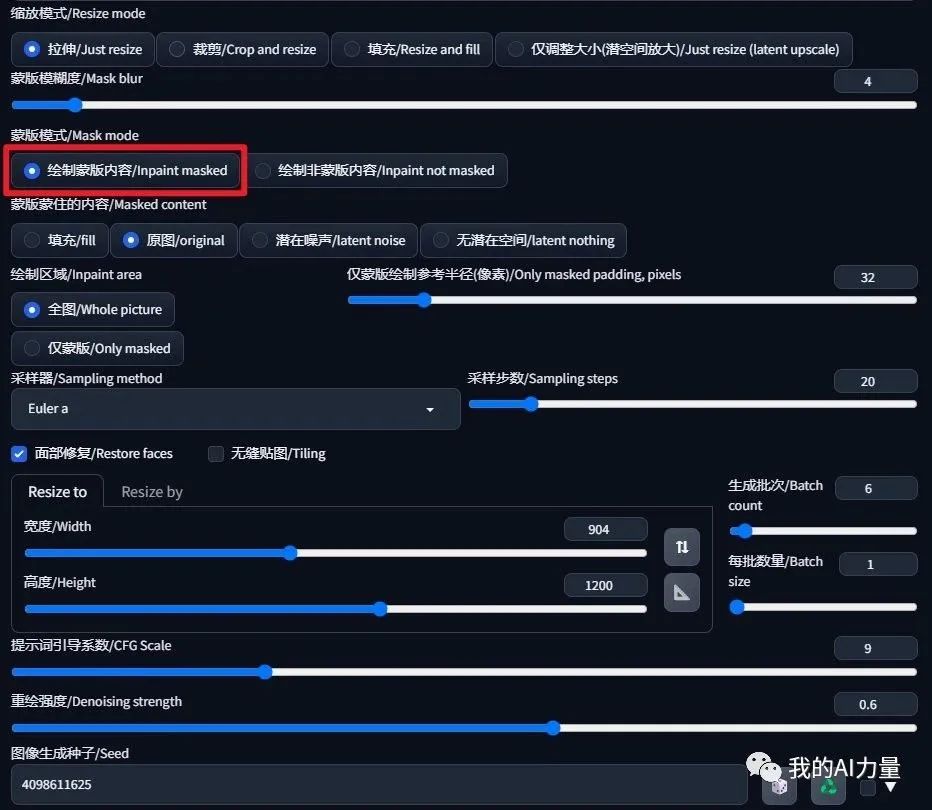
3️⃣ Then you can generate skirts with different appearances.
# Summary
The AI wave is sweeping across all industries. E-commerce is closely related to efficiency, and it is also one of the areas where AI can best demonstrate its capabilities. Integrating Stable Diffusion into e-commerce design can greatly improve efficiency.