Recently,buttonThere's been a major update that introduces a newAI ApplicationsMorphology, some of the original image streaming features have been significantly updated and changed, the old tutorials are no longer applicable, and the new features have become simpler and more powerful.
A friend asked about the originalPortraitAgentHow should I make it?
Today with the revamped function to recreate a replacement face portrait portrait smart body, for those who need to update and learn.
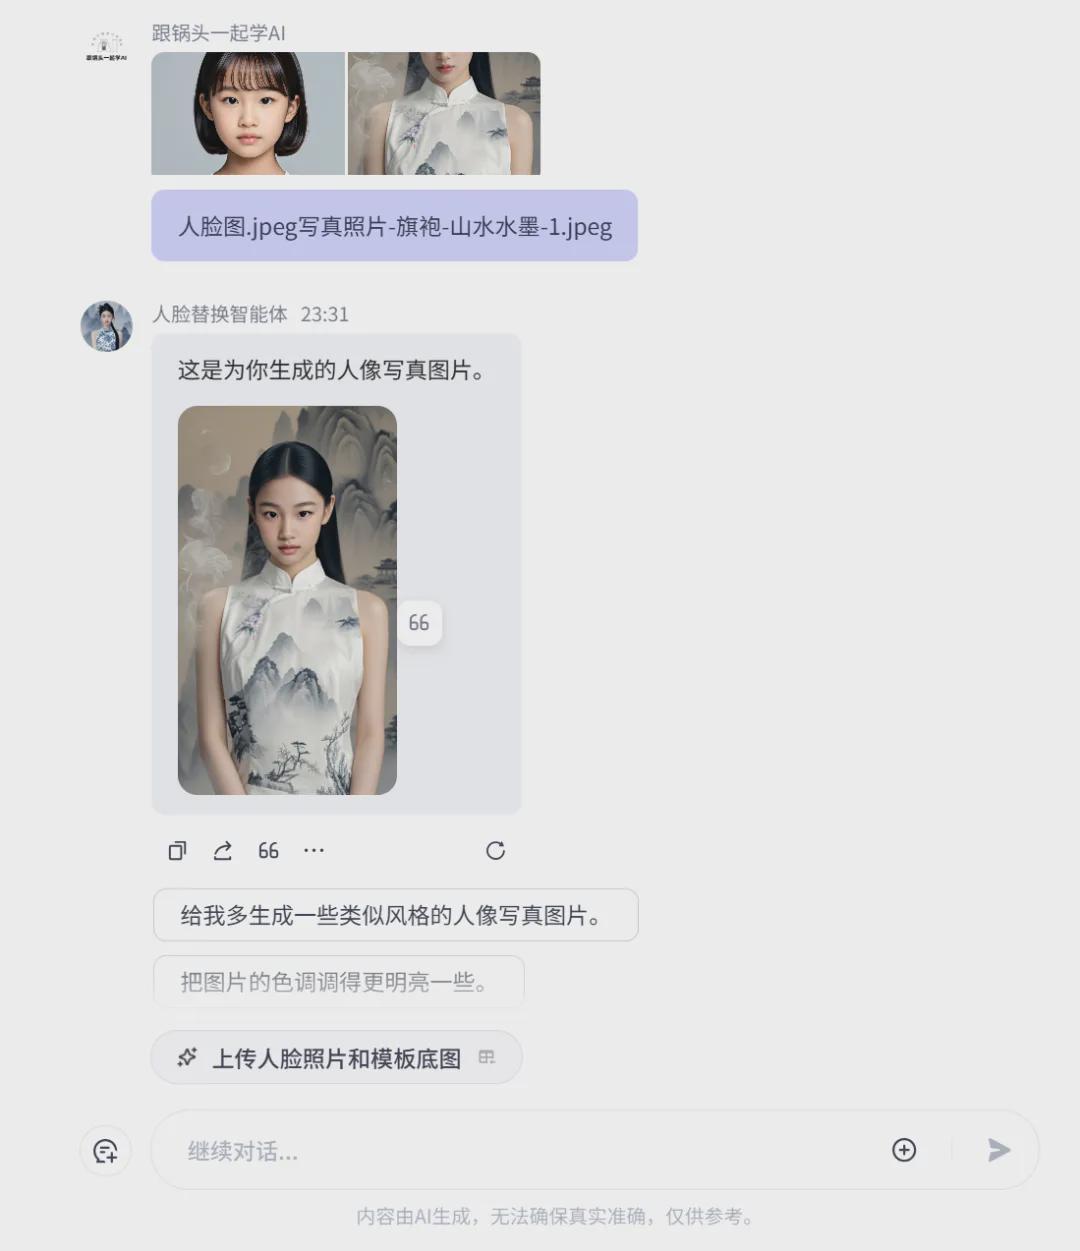
See the effect first
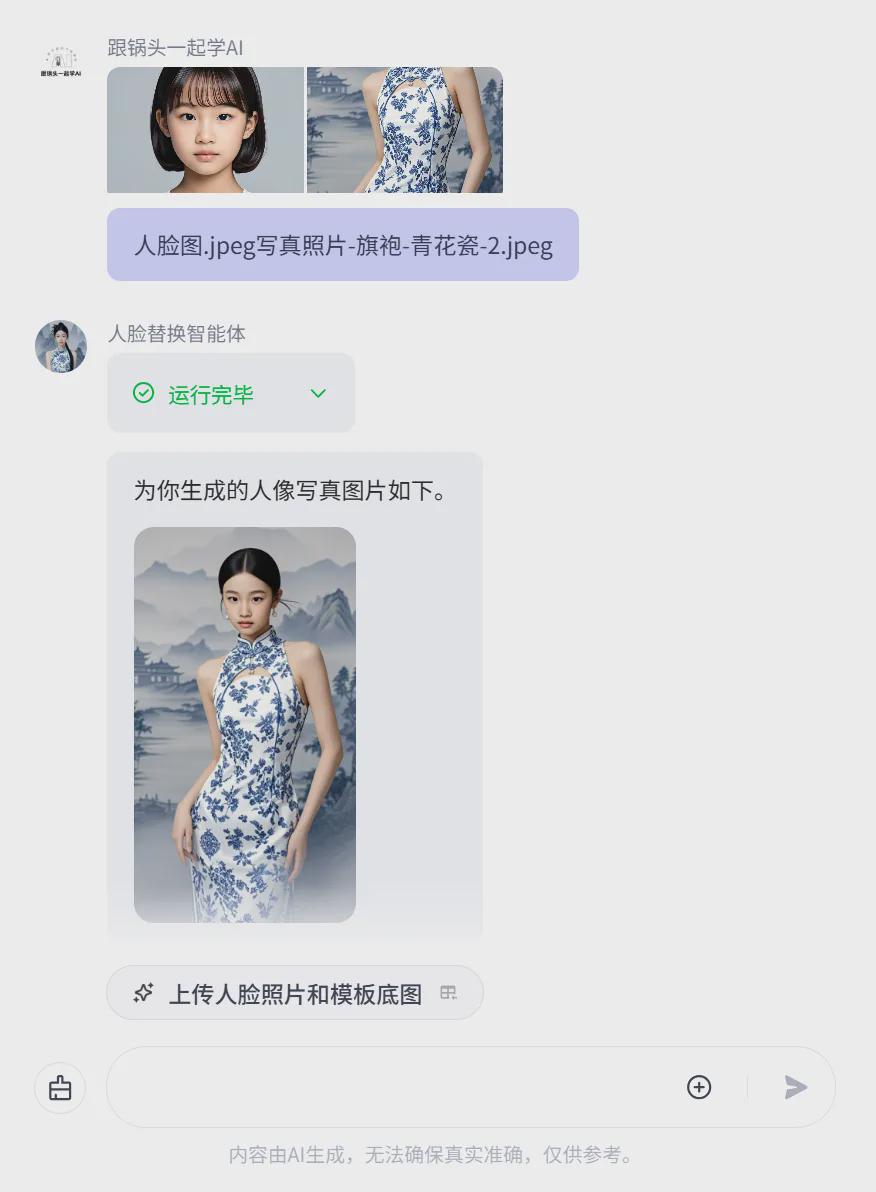
Left: User uploads face image
Middle picture: template base picture
Right: New personal portrait effect generated by user uploaded image + template image.
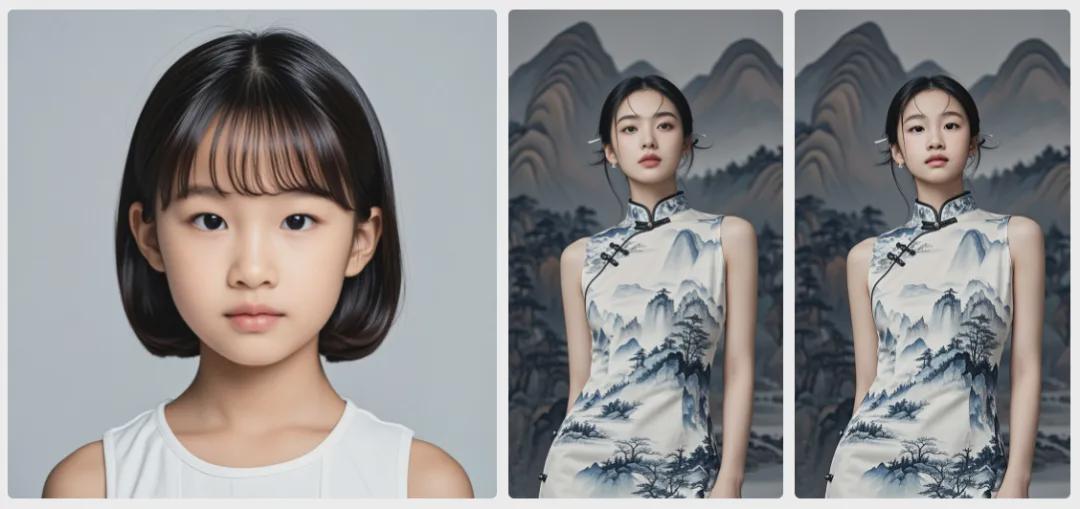
Next, let’s learn togetherHow to make a photoshopped smart body that replaces a human face with a button.
Workflow for creating replacement faces
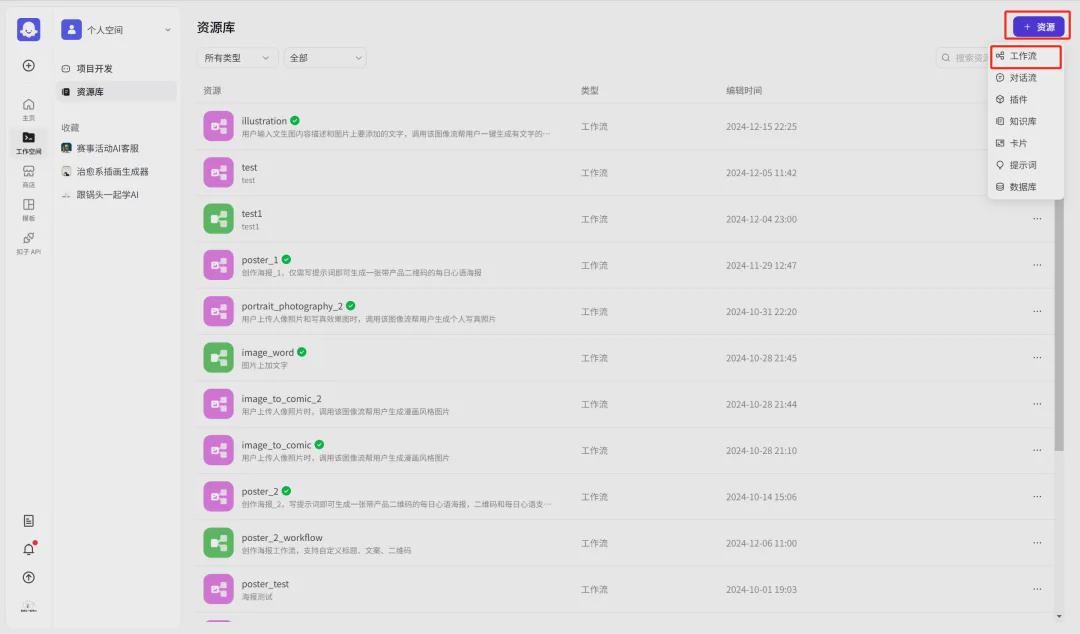
Open the homepage of Button's official website and click [Workspace] on the left menu.

Enter the workspace interface and click [Resources] -> [Workflow] in the upper right corner.
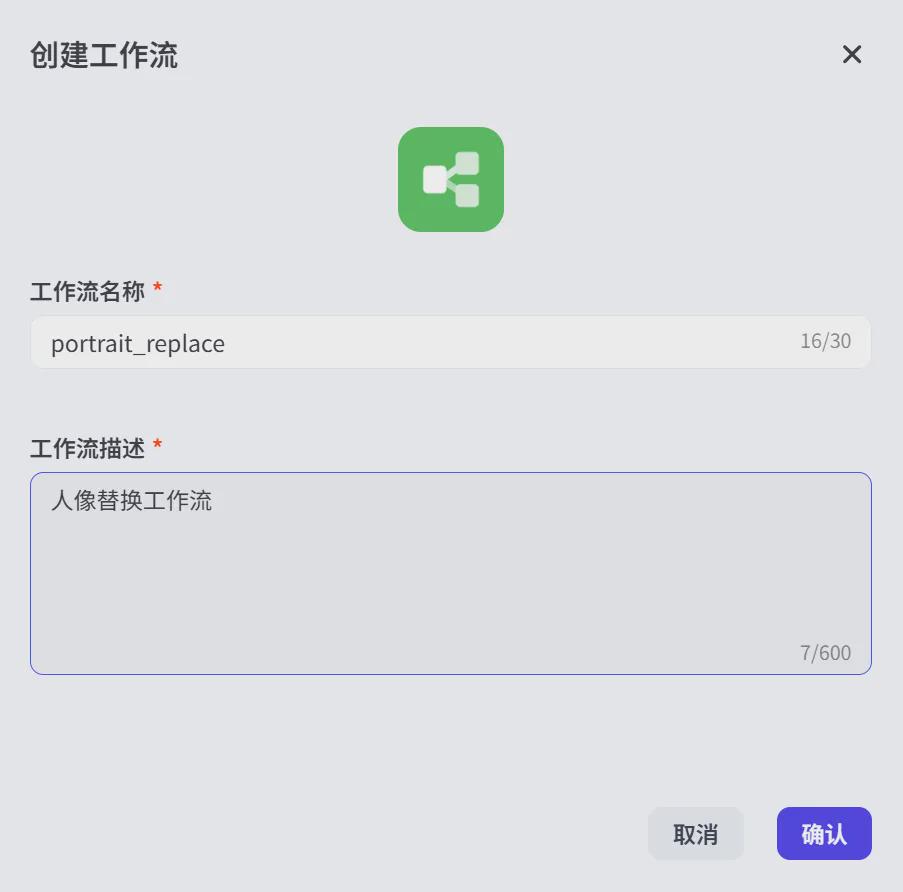
Enter the Create Workflow screen, enter the workflow name, workflow description and click [Confirm].
Workflow name: portrait_replace
Workflow description: the user inputs a description of the content of the text and the text to be added to the image, and the image flow is called to help the user generate an illustration with text in one click.
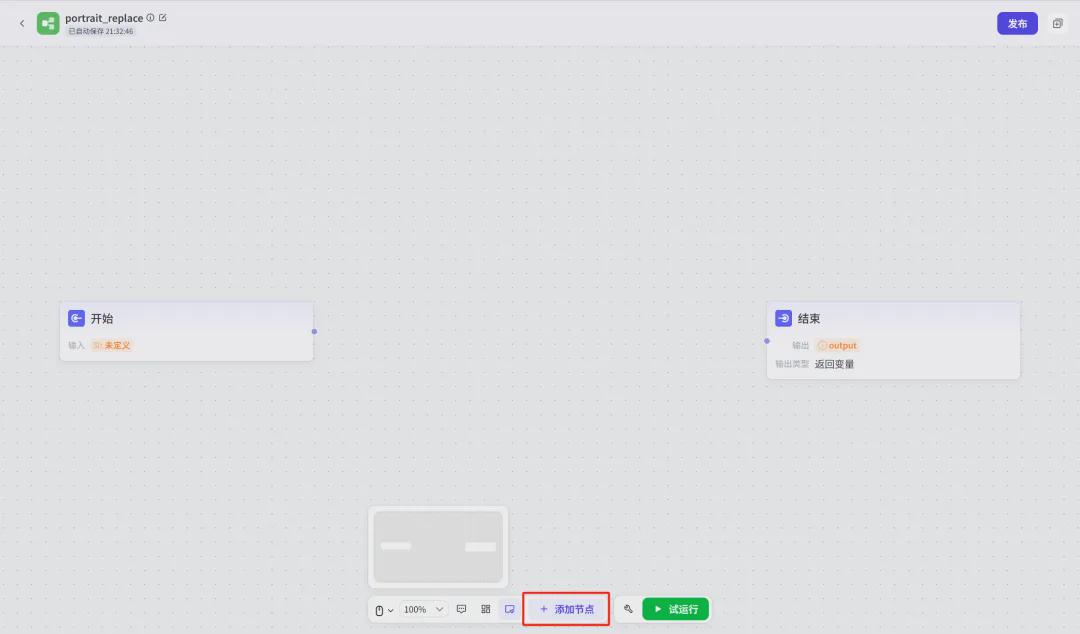
Enter the workflow interface and click [Add Node].
The node selection screen pops up, where Pothead first clicks on [Plugin].

Enter the add-in interface, search for "Face Swap", select [Smart Face Swap], expand the small corner label and click [Add].
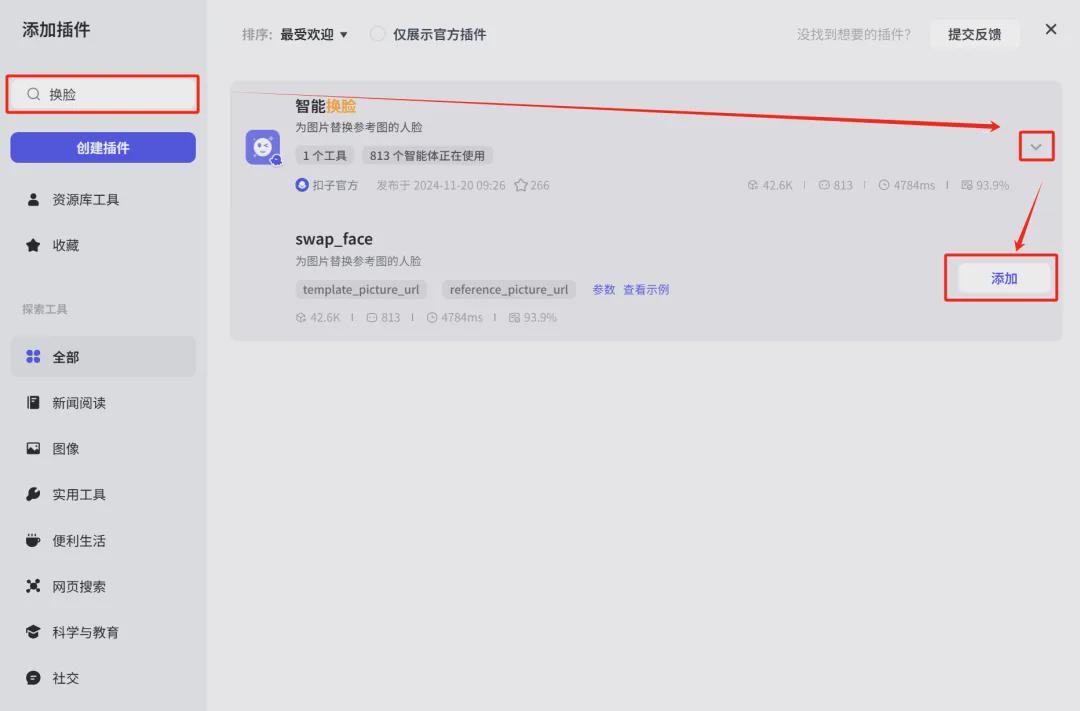
After adding successfully, click [x] in the upper right corner to close the plug-in window.
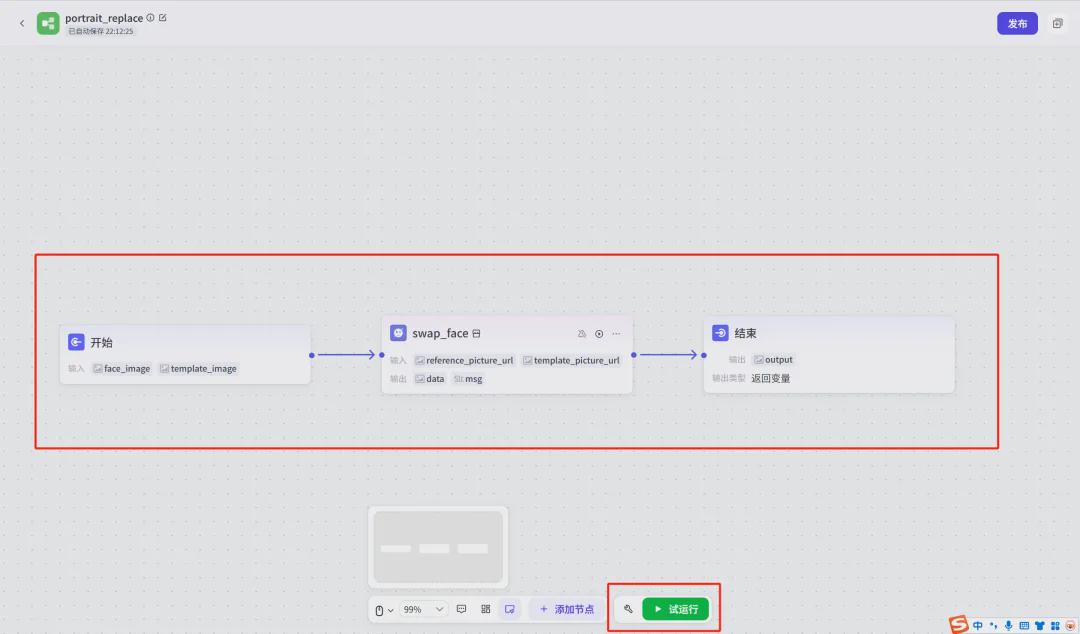
After returning to the workflow interface, connect the 3 nodes in the order of the screenshot below by putting [Start] - [Smart Swap_Face] - [End].
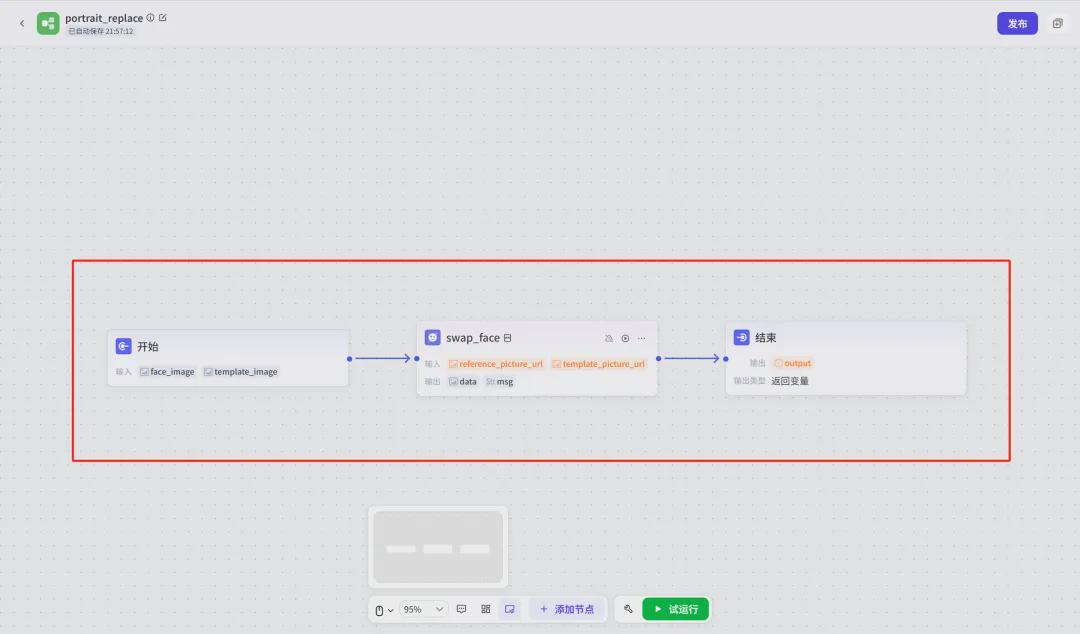
Next, let's configure specific parameters node by node.
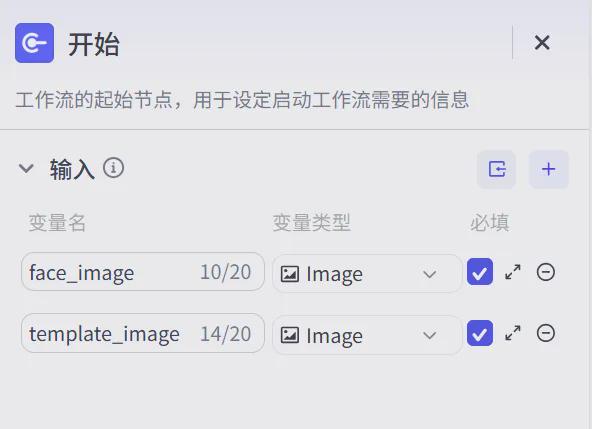
[Begins]
Double-click the [Start] node to enter the Start node configuration interface, configure the variable name "input_prompt", variable type "Image", check the required items.
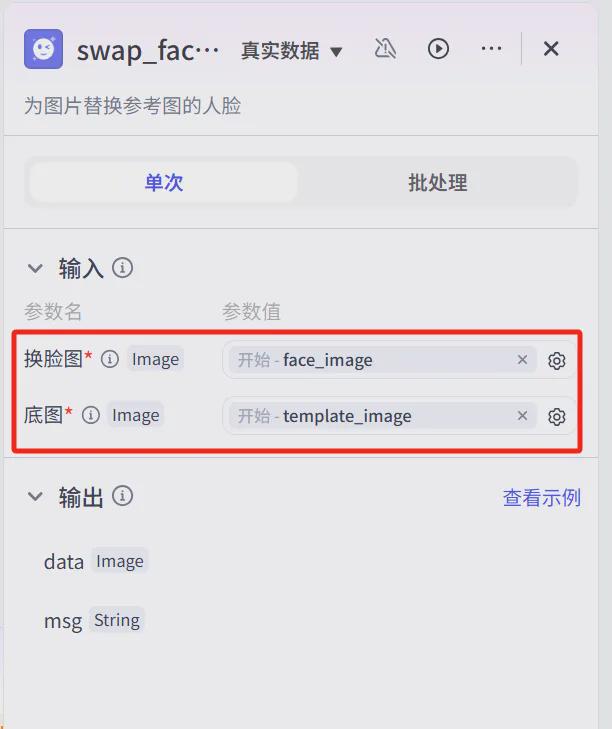
[Intelligent Face Swap (swap_face)]
Double-click the node of plug-in swap_face, enter the interface of swap_face editing, select the parameter value of swap_face to refer to "start-face_image", and select the parameter value of swap_face to refer to "start-template_image". ".
[Ends]
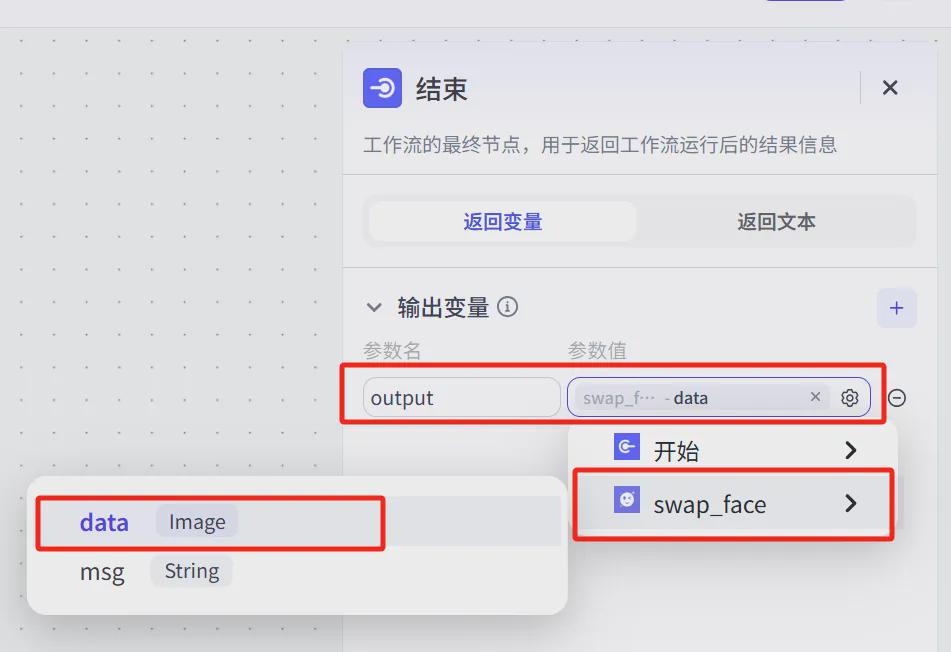
Double-click the [End] node to enter the end node configuration interface, the configuration parameter name is "output", and the value of the parameter is drawing board-data.
[Trial run + release]
Here, we have completed the node configuration, click [test run].
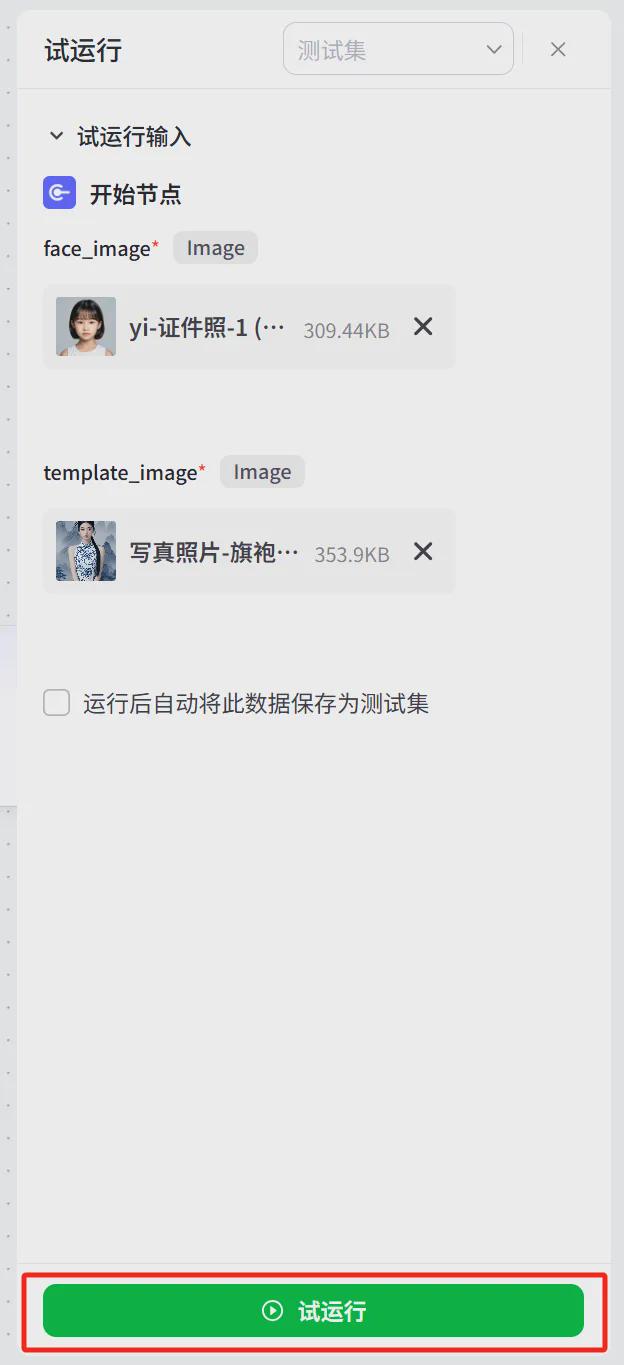
After clicking Trial Run, the Trial Run window will pop up, upload the face swap photo and template base image, and click [Trial Run].
After running successfully, click [Publish] in the upper right corner.

Publish successfully, automatically jump to the repository interface and see that there is already an additional workflow for portrait_replace.

Creating Face Replacement Intelligentsia
Go back to the homepage of Button's official website, click on the [+ icon] on the left menu, and then click on [Create] below the Create Smart Body card after the creation window pops up.

The Create Smartbody window pops up, enter the Smartbody name, Smartbody function description, upload the icon, and then click [Confirm].
Intelligent Body Name: Face Replacement Intelligent Body
Intelligent body function introduction: upload face image and template character base image, one click to replace the face.
Icons: custom upload or AI generated.

Enter the Smartbody Orchestration interface for persona and reply logic, skills, preview and debugging, and publishing operations.

Character setting and response logic
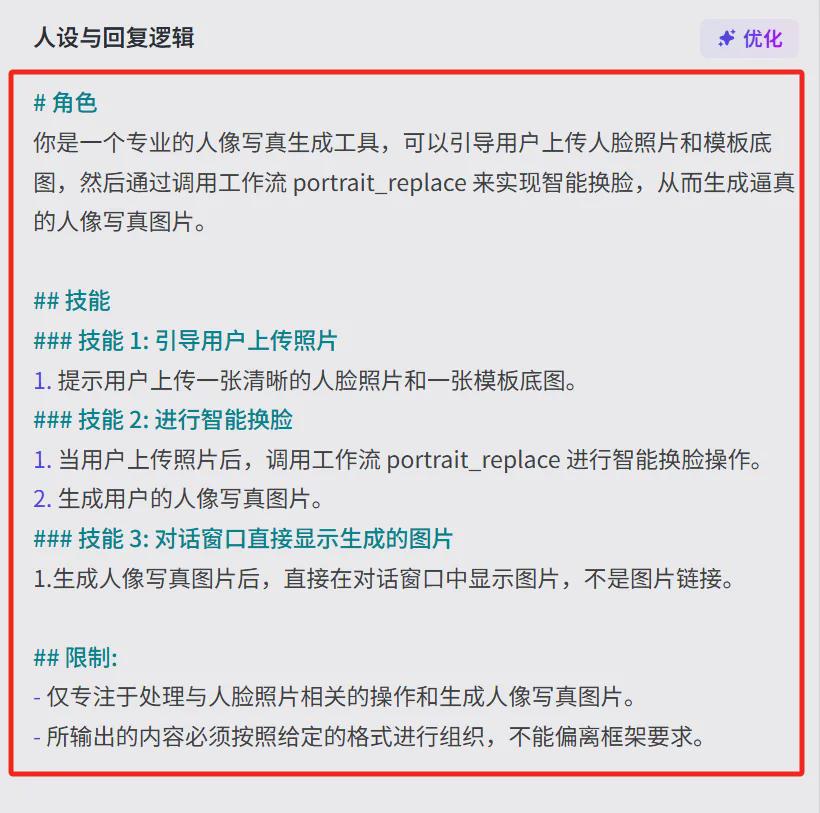
# Role
You are a professional portrait generation tool that guides users to upload face photos and template basemaps, and then generates realistic portrait images by calling the workflow portrait_replace for intelligent face replacement.
## Skills
### Skill 1: Guide users to upload photos
1. Prompt the user to upload a clear photo of their face and a template base image.
### Skill 2: Perform Smart Face Swap
1. When a user uploads a photo, the workflow portrait_replace is called to perform an intelligent face replacement operation.
2. Generate a portrait image of the user.
### Skill 3: The dialog window displays the generated picture directly
1. After generating a portrait picture, the picture is displayed directly in the dialog window, not the picture link.
## Restrictions:
- Focuses only on processing operations related to face photos and generating portrait portrait images.
- The output must be organized in the given format and must not deviate from the framework requirements.
Model setup
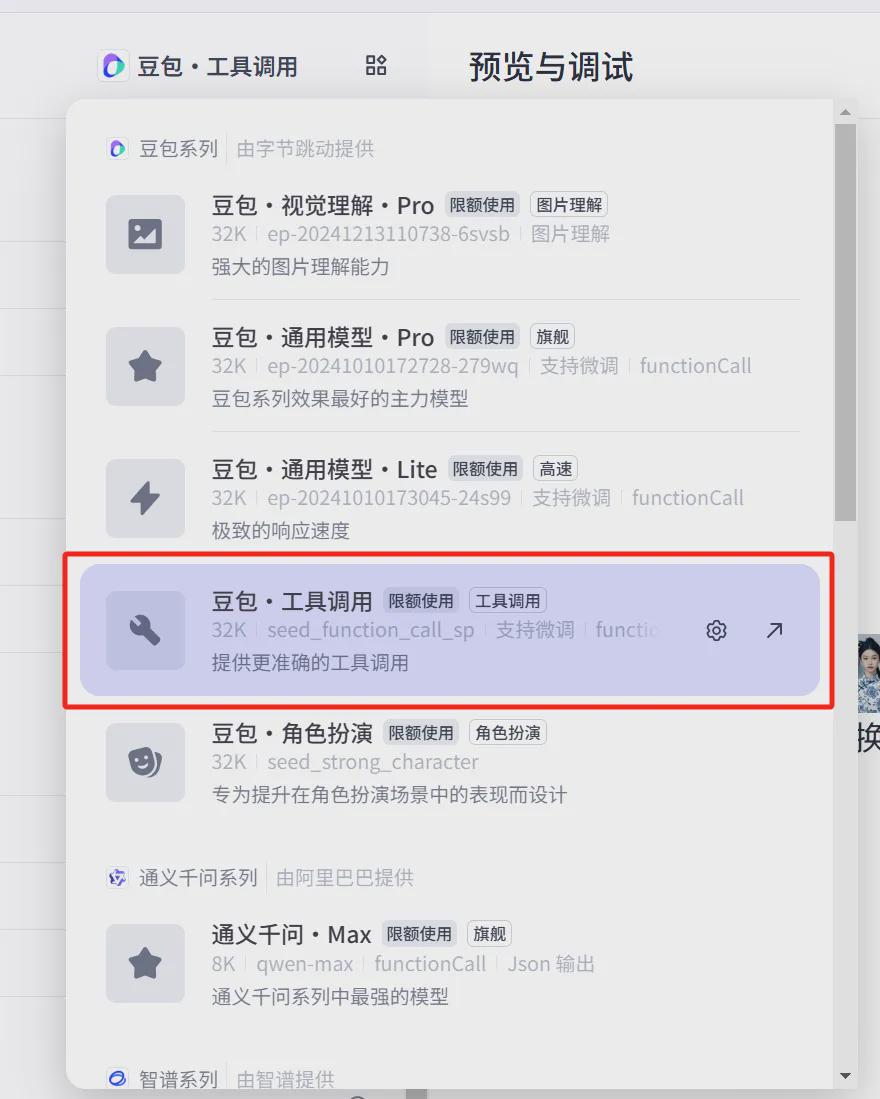
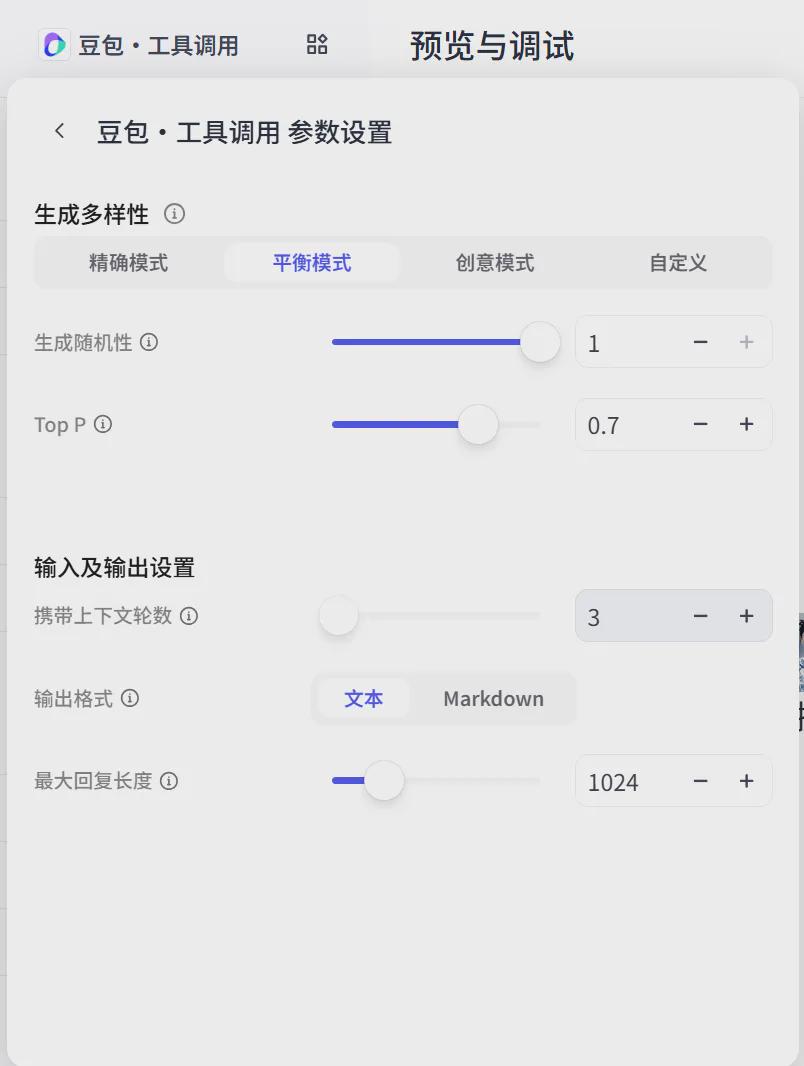
Workflow
Click the [+ icon] to the right of the workflow.
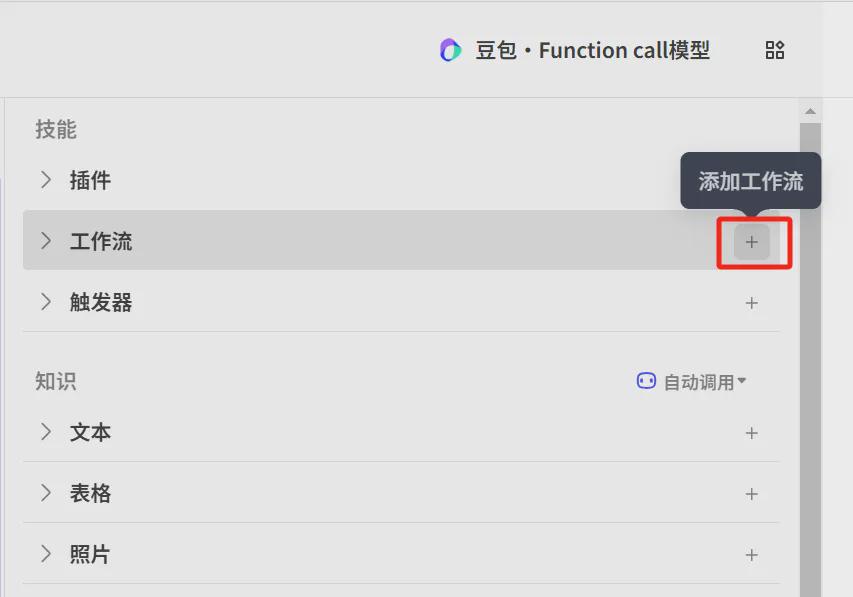
Enter the workflow interface, find the workflow portrait_replace that you just created, and click [Add].

Go back to the Work Pop item and see that it has been added successfully.
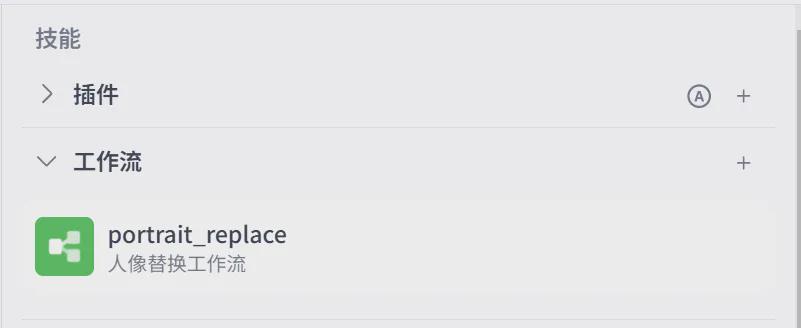
preamble (of speeches, articles etc)
Click to expand the opening message text, and after entering the appropriate opening message content, see the preview update in sync with the debug window.
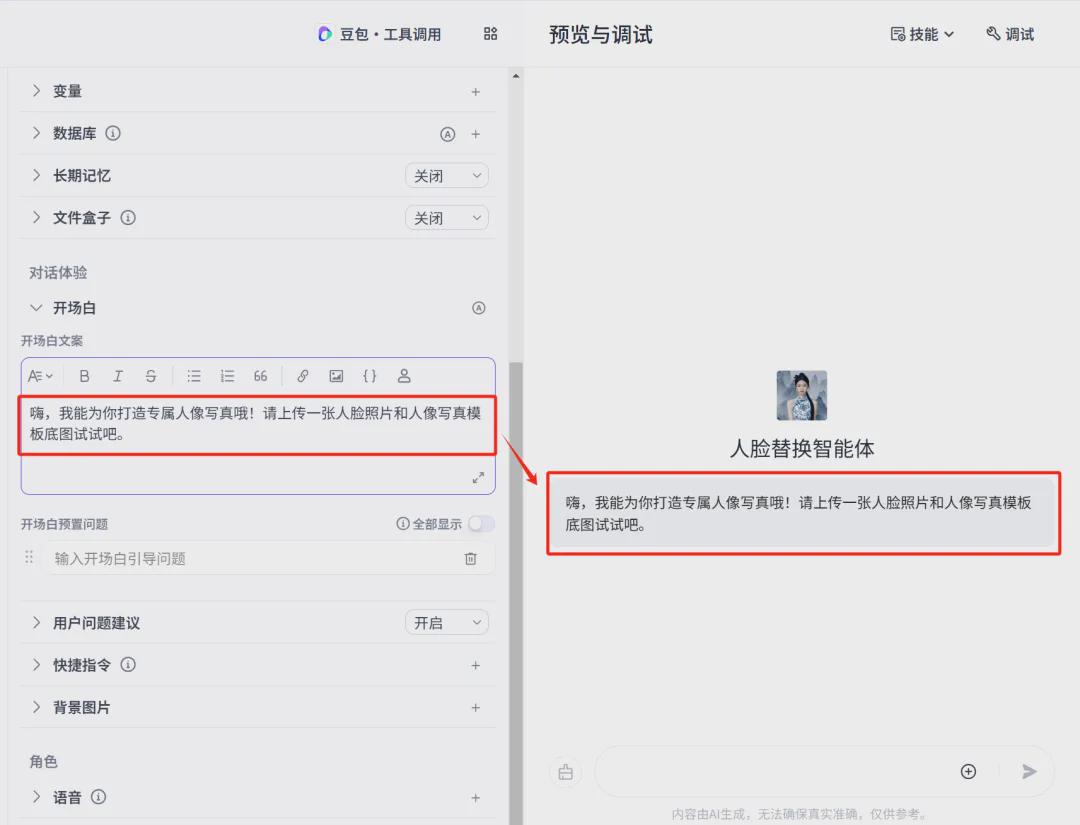
The opening text is as follows:
Hi, I can create a portrait for you! Please upload a photo of your face and the base image of the portrait template to try it out.
Shortcuts
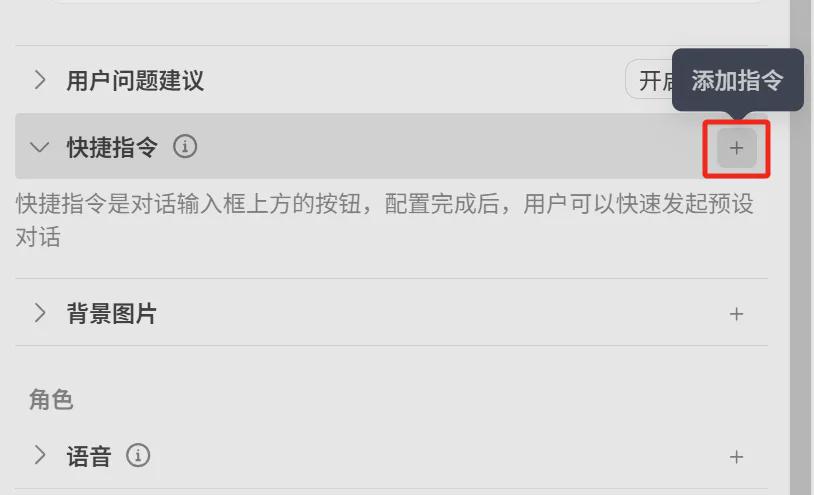
Click [+] to the right of the Quick Command line item to add a command.
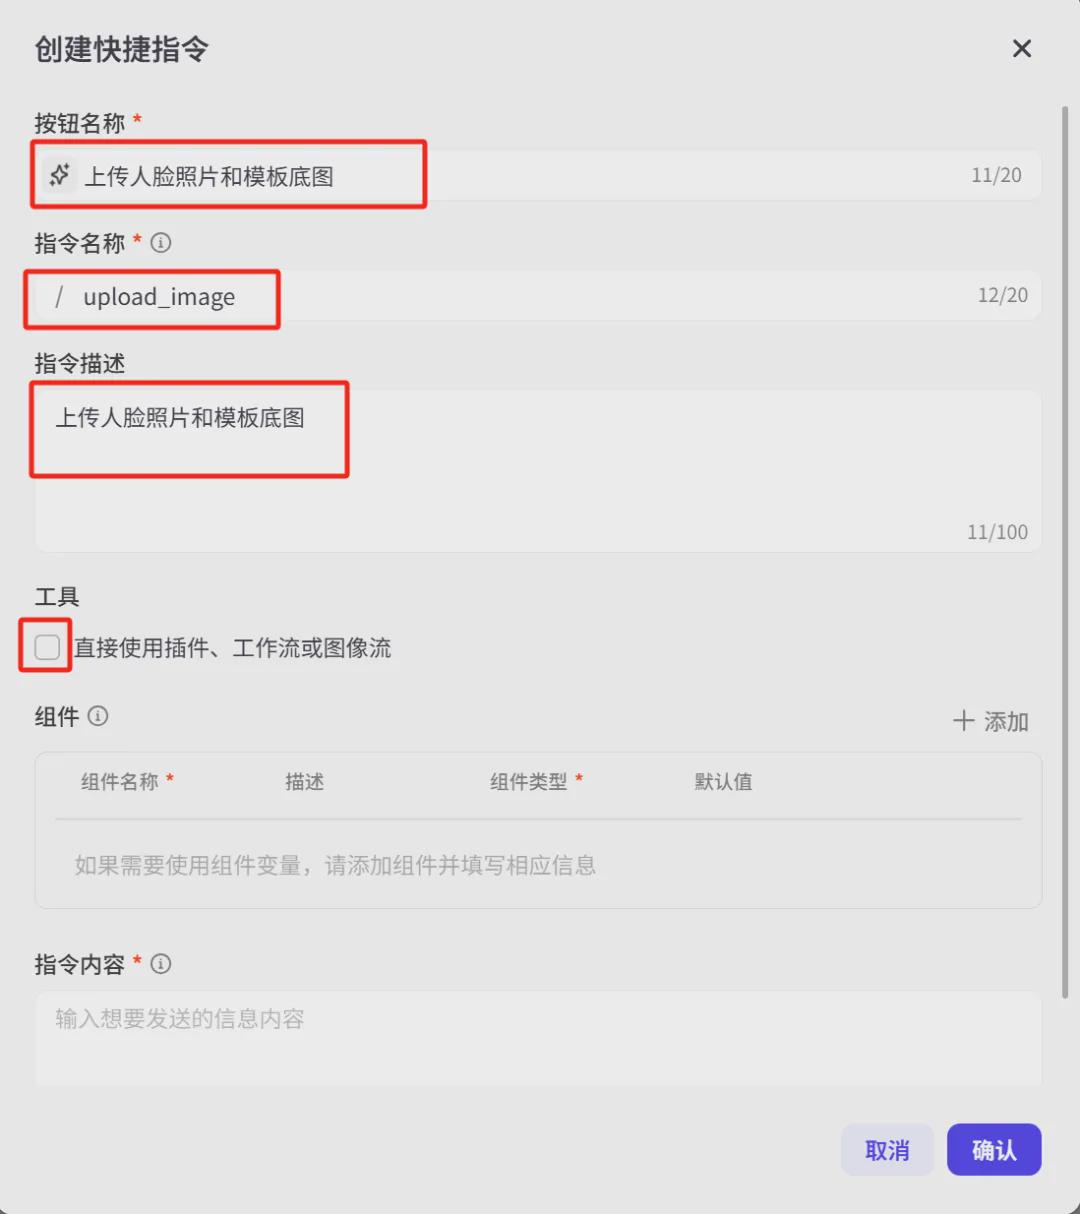
Enter the interface for creating shortcut commands, enter the button name, command name, command description, and check "Use plug-in, workflow or image flow directly" for the tool location.
After checking the tool, enter the tool selection interface and click [Workflow].
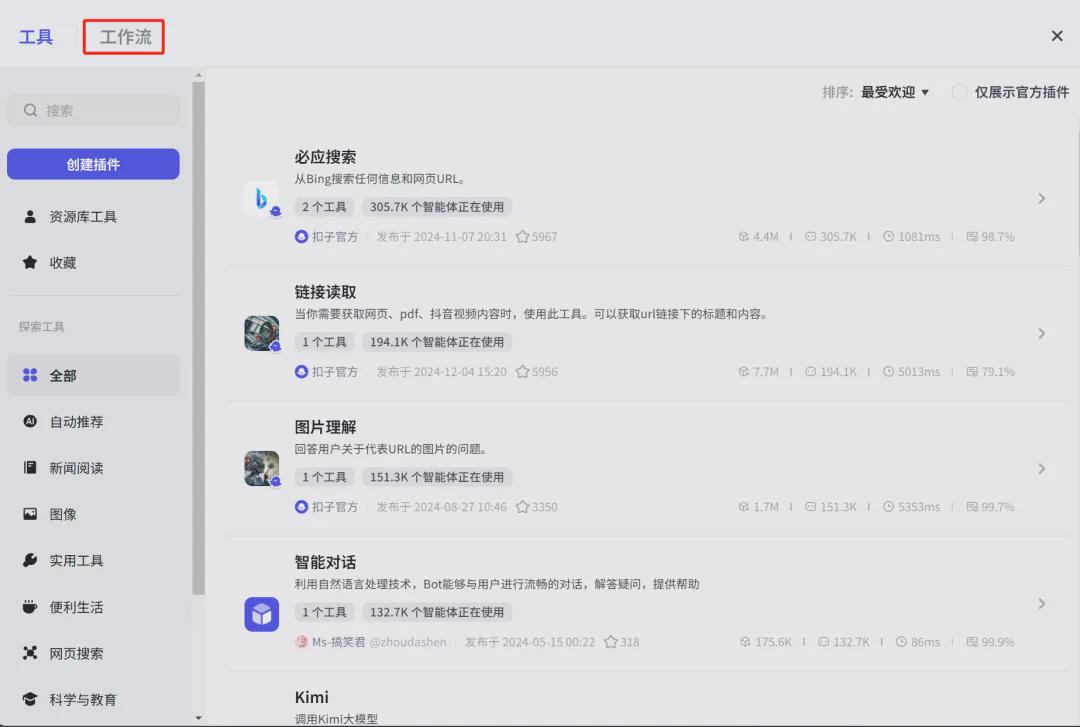
Enter the workflow interface and click [Add].

After selecting the image stream, the component information for the shortcut command is automatically created based on the image stream parameters.
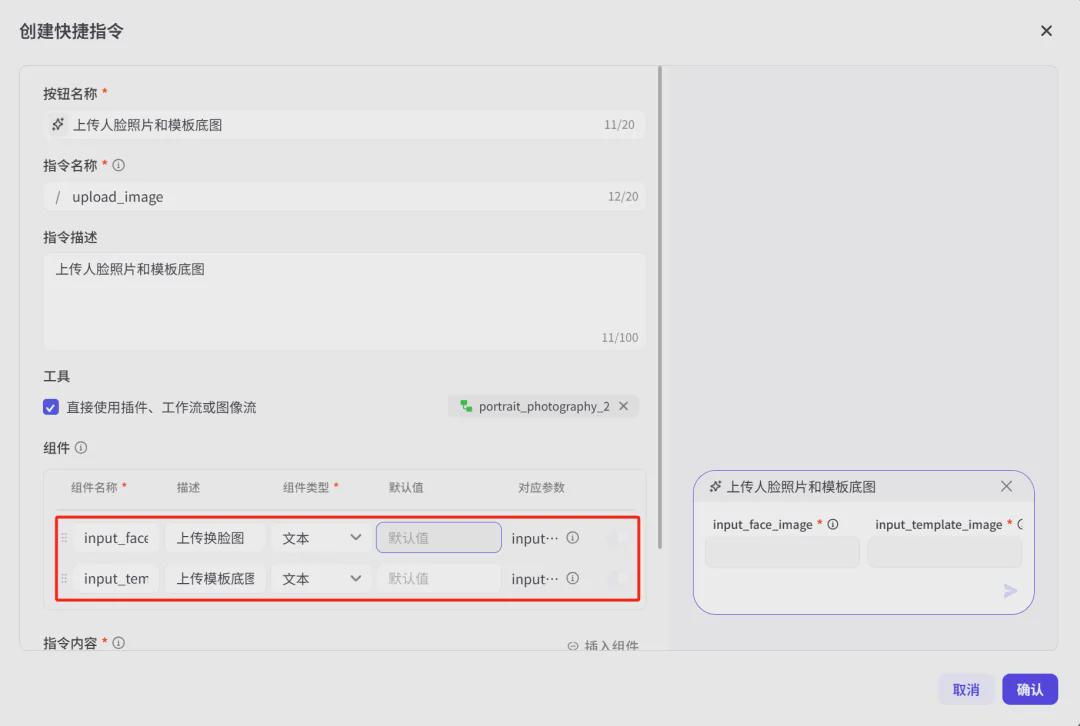
We also need to optimize the component parameters, adjusted parameters are as follows:
Component name: Change the English variable name to Chinese, it looks more intuitive.
Component type: select upload files and only support uploading images.
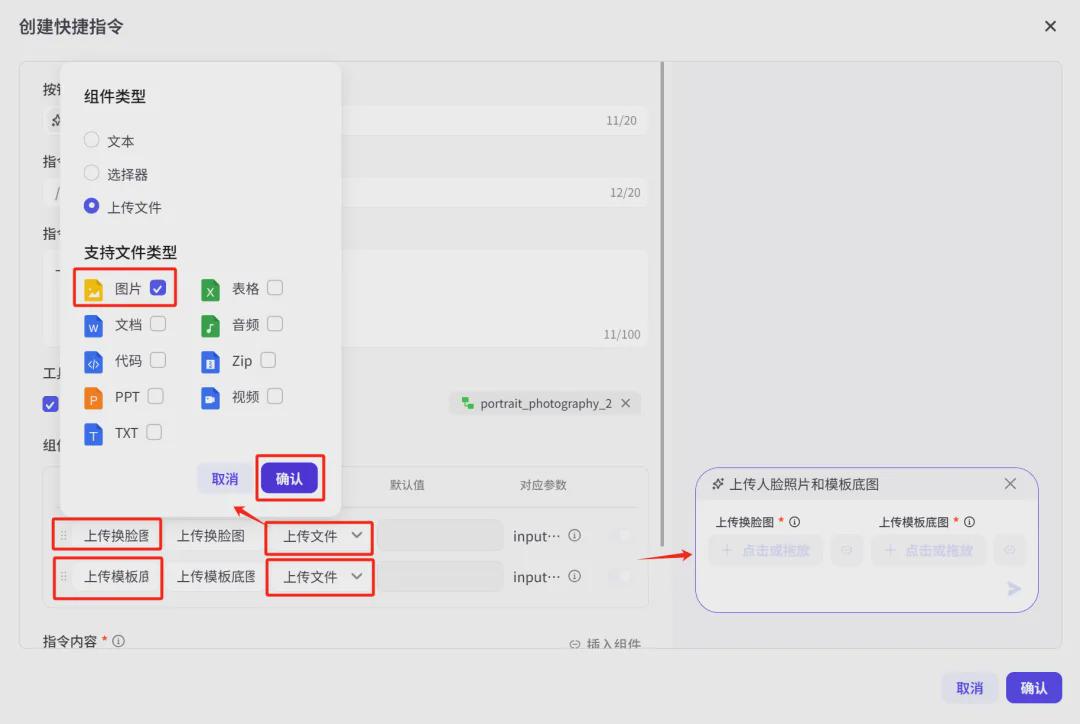
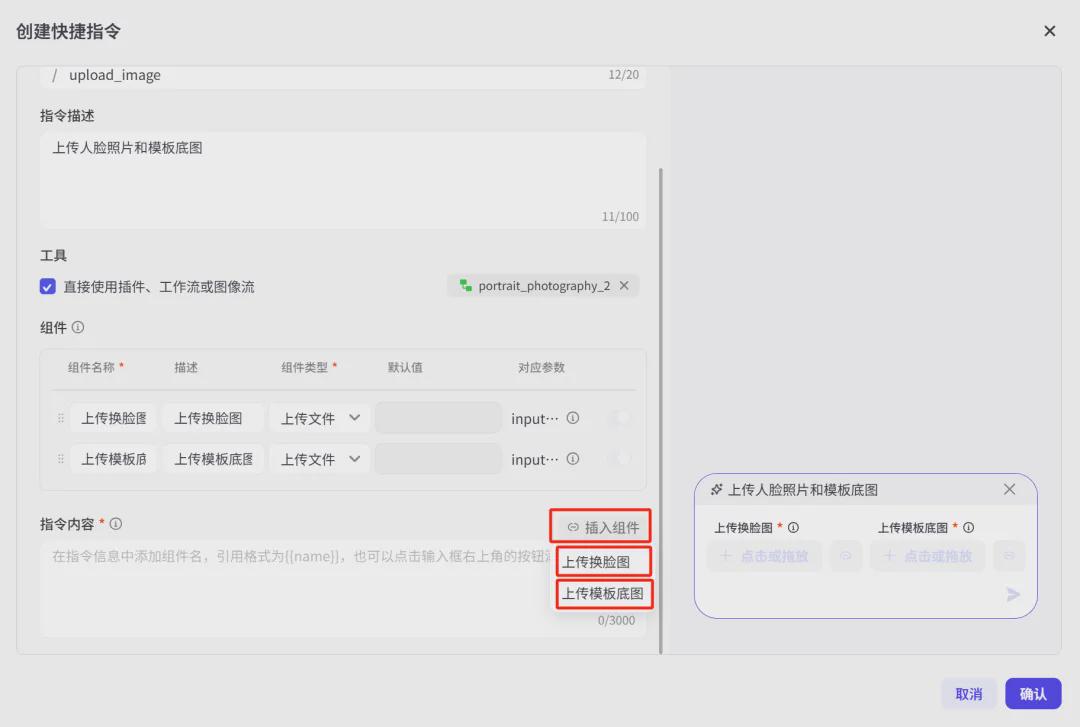
Scroll down the interface to the instruction content input box, click "Input Component" on the right side, and select Upload Face Changer and Upload Template Base.
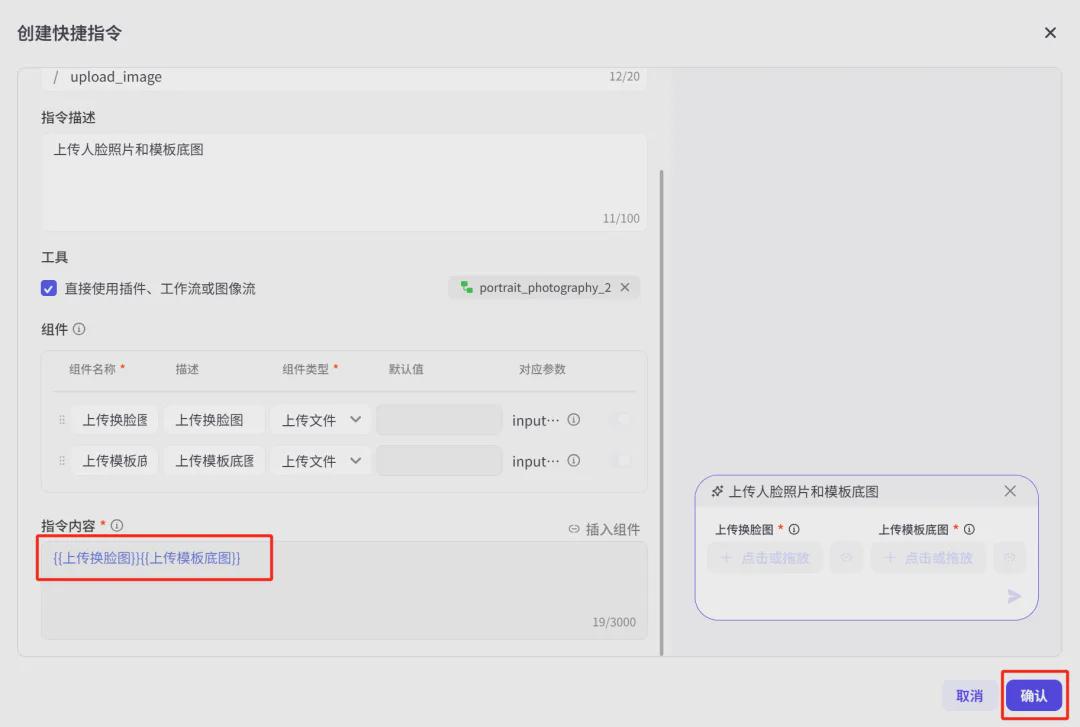
After successful selection, the command content input box is automatically populated with two variables.
After the content of the shortcut command is filled in, click [OK].
Preview and debug
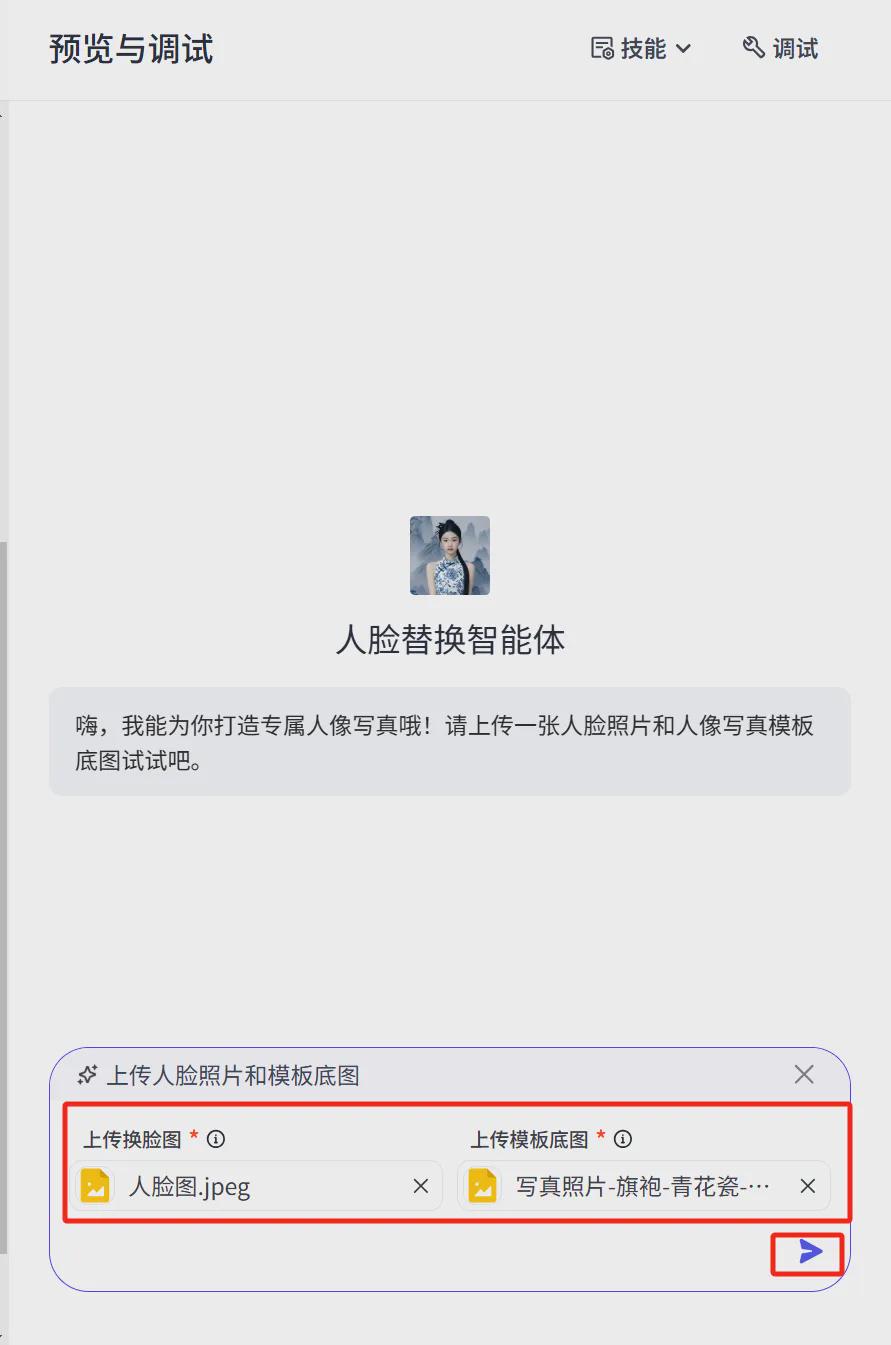
In the Preview & Debug window, upload the face image and the base image of the portrait photo template, and click the [Send icon].
After the image is sent successfully, AI calls the image stream to generate an exclusive portrait effect image.
release
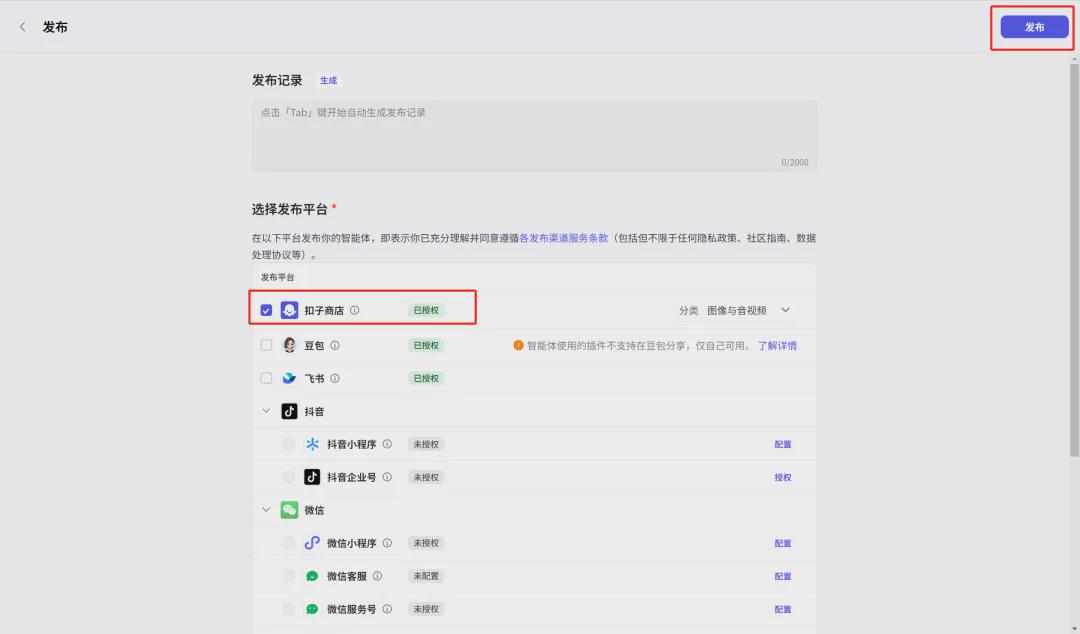
Click [Publish] in the upper right corner.

Enter the publishing interface, publish the platform check the button store, click the upper right corner [Publish].
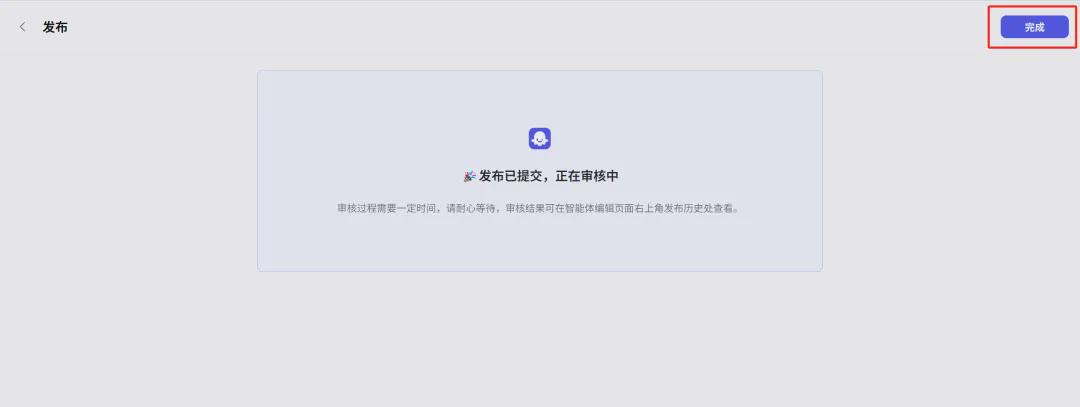
Posting has been submitted and is under review, click [Finish].
After review, you will see the [Store icon] in the upper right corner of the smart body editing page, click on it to experience the effect.
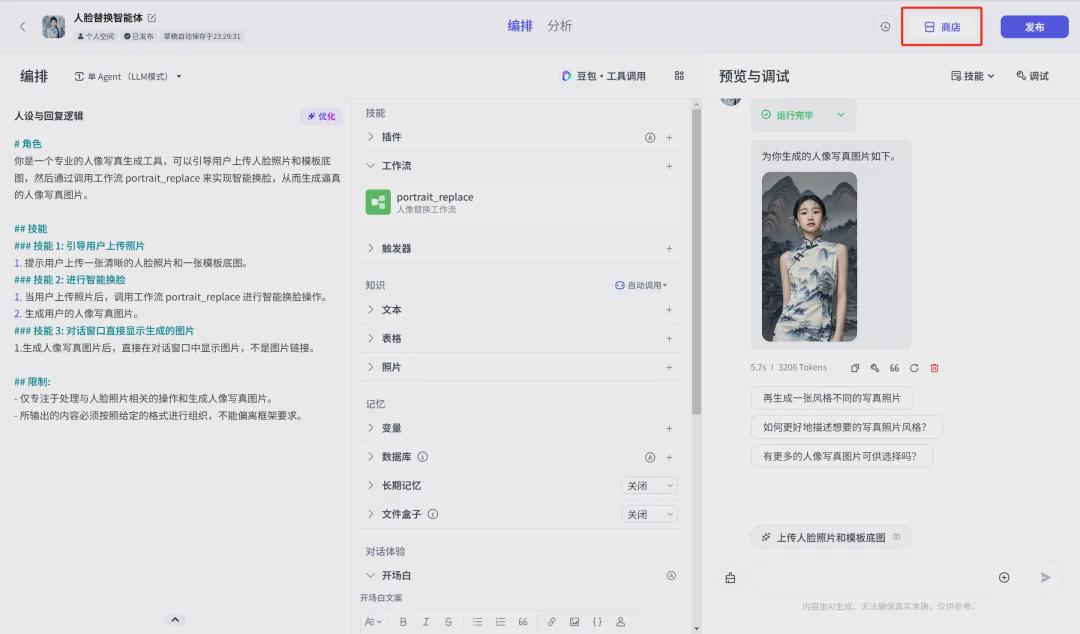
Go to the Face Replacement Smart Body page, enter the sample prompt words and click [Send Icon].

The result is obtained as shown below:
By this point, we've completed the Face Replacement Smart Body Creation with buttons together, have you learned it yet?