Today we're going to learnComfyUIofWorkflow. The best tutorials for learning a new thing are always the examples provided on the official website.
Here I'll illustrate with an example from the official website, followed by an example.
This will allow us to get up to speed quickly and go further.
Official Tutorial: https://comfyanonymous.github.io/ComfyUI_examples/2_pass_txt2img/
Download the text: https://pan.quark.cn/s/46a899c45618
Example of official website
Tips: For the workflow just loaded in, we don't know whether all the local models exist, so the best practice is to click Run on the right side directly after loading to see what big model files are missing locally, and then download them according to the model file names in the prompt. It is recommended to use the common ftp download tool to download the models after getting the model name and model download address, the download speed of ComfyUI Model Manager is too slow!
Note: For those who don't have ComfyUI, you can read my post from yesterday.
Learn ComfyUI from the ground up with the ComfyUI Getting Started Tutorial!
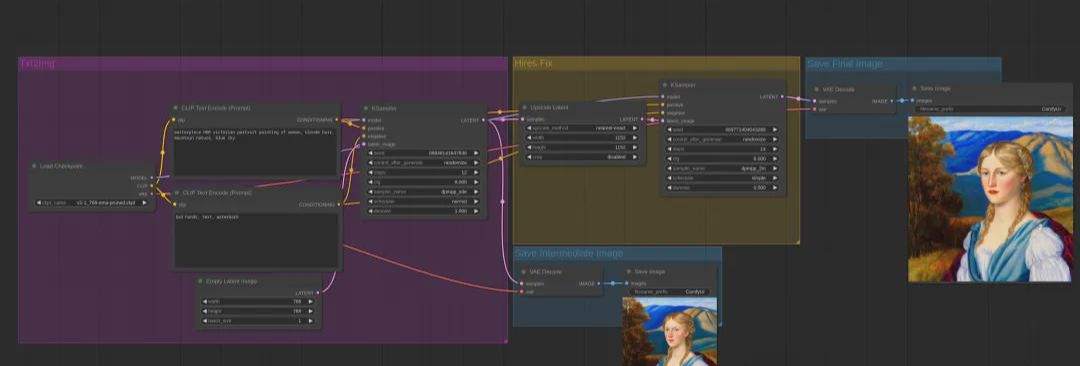
Workflow functionality:This workflow generates images using a text-generated graph, then scales them using an amplifier, and then saves the images after processing;
Load this workflow:You can drag this image onto the page and the workflow is loaded in.
Reading order:These workflows are read in the same order as we read a book, left to right from top to bottom.

Process Description:
1. Node 1, node 2 node 3, node 5 is mainly for node 4 to provide some basic raw material data, so that node 4 can generate Latent at ease;
2. Node 4 is processed using the previous base raw material to generate Latent;
3. Node 7, node 8 and node 10, node 11 convert Latent into a viewable image before saving it;
4. node 6 is scaling the Latent of node 4 and still outputs the Latent;
5. node 9 is to process the Latent of node 6 and other underlying raw material data to finally generate a new Latent for node 10 to process;
Overall:This workflow is to generate images based on the cue words, and then zoom in on the images, similar to a restaurant where there is a chef cooking and a lot of small workers serving him, and the chef's cooking will be given to the waiter;
Functional interpretation of each node:
Node 1: Checkpoint Loader
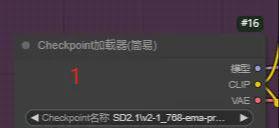
This node is used toLoading model filesIn this workflow, the node loads the model file "v2-1_768-ema-pruned.ckpt" by default.
Provide other subsequent nodes withModelParameters.
VAE: This parameter is used to help the model generate images better;
Node 2, Node 3: CLIP text encoder
These are 2 identical nodes that are used to fill in the prompts, and it's common to see what positive prompts and negative prompts are set up through these nodes.
Node 4: K Sampler
The core component that receives all the input data and processes it before feeding it into the image.

Node 5: Empty Latent
Blank images, used to set the size and number of images, and to give the sampler an empty Latent for the K sampler to fill;
Node 6: Latent Scaling
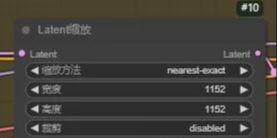
This node sets the size of the scaled image, the scaling method, whether to crop or not; and passes the processed Latent to the subsequent node;
Node 7, Node 10: VAE decoding
Receive VAE, Latent and convert to real image
Node 8, Node 11: Save image
It's for saving images.
Node 9: K Sampler
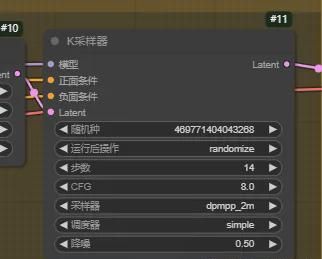
Receive the model provided by the previous Checkpoint loader, the Latent provided by the previous node, and the positive and negative cue words, and generate the scaled Latent for subsequent nodes after processing;
raise one and infer three1
Since the previous example used text to generate a Latent, then scaled the Latent, and then processed it with a K-sampler to get a new Latent, what if we want to scale an existing image? What should we do?
My thought process is as follows:
I take a similar approach by loading an existing image into the workflow, converting the image to Latent, then scaling it with Latent, then processing it with the K sampler, and it's basically the same thing later.
Steps:
1. Load image
Double-click on an empty space on the workbench and type "Load Image" in the pop-up box.
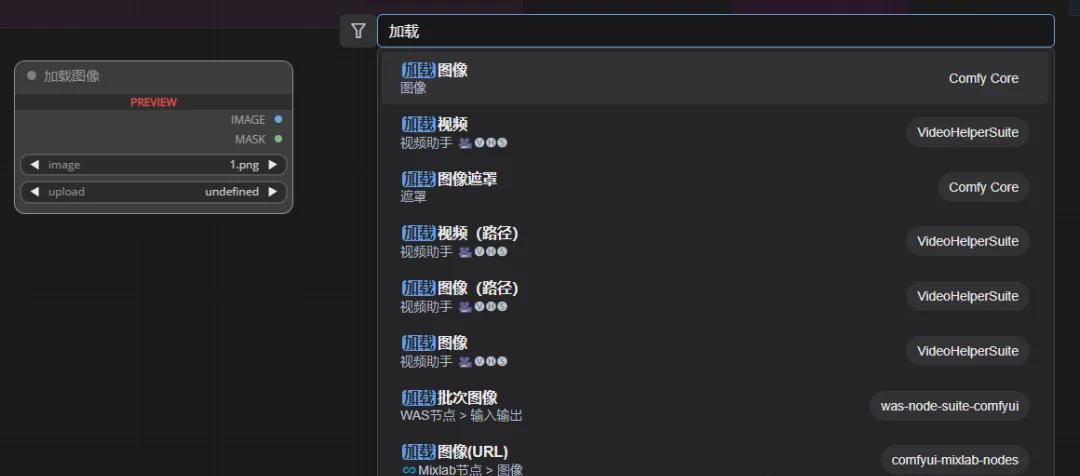

2. Next node:
If we encountered that we do not know what to do next, we can press the current output and our whole idea to operate together. Here "image" we drag the left mouse button out of a line after the release of ComfyUI will prompt us what nodes can be used.
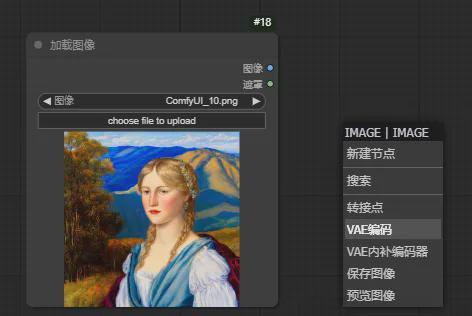
Here we select "VAE code" and get the following result
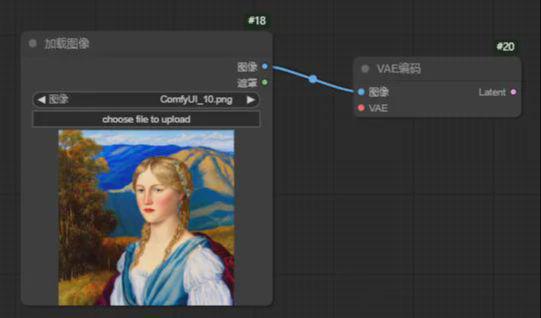
3. VAE code
VAE encoding has an input VAE, and an output Latent, and here we get a Latent, but don't scale it.
So next we drag a line at Latent and add a node with Latent scaling.
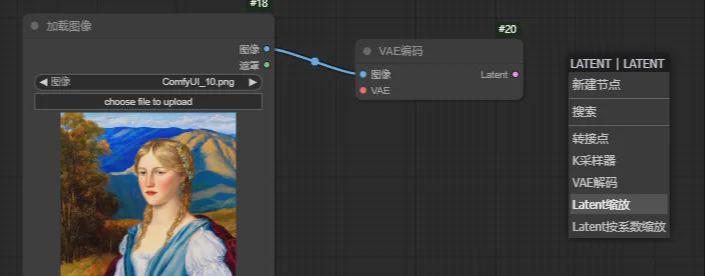

Here, I've set the width and height to be larger than the size of the original image.
4. Next node
Referring to the previous example on the official website, after Latent scaling, the next step is the K sampler, so I followed suit and added all the subsequent nodes

5. Completion of other nodes
Here we find that the VAE Encoding, K Sampler, VAE Decoding, Positive and Negative Conditioning nodes all have some input parameters that are not connected, so we still have to complete them. Refer to the previous example on the official website to add other nodes so that we can connect all these unconnected nodes.
Similarly, I press the mouse to drag a line from the VAE here, and after releasing the left mouse button ComfyUI prompts me which nodes I can use, and I can select the target node from the list.

Then we keep dragging out the lines to connect all the unconnected parameters and end up with the following workflow. Note that the model file in the "Checkpoint loader (simple)" here is consistent with the official example.

6. Execute and see the effect

The execution turned out to be a big disappointment, so far from our original image, so what's going on here?
According to the official website, the noise reduction parameter in the K-sampler has a big influence on this, we change this noise reduction parameter to the same value as the noise reduction parameter of the K-sampler in the official website's example, and try again.

Hmmmmmmmmmmm, works great, now you get a zoomed in image that resembles the original just fine.
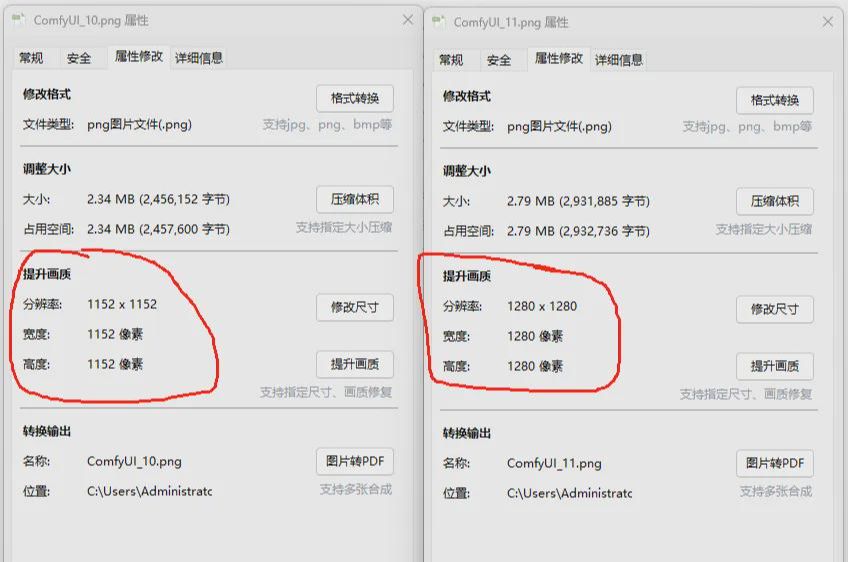
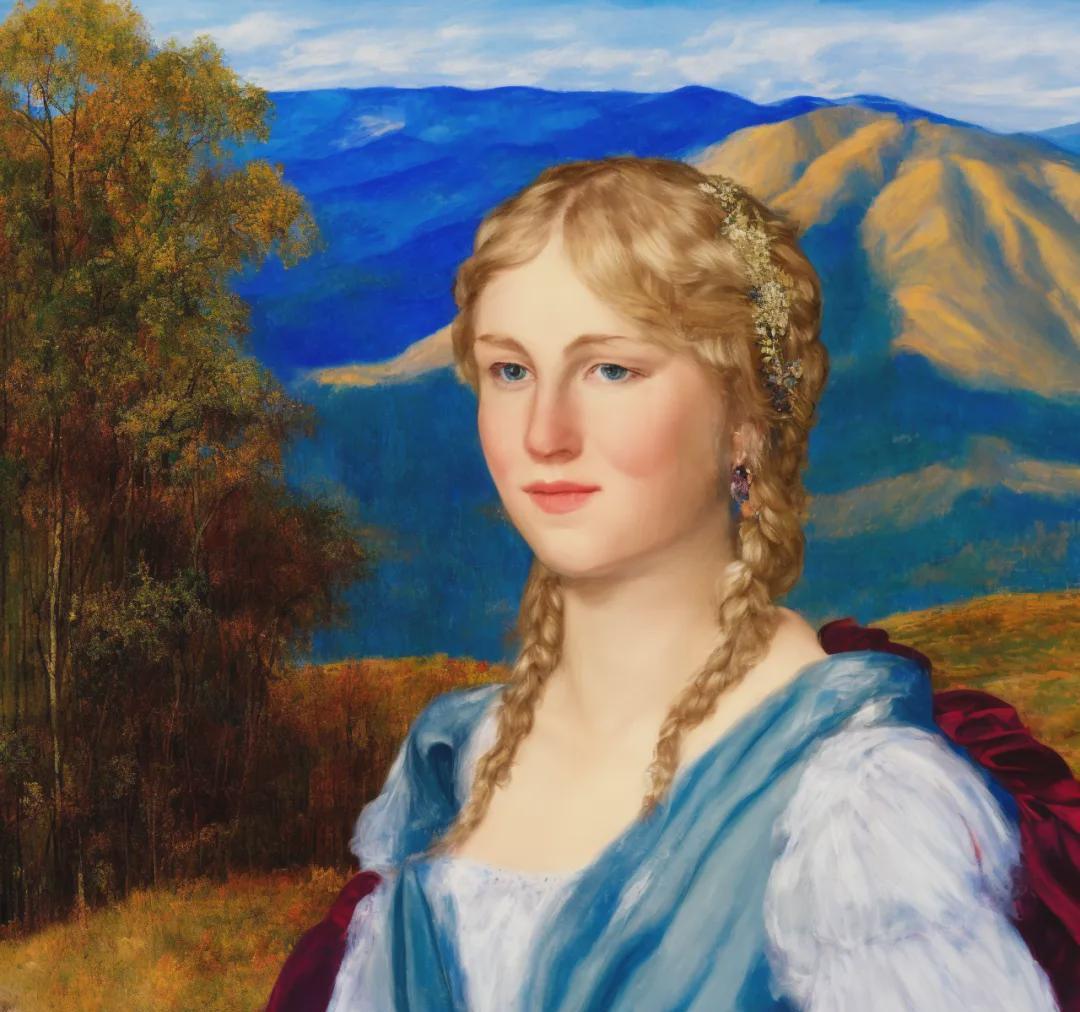
raise one and infer three2
Hmmmmmmmmm, by creating our own new workflow earlier in the day has given me a lot of confidence, so is there any more ways to implement this kind of image enlargement? Let's keep trying.
My thoughts:
Is there a model for zooming in on an image? I'll try it with this and see?
1. Search images, models

A node was found through which the image was zoomed through the model.

2. Next node
For this node, we still use the practice of 1 in the previous example, dragging out a line for the input and output parameters, and later selecting the appropriate node.

The "Image Zoomed by Model" left image parameter is directly connected to the loaded image;
3. Scale-up models
Next press the left mouse button and drag out a line to see what nodes can be selected.
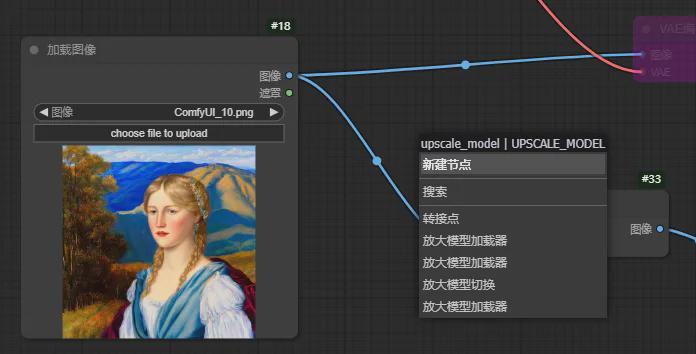
Select a "Zoom Model Loader".
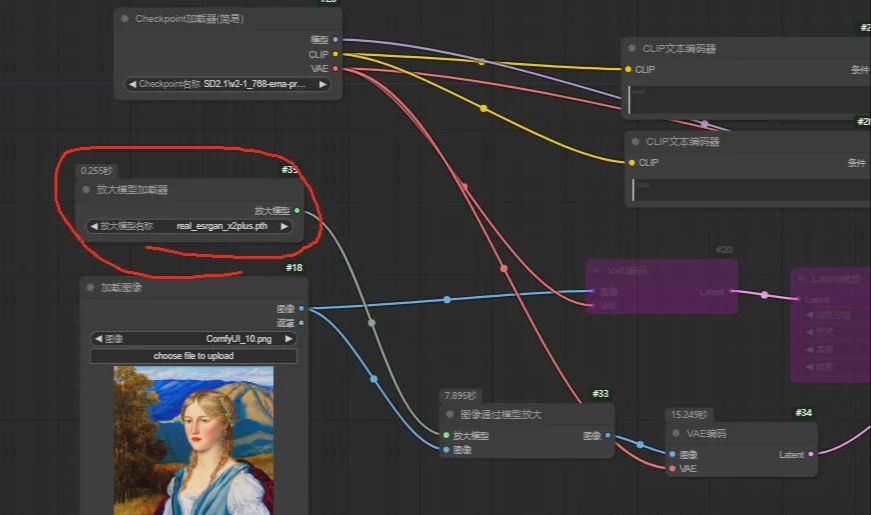
This loader uses the real_esrgan_x2plus.pth model file.
4. Improve all the connections
After adding the loader, basically after the transformation of the workflow we have finished developing, and then the new workflow all connected to the line are connected, as shown in the figure:

5. View the effect
Here we execute the workflow directly to see how the final enlarged image looks.
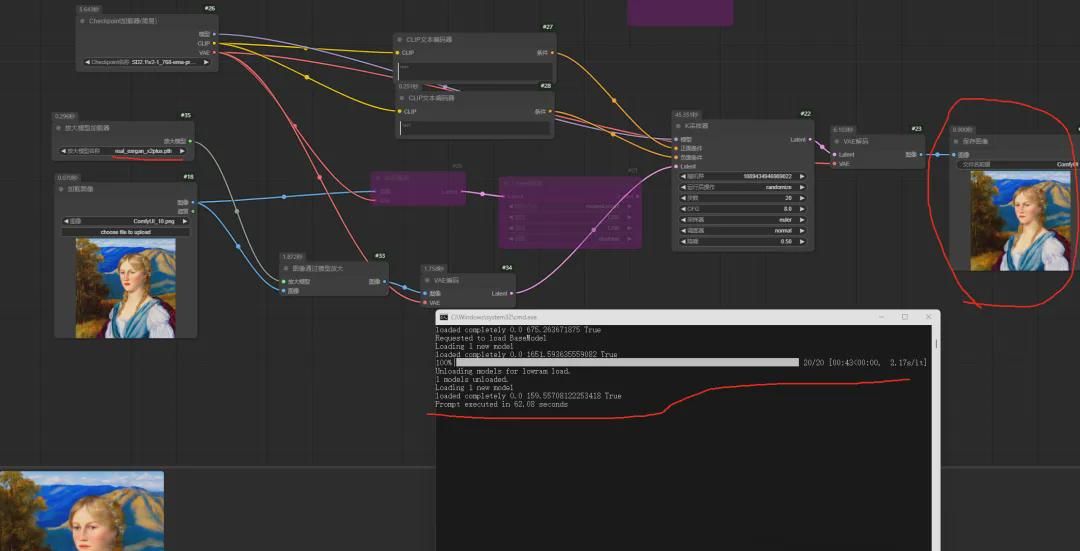
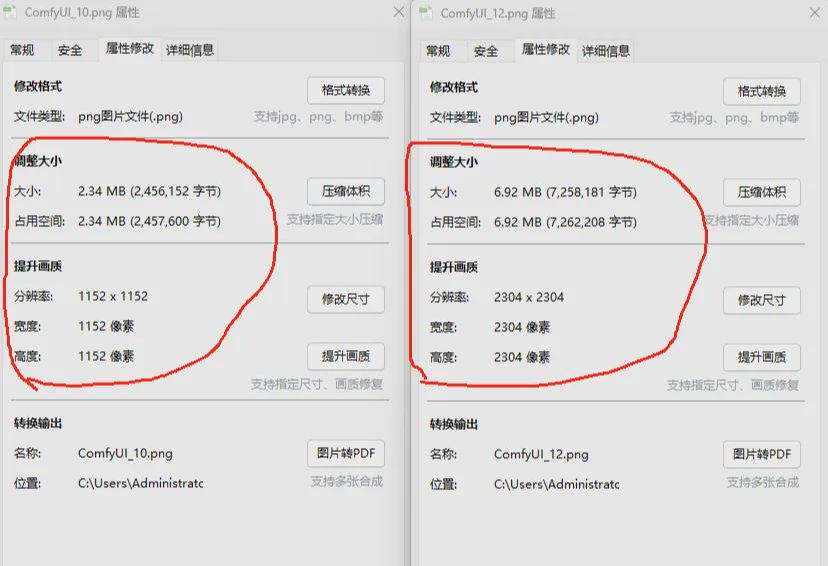

Note: For those of us who are just learning ComfyUI, let's put aside the effect of enlarged images for now and focus on how to build a new workflow first. After you are familiar with building the workflow, then you can improve the quality of your work.
This article uses the following workflow:
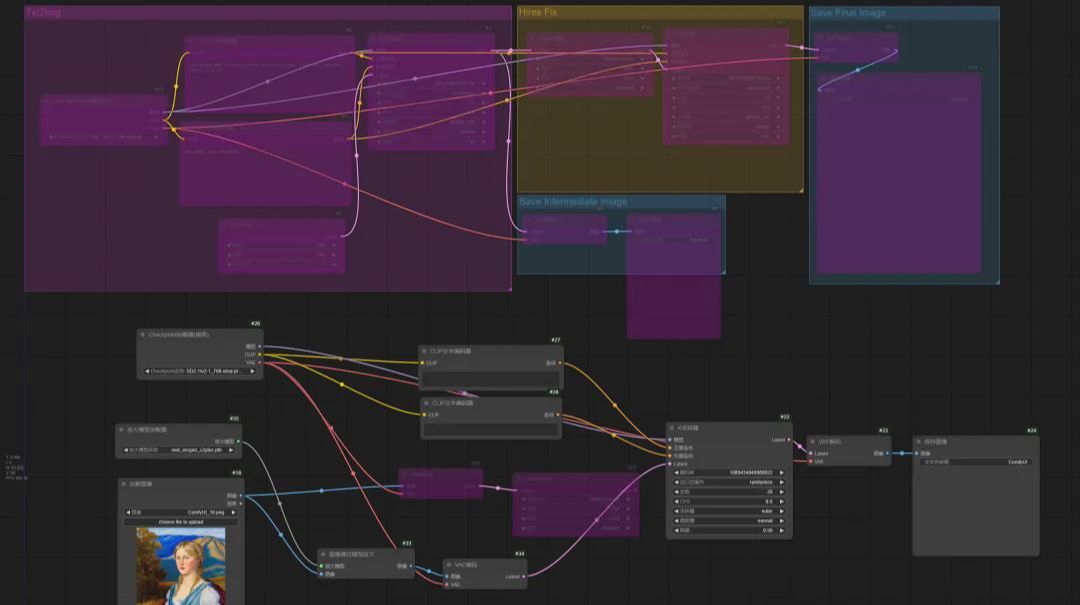
Note: The workflow is exported as an image, you can right mouse click and in the right click option you can export it as a png carrying the workflow metadata to share it with more people.
at last
Well, through the previous official website examples of learning, we have mastered the text of the map and picture enlargement. And then by way of example, we can zoom in on existing pictures, the process we mastered the process of building a new workflow.