Starting today I'm going to start sharing someComfyUITopic, introduce ComfyUI related content. Convenient for those who want to learn ComfyUI to download and learn.
The following article will explain ComfyUI introduction, downloads, workflow, and learning materials.
I. Introduction
ComfyUI is an open source GUI tool that is primarily designed to simplify the process of using other AI tools such as Stable Diffusion.
ComfyUI has relatively low video memory requirements for the running environment, and the application launches quickly, produces images quickly, etc.
Given the openness of ComfyUI and the flexibility of its design, the tool has been able to generate and process not only images, but also sound and video.
ComfyUI allows users to build workflows through visualization, allowing them to adjust and configure the parameters of the model themselves.
II. Characteristics
1. Easy to deploy
Users just need to download ComfyUI from the official download. then unzip the zip to start it.
2. Intuitive and easy to use
ComfyUI provides an easy-to-use drag-and-drop interface that allows users to get started quickly without programming skills.
The interface allows the user's ideas to be programmed by means of nodes and wires into a workflow that applies to a specific functional scenario. The user simply drags and drops and sets it up with the mouse.
3. Modularization
ComfyUI allows users to freely combine and extend on the workbench. So users can quickly build and apply workflows;
4. Flexibility
ComfyUI supports a variety of input and output formats, which can be more easily integrated with other tools. In addition it also supports some custom plug-ins and scripts, which can meet the more advanced needs of users.
5. Community support
ComfyUI, as an open source project, also has some large open source communities, which means we can find a wealth of resources and get help easily.
6. Workflow management
The new version of ComfyUI comes with a workflow management feature that allows us to easily edit and manage multiple workflow files.
7. Advanced
ComfyUI, like Stable Diffusion, inserts workflow metadata along with the PNG image when generating it, so you can import workflow images directly.
iii. relevant resources
Official website: https://www.comfy.org/
Example of official website: https://comfyanonymous.github.io/ComfyUI_examples/
Project address: https://github.com/comfyanonymous/ComfyUI
ComfyUI plugin centralized location: https://github.com/ , enter comfyui to search for
Foreign communities:
https://www.reddit.com/r/comfyui/
https://discord.com/invite/comfyorg
Community Summit:
https://github.com/ComfyCommunitySummit
Domestic communities:
https://www.mixcomfy.com/
IV. Downloads
Workflow:
Domestic : https://www.liblib.art/
Abroad: https://civitai.com/
Model Download:
Domestic: Magic Match Community, https://www.liblib.art/
Abroad: hug face, https://civitai.com/
Install the package with one click:
Note: For those who purely want to be lazy, using a one-click installer is the best and most hassle-free.
Installation package: https://pan.quark.cn/s/d07d8e13ee56
Installation package: https://pan.baidu.com/s/1OWEbAC_dVi55EOO1GYK1ew?pwd=3egy
Learning Materials:: https://pan.quark.cn/s/6c42427c3d8a
Workflow:: https://pan.quark.cn/s/68fba7e225ed
Installation, startup
The official website says that it is best to install the compression software 7z locally, and the official website of the package, the autumn leaf package and so on are also used 7z this compression format.
So for those who want to learn and use ComfyUI, it's a good idea to install: 7z. and of course: python, git
7z download: https://pan.quark.cn/s/1b2ccad091e1
python: most use 3.10, visit https://www.python.org/downloads/ to download newer versions under that major version, e.g. 3.10.13;
git: https://pan.quark.cn/s/2ef63e9aac7b
Note: install git is to download plug-ins will use the git command; install python is to allow the machine can run python applications (of course, many dependent packages installed is also dependent on python pip, pip3)
For example, after downloading the installation package for Quark.com and unzipping it, you get the following file
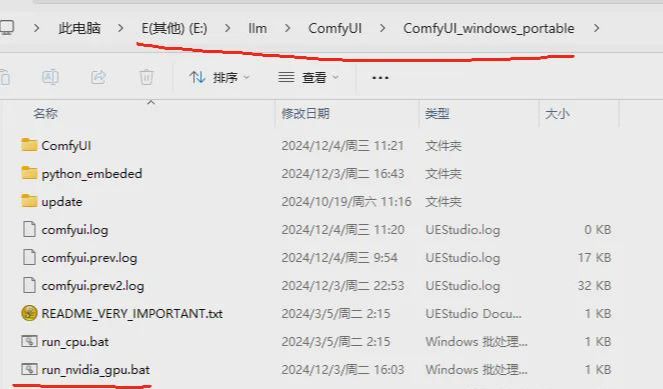
Double-click the batch script to start ComfyUI:

Upon startup ComfyUI will provide a set of workflows for Vincennes diagrams by default.
file directory
1. Plug-in Catalog
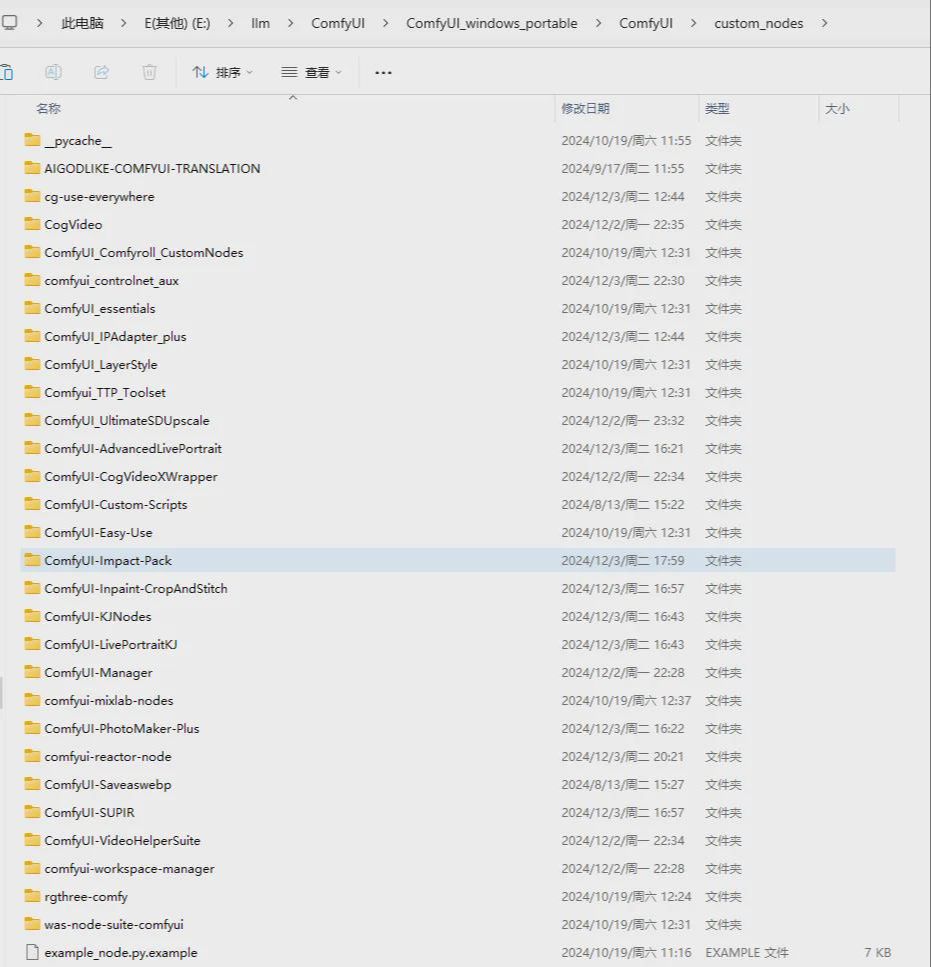
ComfyUI comes with some plug-ins by default, which are convenient for users. For example, that ribbon on the right side after startup is the plugin - ComfyUI-Manager.
We can use ComfyUI-Manager to download and install the plugin for us, or we can manually put the plugin in this directory.
2. Model Catalog
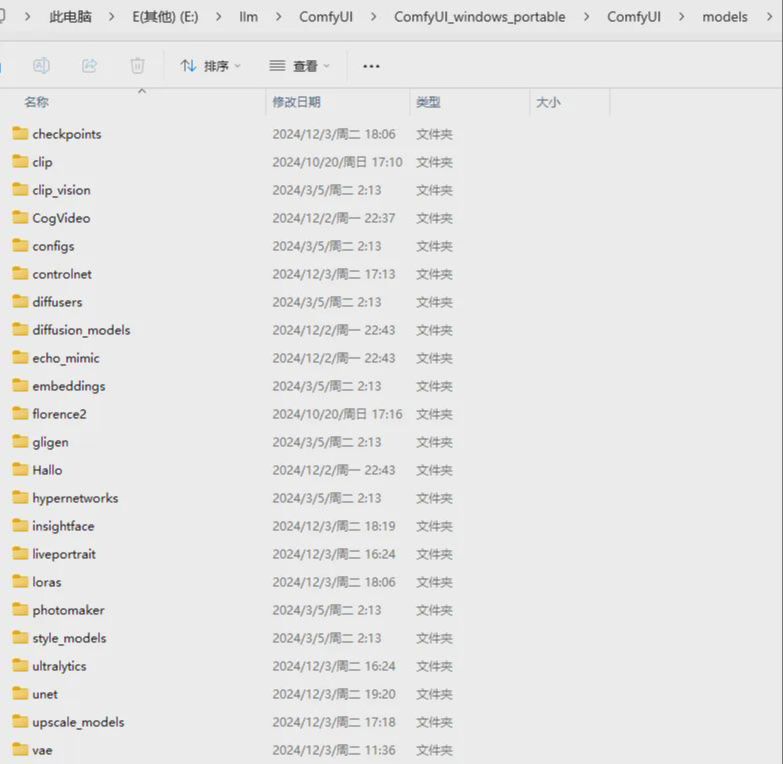

Large model files that we download using ComfyUI-Manager or manually download are organized into folders under models.
However, it should be noted that the models folder will take up a lot of disk space on your computer (because the large model files are very large and you will need more large model files as you work), so ComfyUI needs to be placed on a large hard disk partition with a lot of space.
3. Workspace catalog
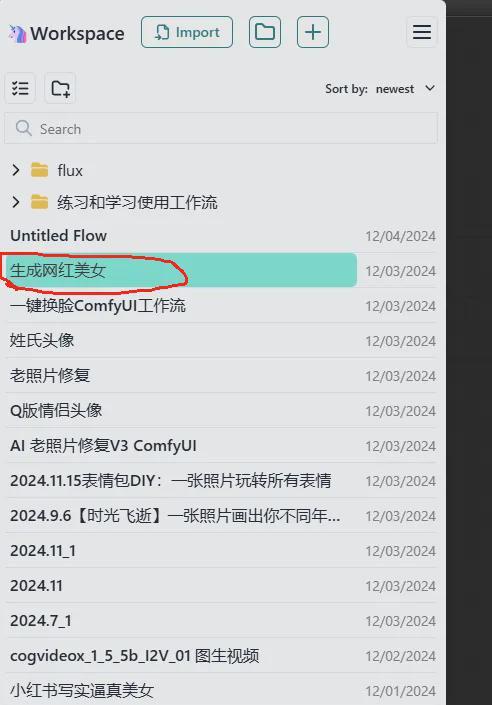
It will be stored on a hard disk, for example:
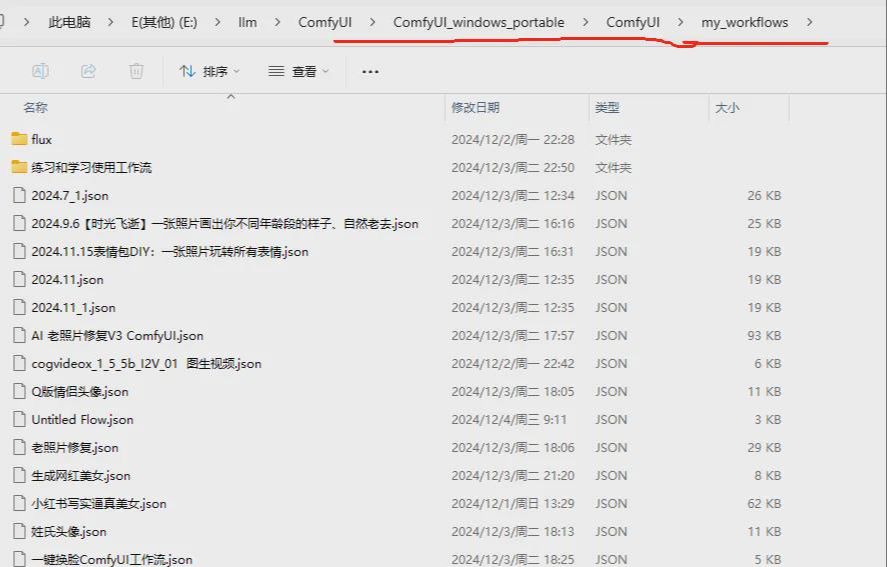
Want to change the workspace directory, you can change it here

Page Features

1. Right Function Panel
Mainly for plug-ins, model downloads, workflow loading and saving, clearing, workflow execution, and real-time monitoring of system resources.
"Add cue word queue": clicking on this button will execute the current workflow, using ctrl + enter will also work;
"Save": saves the current workflow;
"Load": Import the workflow from your computer's hard disk;
"Refresh": refreshes the current workflow, etc;
"Clear": clears all nodes in the current page;
"Load Default": loads the default workflow;
"Manager": (emphasis added) This feature will be used to install plugins, download large models, etc;
2. Shortcut Keys

![]() : Click on the folder icon to bring up the Workspace page;
: Click on the folder icon to bring up the Workspace page;
![]() : Click the plus sign to create a new workflow;
: Click the plus sign to create a new workflow;
Workflow name: it is the above Chinese text those, click can change the name, and then save;
![]() : You can view the model list page;
: You can view the model list page;
![]() : Workflow file download, save, save as, undo save, version control, and more;
: Workflow file download, save, save as, undo save, version control, and more;
3. Left workshop
Workflow list, you can delete workflows, create new ones, import workflows and so on;
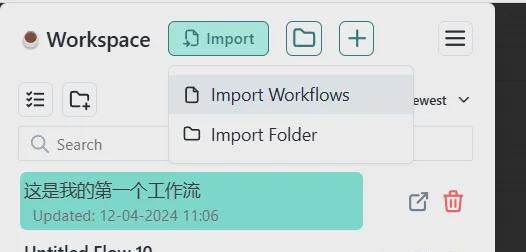
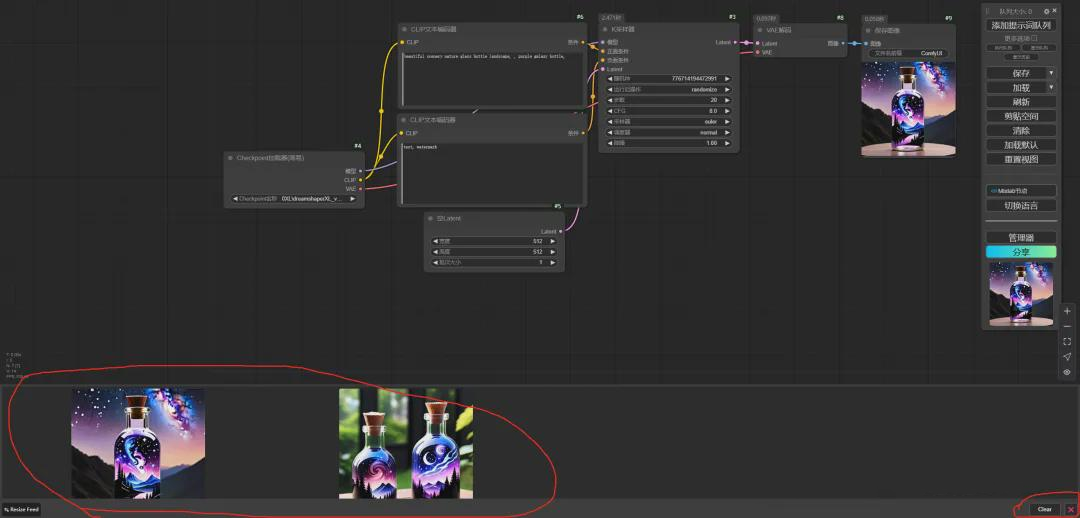
4. Clear bottom right corner
You can clean up the result area after executing the workflow
Chinese localization
For those who are not so convenient to use English, it is best to Chineseize all the pages and use the Chinese interface, here I will demonstrate how to Chineseize.
Method 1:
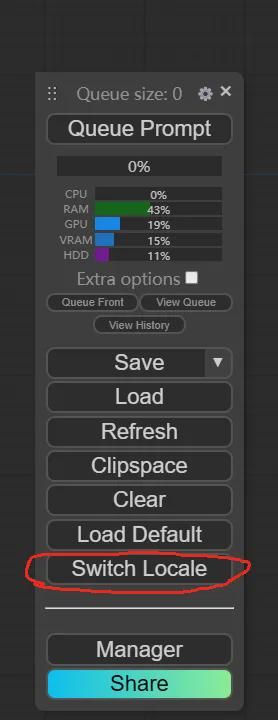
Click this "Switch Locale", you can let ComfyUI switch to pure Chinese interface, such as:

Method 2:
a. Click on the gear to open the settings page
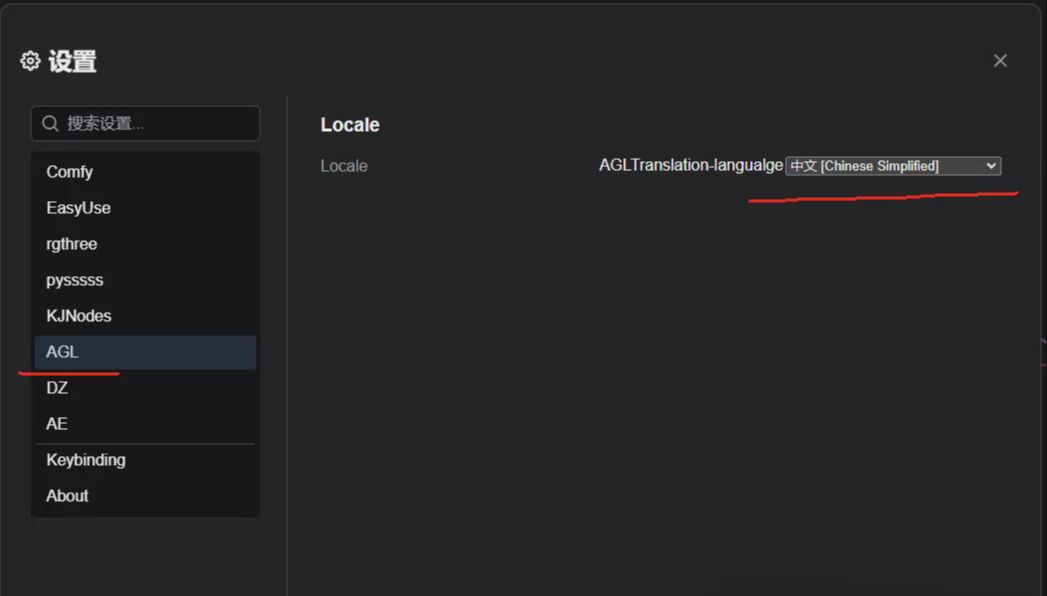
b. Find AGL, and find the Chinese option on the right side of the options

c. Selected page reloaded and localized into Chinese
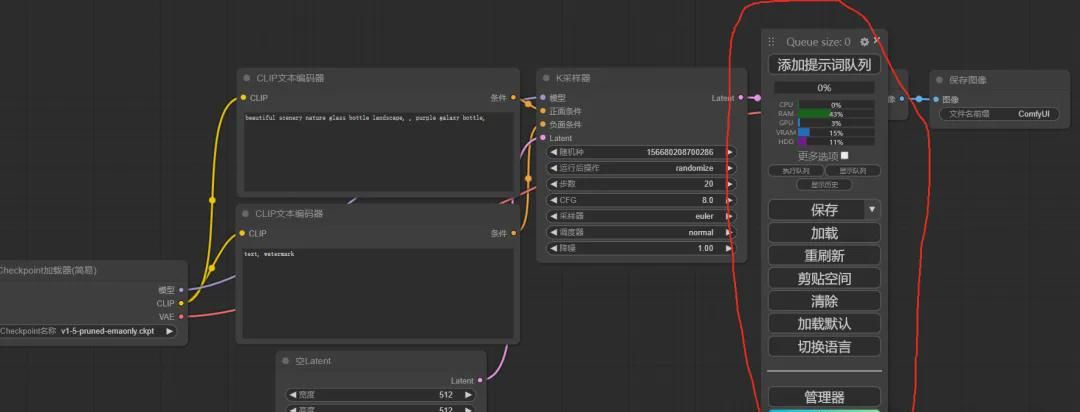
Plugin Installation
If we need to install a particular plugin, then we can take the following approach:
Method 1:
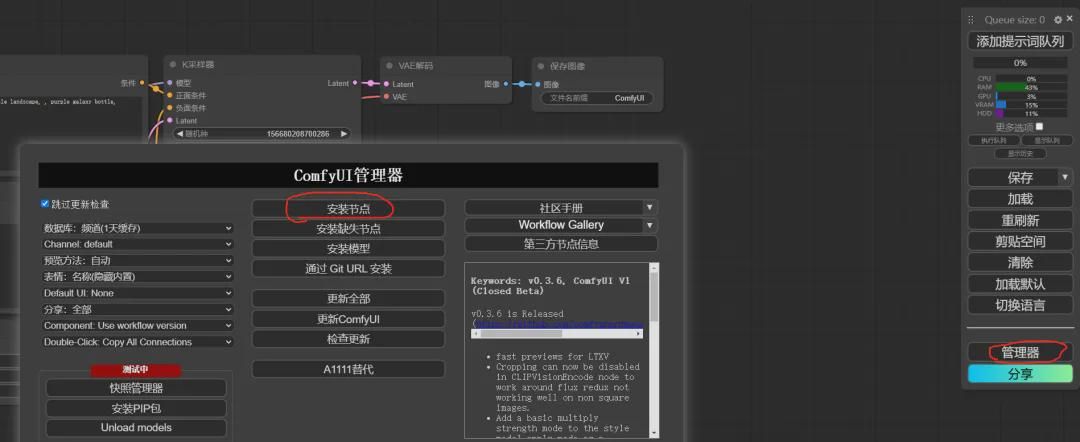
Select "Install Node" to open the following page
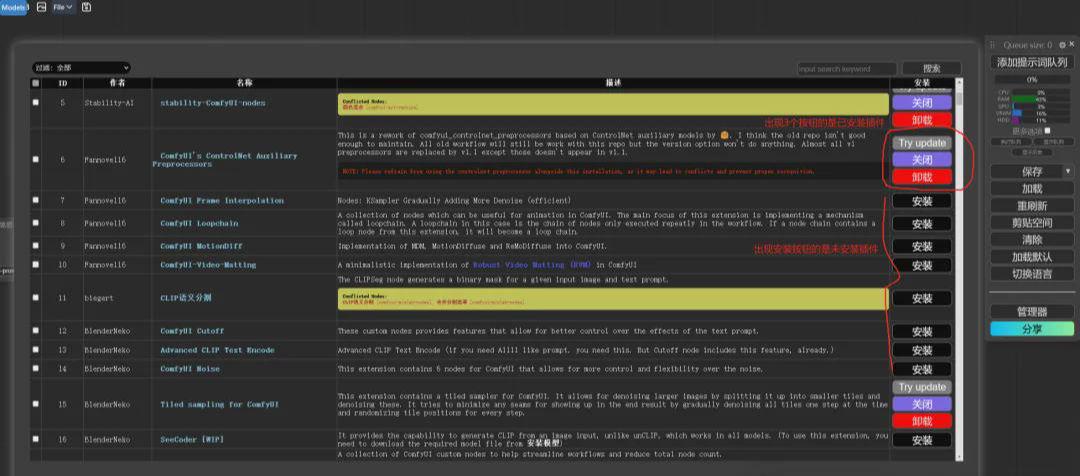
There is a search box in the upper right corner, enter some keywords and filter out the target plugin, click the button and reboot.
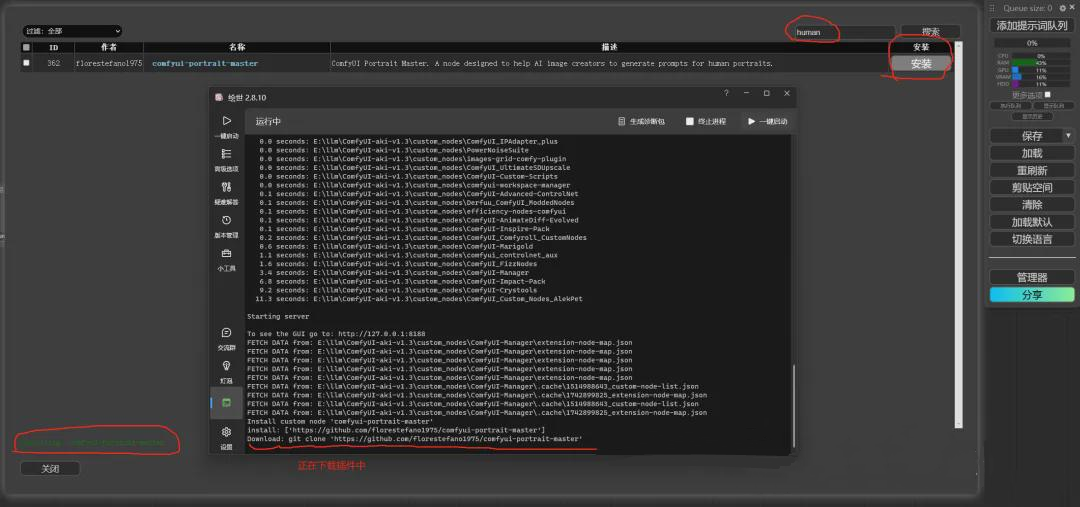
Because github is restricted, you have to use some tools to access github.
Method 2:
Use the git command to download the plugin, for example:
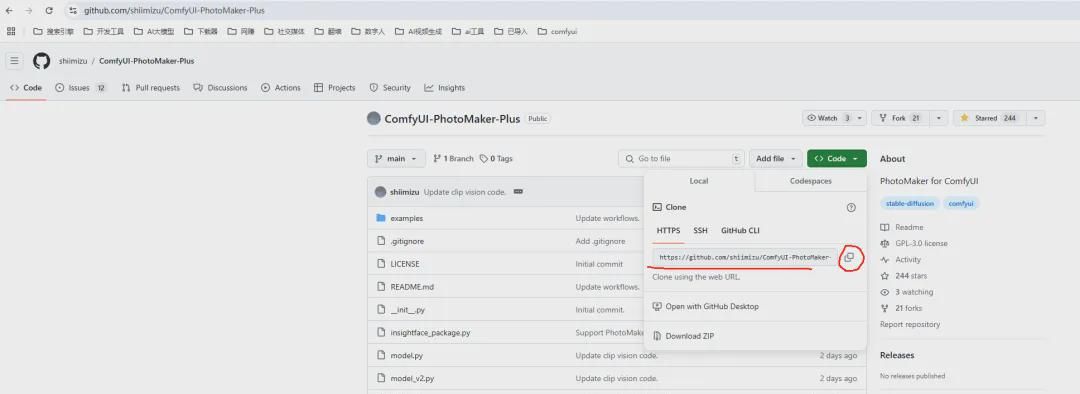
Find a desired plugin, copy its git address, then open a CMD window and enter the following command in the window
git clone https://github.com/shiimizu/ComfyUI-PhotoMaker-Plus.git
as follows:
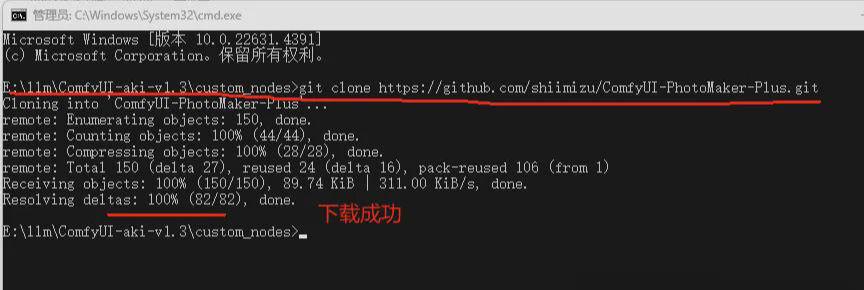
model management
For model downloads, priority is given to using the manager's install model function, followed by going directly to model download sites, such as civitai, cuddleface, Magic Match Community, liblib, etc. to download directly.
1. Model management

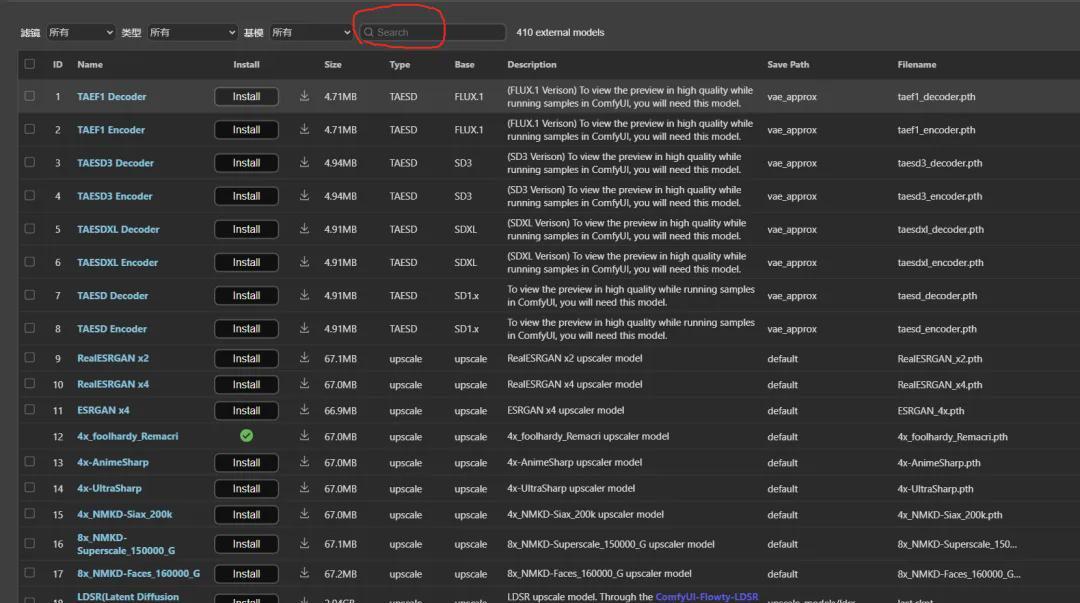
Search here, find the target model and click "Install" or "Install".
2. Direct Download
For example, if I need a model of a wheat orange, I search in liblib and find the corresponding model as follows, click to download it

Workflow
Loading Workflow
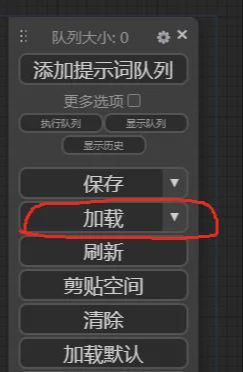
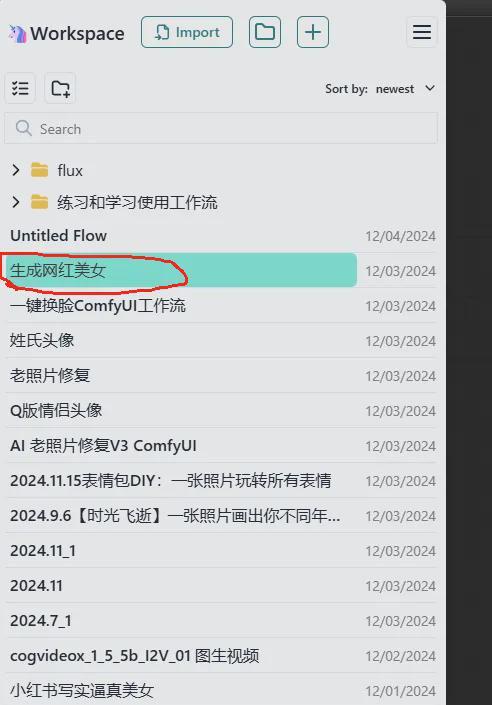
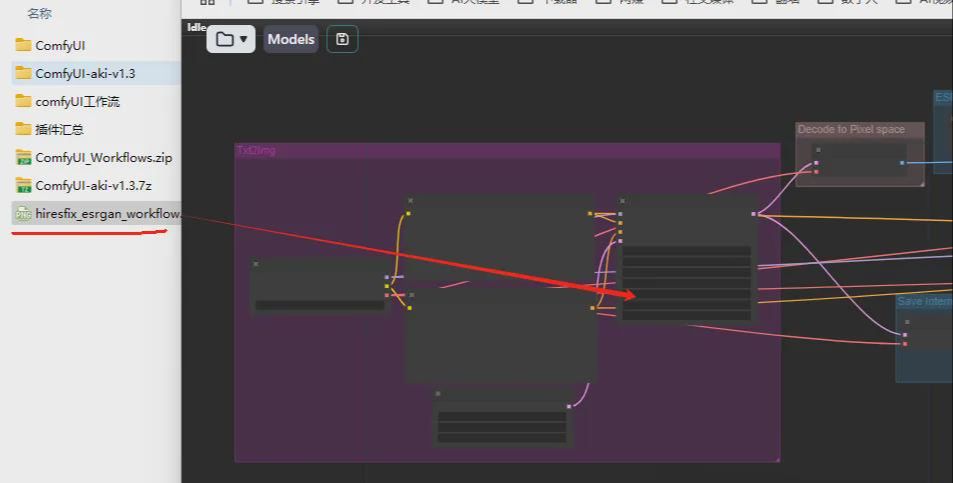
- Click the "Load" button as shown above;
- Double-click on the workflow in the left workspace;
- Drag in the external workflow png file;
- Drag in the external workflow json file;
at last
That's all I have to share for today, and I will continue to bring you the next ComfyUI A series of features to help you master every detail of this powerful tool from entry to mastery.
Whether you are new toComfyUIOr are they already in use?ComfyUIof the road, there will be all the dry stuff you need here.