What if you want to make your own product website but don't know how to develop it? Teach you to use cloud development in 5 minutesAI Programming AssistantGenerate an official website, the whole process without coding, write your requirements to generate the page, but also supports the collection of form information, the effect is as follows:

move
Access to Cloud Development Platform
https://tcb.cloud.tencent.com/dev
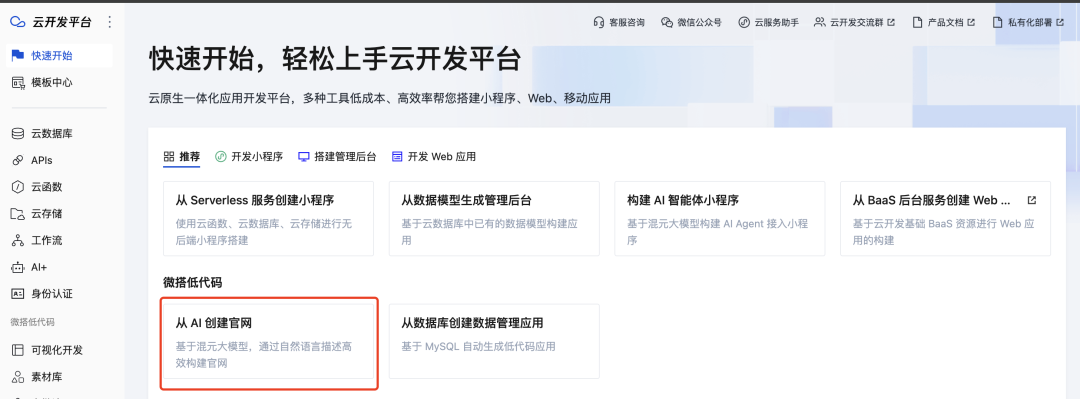
Select the "Create Official Website from AI" module
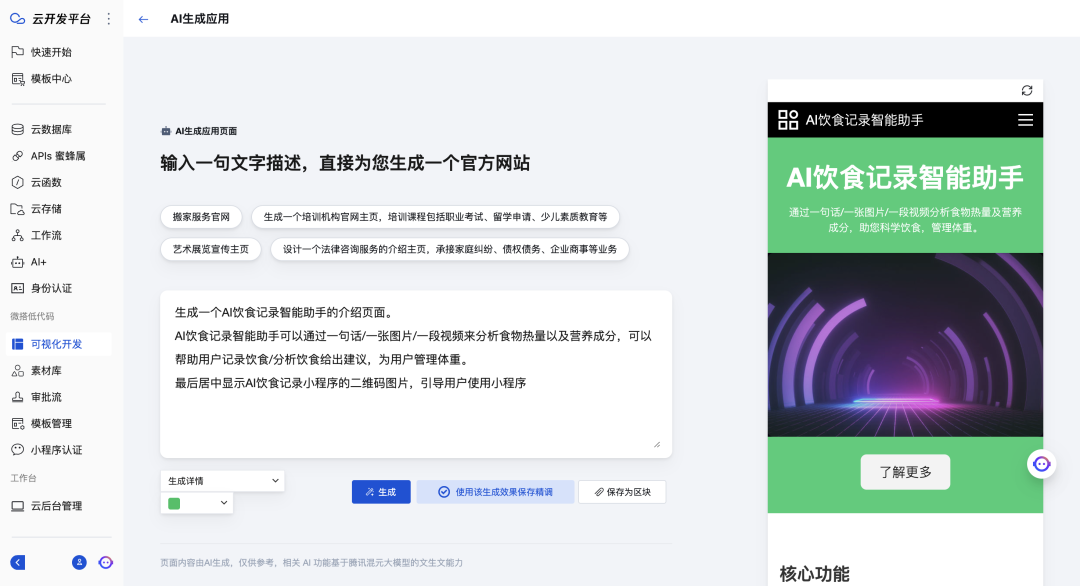
Input the needs of the product introduction official website, choose the main color, click "Generate" can be, to our team's new product "AI Food" small program as an example:
Generate an introductory page for the AI Dietary Record Smart Assistant.
Input the needs of the product introduction official website, choose the main color, click "Generate" can be, to our team's new product "AI Food" small program as an example:
.//,/.
After the generation is completed, you can click "Save fine-tuning by changing the generated effect" to jump to the detailed editing page.
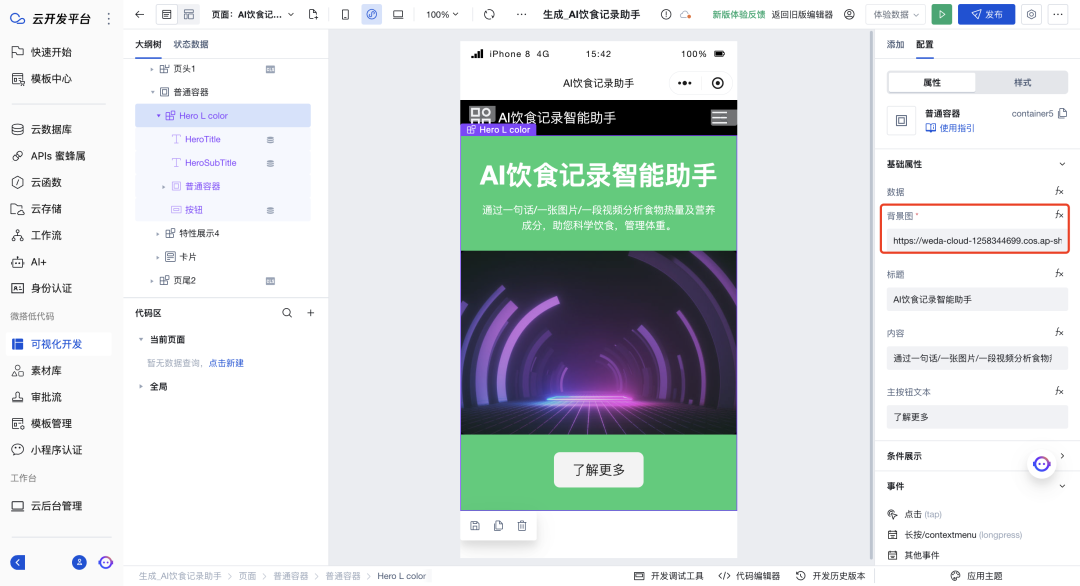
For example, the header image has nothing to do with the diet, you can select the image component area, adjust the background image properties to replace the image link can be. Some unused page layout, selected directly delete can be, such as: black title bar at the top of the page.

You can see that there is a "Learn More" button, how do I add a click event to the button?
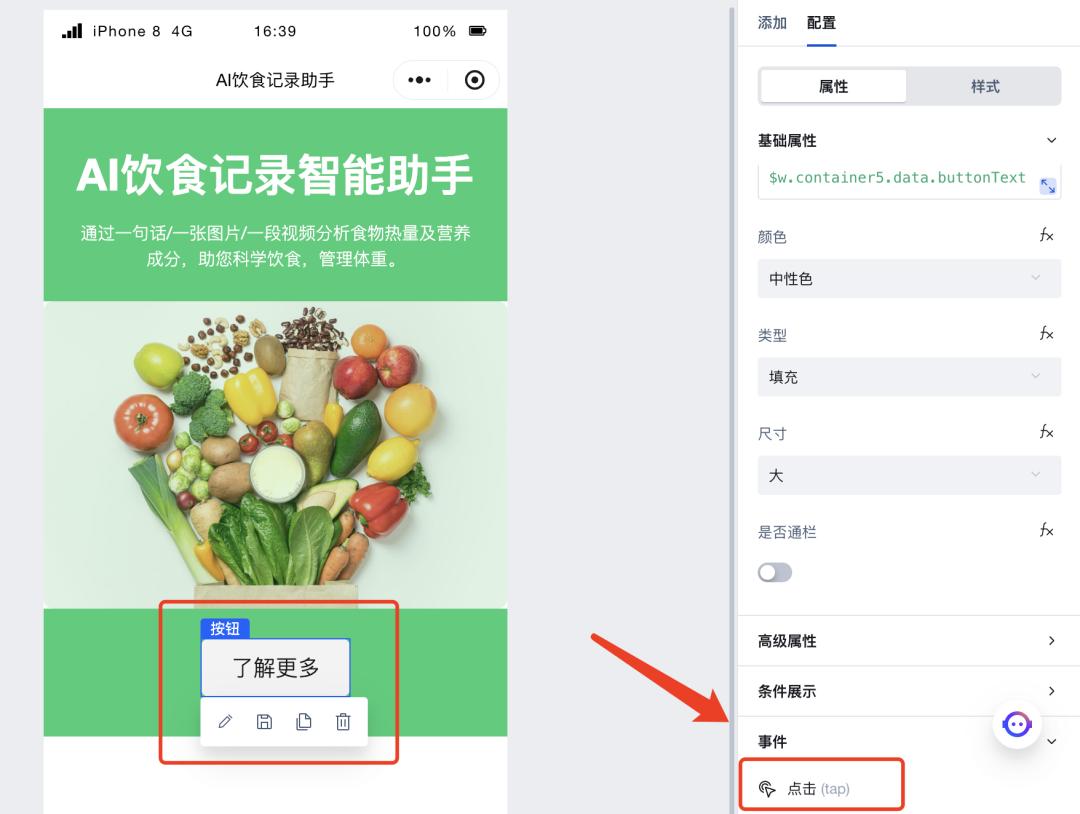
Select the button component, see the right side of the "Properties" configuration has an "Event" select "Click".
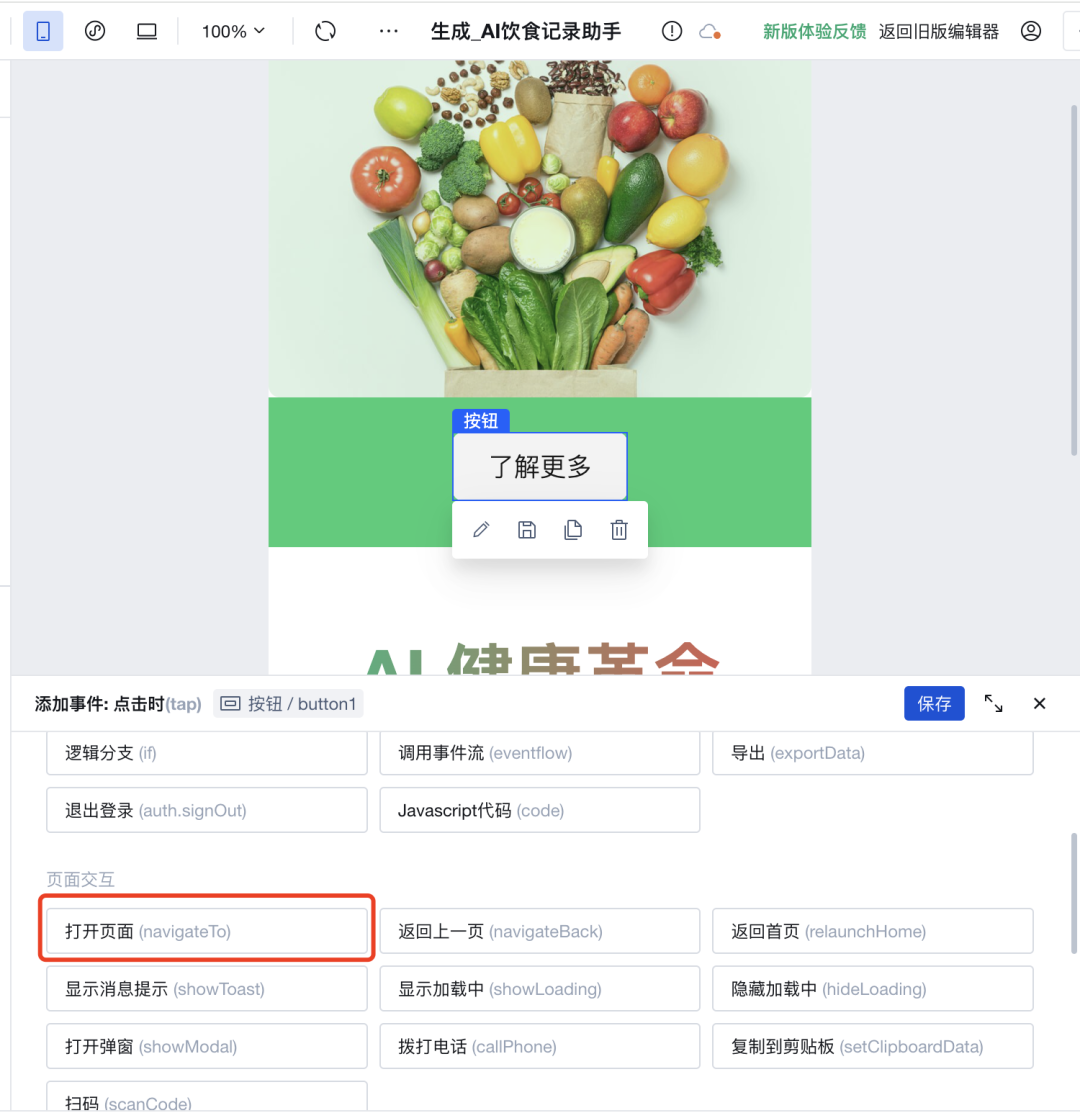
Find the "Open Page" function
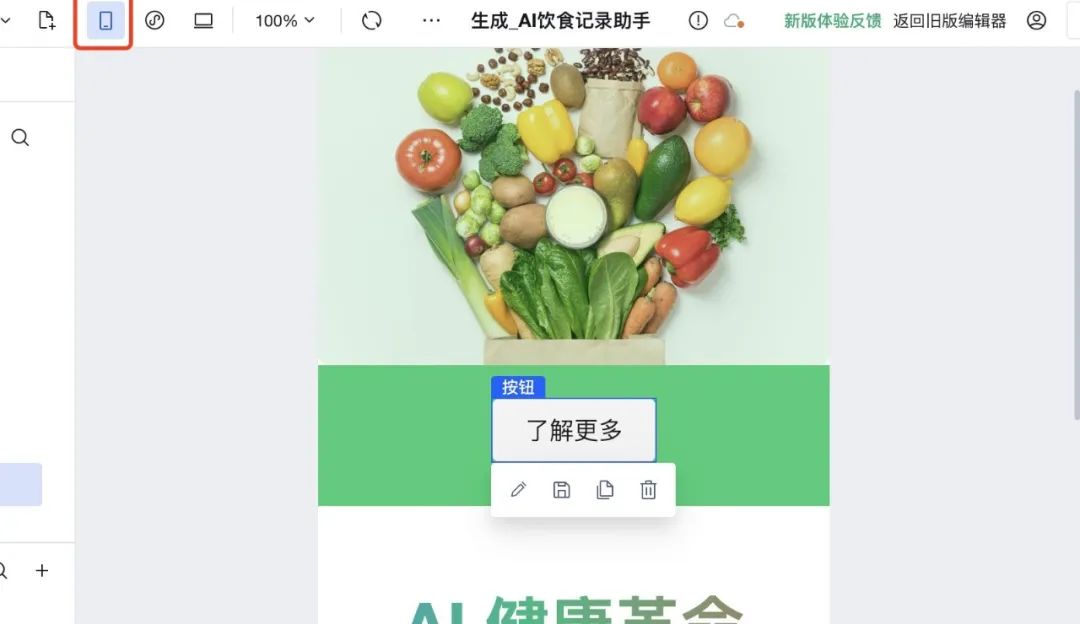
The top left corner switches to H5 mode, which defaults to applet mode (applets don't support jump links)
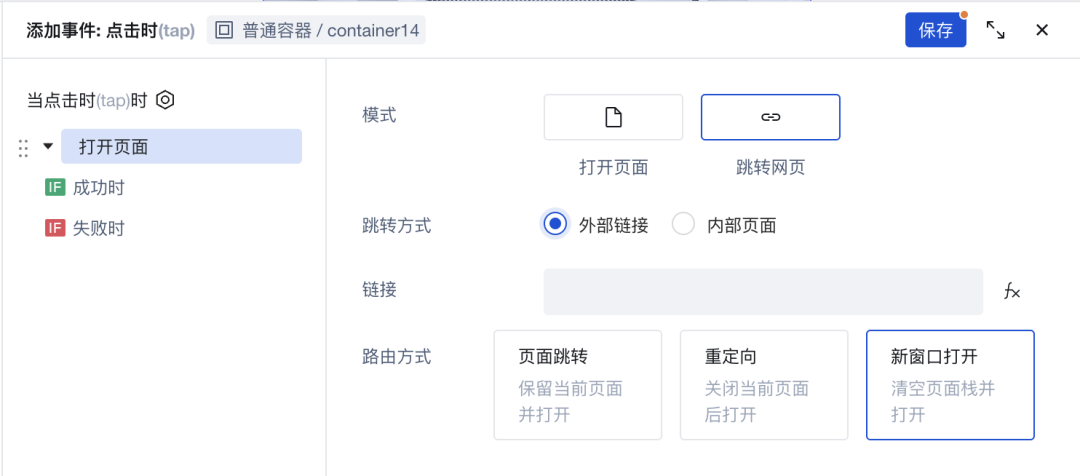
The configuration is as follows:
Mode: Jump Page
Jump method: external link
Link: Enter link
Routing method: opens in a new window
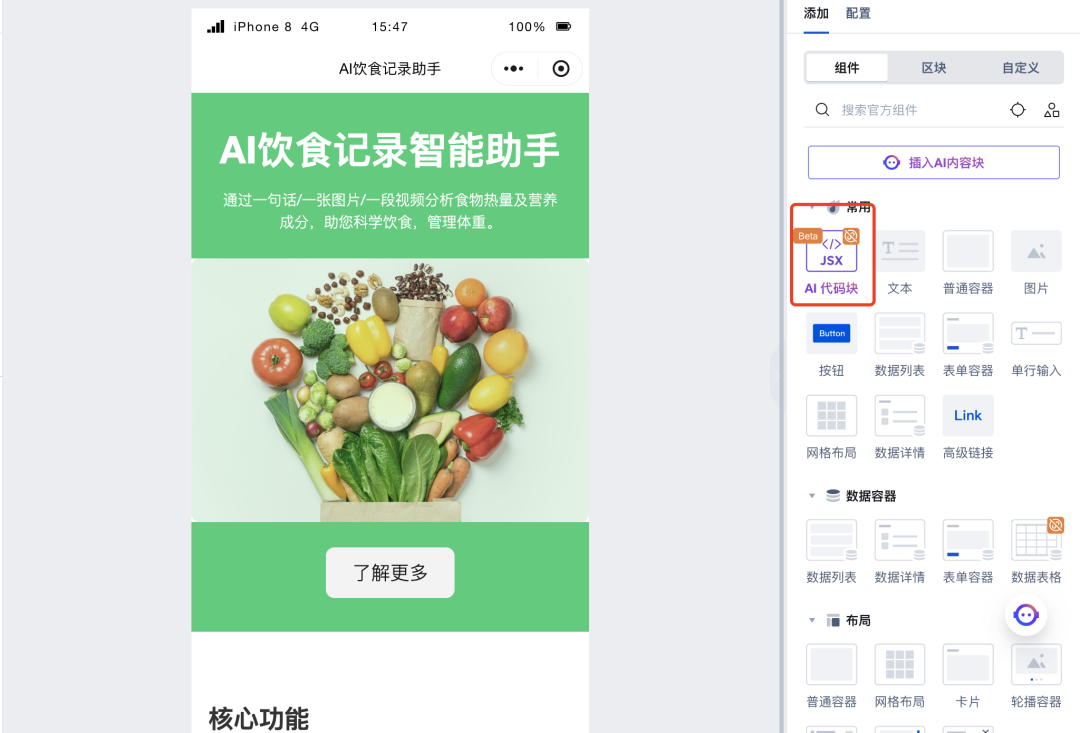
A new custom module can be dragged and dropped [AI CodeBlock] component to the location you want to add it to, e.g. drag and drop it under the "Learn More" module.

Then click on the "Properties" area on the right and select "Edit JSX Code" to bring up the edit dialog box.

In the dialog input box, enter the requirements to generate the layout, for example:
,,]()]()]()
The effect is as follows:

The overall generation is good, if you are not satisfied you can generate a few more times.

If you want to modify the copy or jump links in the code block, you can find the relevant content in the generated code to modify it.

Finally, we will generate a form layout to collect user information. Because the collected data needs to be stored in the "Database", you need to create a data table for storing the data first, select "Cloud Database" in the right menu and then click the "+" sign to add a new data model.
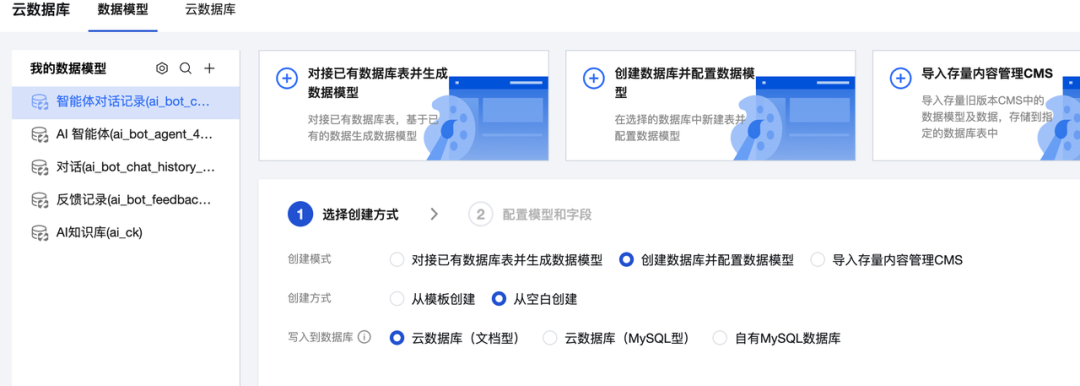
Creating a schema: creating a database and configuring the data model
Creation method: create from blank
Write to database: cloud database (document-based)
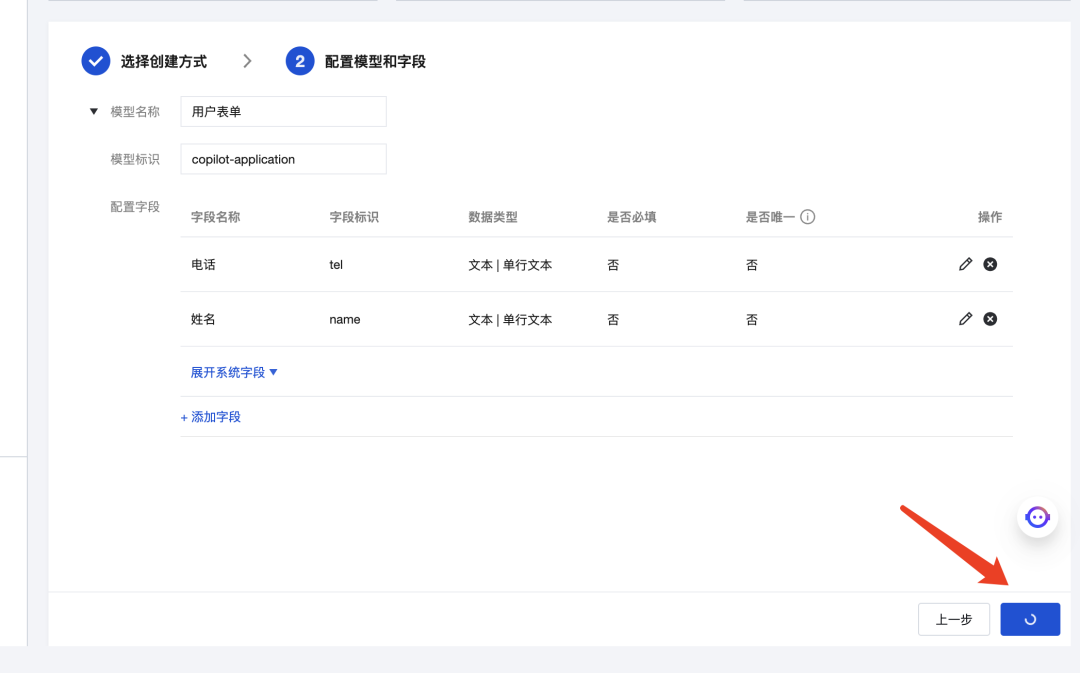
Model name: user information
Model identification: copilot-application
Configuration fields (name, logo, type)
- Phone, tel, text
- Name, name, text
Click "Finish" in the lower right corner when the configuration is complete.
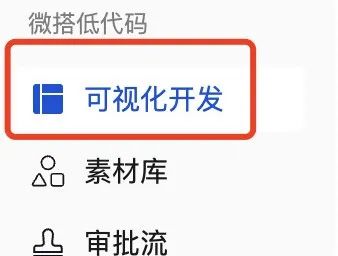
Then switch to "Visual Development" again via the left menu and continue to insert "AI Code Blocks" to generate form layouts and enter commands:
,,,, ,.--= ..();=.{} = [].({: {: ,,}});
The effect is as follows:

Then click on the top right corner to switch to "Official Data" to preview the form filling.
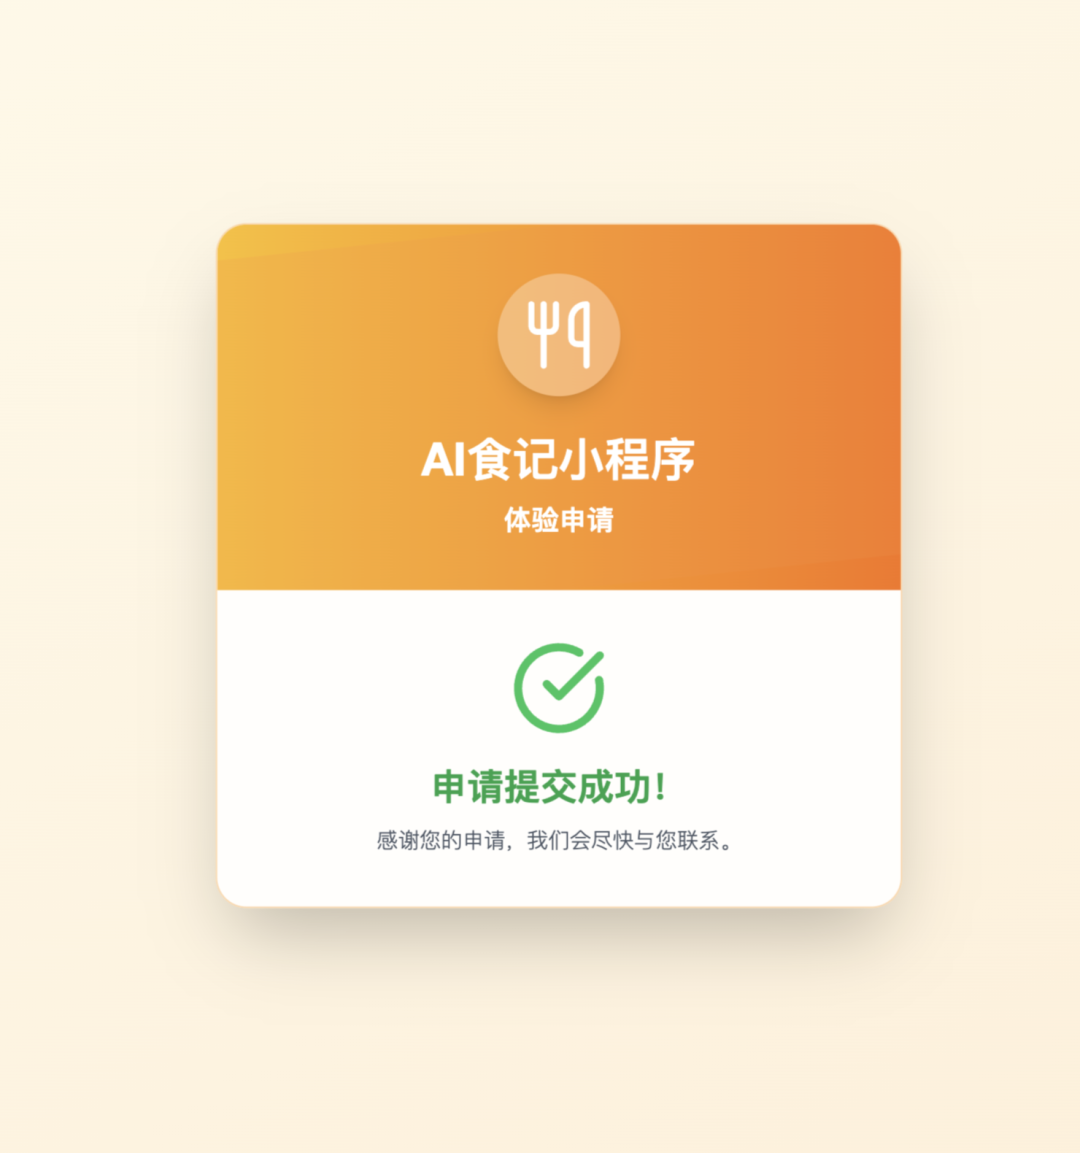
A successful status is displayed when the form is filled out successfully.

To view user data, you need to switch to "Cloud Database" and select the user data model to view.
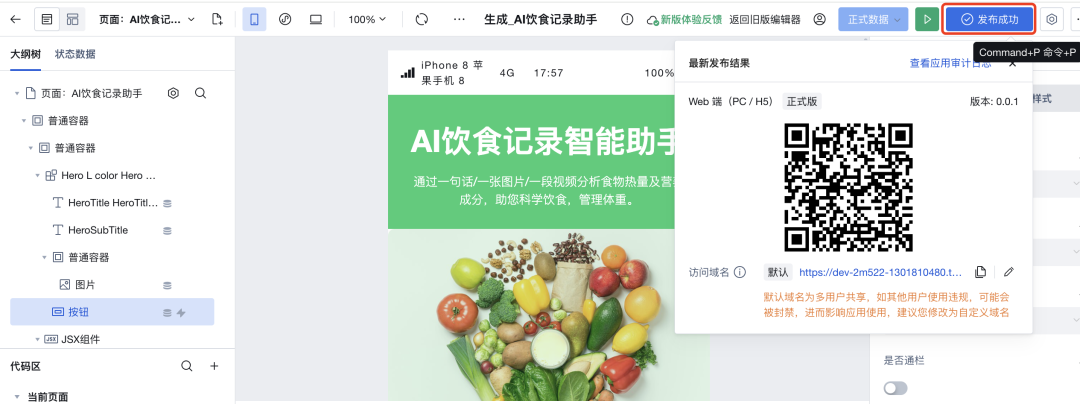
Confirm the effect and functionality is correct and click publish in the upper right corner to get the online access link and QR code.
at last
I hope you can keep up with the pace of the AI era, with AI programming assistant belongs to their own product official website, there are questions welcome to leave a message to discuss.