
In this AI era, combined with AI to make new products or based on your first business to join the AI capabilities, this is where the trend is, so how to access the AI capabilities faster? Next to share with you the integration method of cloud development AI+.
move
Log in to the WeChat Cloud development backend
https://tcb.cloud.tencent.com/cloud-admin?_tcbProviderId=mp
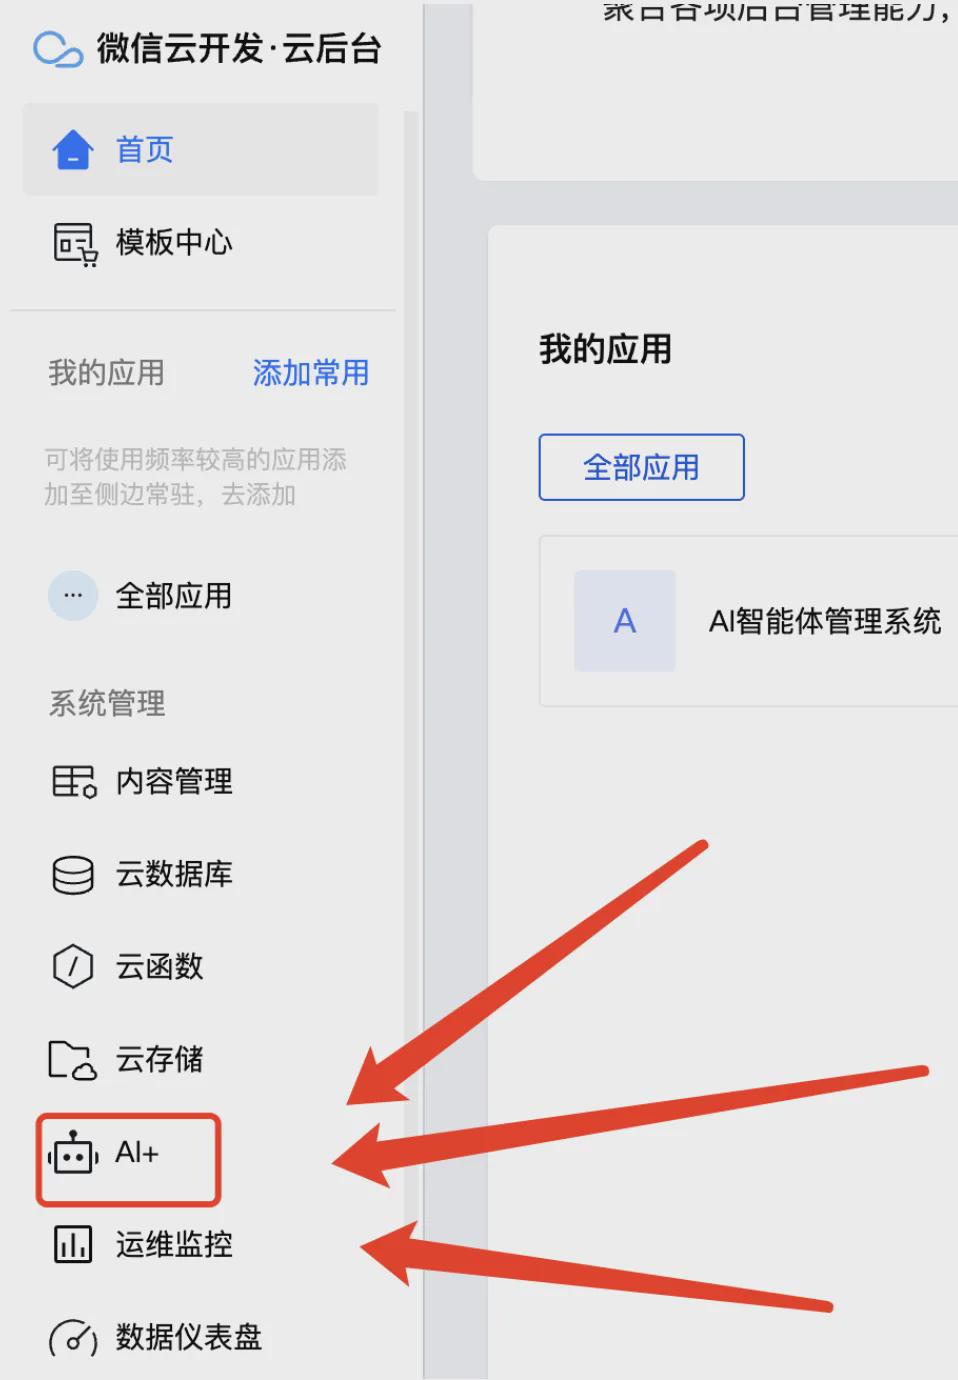
Then find the AI+ menu

There are two pieces in total:
1.AI Big Model: basic AI dialog capability suitable for quick access to big models
2. Customized AI capabilities: AI intelligences applicable to specific businesses are built to support the knowledge base
Access to AI Big Models
Let's start our experience with the AI Big Model by going to the AI Big Model module

Support access to a number of large domestic models, just fill in the Key can be, each large model service background access to the way you can go to see the documentation of each.
The big model I use here is Wisdom Spectrum, after inputting the key and clicking save in the upper right corner, then the relevant model on the left will have an "enabled" status, and it is configured at this time.
I'll take it from here.Mini ProgramsSDK as an example:
Step 1: Install the npm package first
Execute the command install command in the directory where the applet package.json is located (usually the miniprogram directory):
npm i @cloudbase/js-sdk@2.8.3-beta.0
Step 2: Initialize the ai object
= ;();();=.({});=.({: });.();();().();=.();
Then you'll see the console report an error

Because the SDK has a request for the domain name need to be configured in the background of the small program can be or can be in the local settings to check the non-check.

Note: Check the box does not check the purpose is to be able to experience the use, if you want to publish online or to configure the domain name configuration in the background
Step 3: Use AI Big Models to Recommend Streaming Calls
=.();=.({: ,: [{: ,:}, ]}); (.)(.) {.();}
The call succeeded.

Access to AI Agent
The first step is to create an Agent Intelligence

There are some Agent templates built-in by default, you can directly use the templates or innovate a new Agent, enter the name and introduction on the right side and click "New" on the bottom right corner.

You will then be taken to the edit details page, which is divided into three areas, from left to right
- Agent list area, showing all Agents and the ability to switch between them
- Orchestrate Agent area, support setting up persona and response logic as well as adding knowledge base, openers, questions, question suggestions
- Agent preview debugging area, you can debug the effect in this area after setting up the Agent.

Let's take a look at the Choreography Agent area, "Persona and Response Constraints", where you can click the "Generate" button on the right to automatically generate prompts.

Click on the use of the application can be applied, after the completion of the setup can be in the right area of the dialog test effect

You can also add a knowledge base for this intelligence, click [Manage Knowledge Base].

Go to New to enter a title and description

A folder will appear after success

Then add the file

Support for single/multiple add files

Let's say I add a document on common car trouble problems

After adding the file, the status will change from "File Parsing in Progress" to "File Parsing and Writing Completed".

Then just go back to the edit page to add the knowledge base folder, and all that's left is some basic configuration of openers and preset questions.

Next, let's test the effect of the knowledge base after the completion of the setup, when I sent in the document just mentioned the "open the door creaking noise" problem.

It will give the source of the cited knowledge base at the end of the answer, which will go a long way towards avoiding the problem of the big model's hallucination on specific content.

Once we're all configured then we can go ahead and use it, clicking on the Access Guidelines in the upper right hand corner will call out the release document.
release
There are three ways to do this:
1. Docking WeChat platform
2. Small program block components
3.SDK call
Recommended to use these two ways to docking WeChat platform and SDK calls, docking WeChat platform completely no code is more simple, SDK calls pure code way to call more flexible, if your application scenario is not a dialog mode then you can use the code of the way to implant your business flow.
Docking WeChat platform
Support small program customer service, WeChat customer service, WeChat service number, WeChat subscription number

The configuration process is very simple, just follow the steps to set the AppID and then scan the code for authorization.
Applet Block Components
Need to switch to My Apps from the main menu to create a blank app


Then you'll be taken to the microtransmitter edit page, select the right-hand block and search for "Agent".

Configure ID after choosing to play AgentUI

ID has a copy ID function in the Agent detail name.

Once the ID is configured the data will be synchronized to this UI component and you can modify its properties, events, styles, etc.

After all the modifications are completed we can select the Agent-UI component and switch to the configuration where we can directly download the code package

Then you can integrate it into your applet according to the follow up documentation

SDK calls:
- Start by establishing a connection.
;{} ;{} ;().(); =.=.({: ,}); =.=.({: });..();=.();
- Specify a specific Agent dialog
=..({: ,: ,});(.) {.(); }}// !
- View Chat Logs
=..({: ,: 1,.({: ,: 1,: 1,: 10,: , }); {:});// {// {--96617446// {--! , . ,// }// }
Here the whole process of accessing AI is all over.
at last
I hope you can keep up with the AI era and make your own AI applets.
