We know.ComfyUIAs a Stable Diffusion-basedAI drawing creation toolThe ComfyUI plug-in provides users with feature-rich and flexible operations. It mainly enables users to customize workflows more precisely by means of node processes, while ComfyUI plug-ins further extend its capabilities to enable users to customize and enhance workflows according to their needs. Today we focus on understanding the ComfyUI plug-in mechanism and how plug-ins are installed.
I. ComfyUI Pluginmachine
ComfyUI's plug-ins usually exist in the form of customized nodes that can add new features or enhance existing ones. Users can extend the capability of ComfyUI by installing these plug-ins to meet the needs of different users in different scenarios. For example, adding an image keying plug-in can make it easier for users to deal with image backgrounds; a translation plug-in can help deal with multi-language texts.
What the ComfyUI plugin does
- enhancement: Break through the limitations of ComfyUI's native functionality to provide more advanced and specialized features. For example, some plug-ins can realize complex image processing algorithms, specific text generation modes and so on.
- increase efficiency: Enable users to complete tasks more efficiently by simplifying repetitive operations or providing quicker ways to operate. For example, an automated workflow plug-in can automate a series of pre-defined action steps.
- Meeting individualized needs: Different users have different workflows and preferences, and the plug-in allows users to customize the interface and functionality according to their needs, creating a personalized work environment.
How to use the ComfyUI plugin
- nodalized operation: ComfyUI's workflow is node-based. Plugins are integrated into the workflow by adding new nodes. Each node represents a specific function or operation, such as loading a model, processing an image, generating text, and so on.
- node connection: Users can connect different nodes to form a workflow through an intuitive interface. Data is passed and processed between nodes in the order of connection. For example, an image loading node connected to an image processing node and then to an image saving node constitutes a simple image processing workflow. New nodes added by the plugin can be interconnected with ComfyUI native nodes as well as nodes of other plugins to realize the combination and extension of functions.
II. How to find ComfyUI plugins
Generally, the ComfyUI plugins we use can be found on top of github. Scientific internet access is required to access this site.
- github official website: https://github.com/
【initial step】: Go to the home page of the official github website
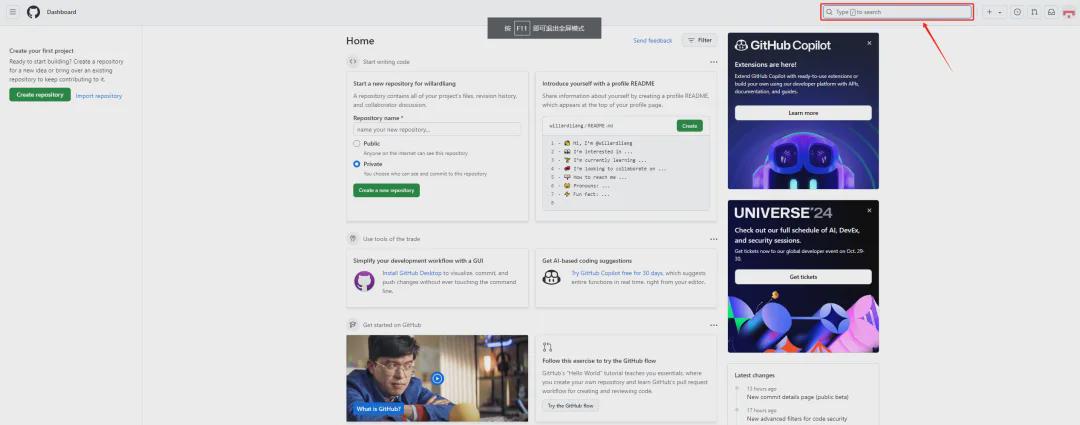
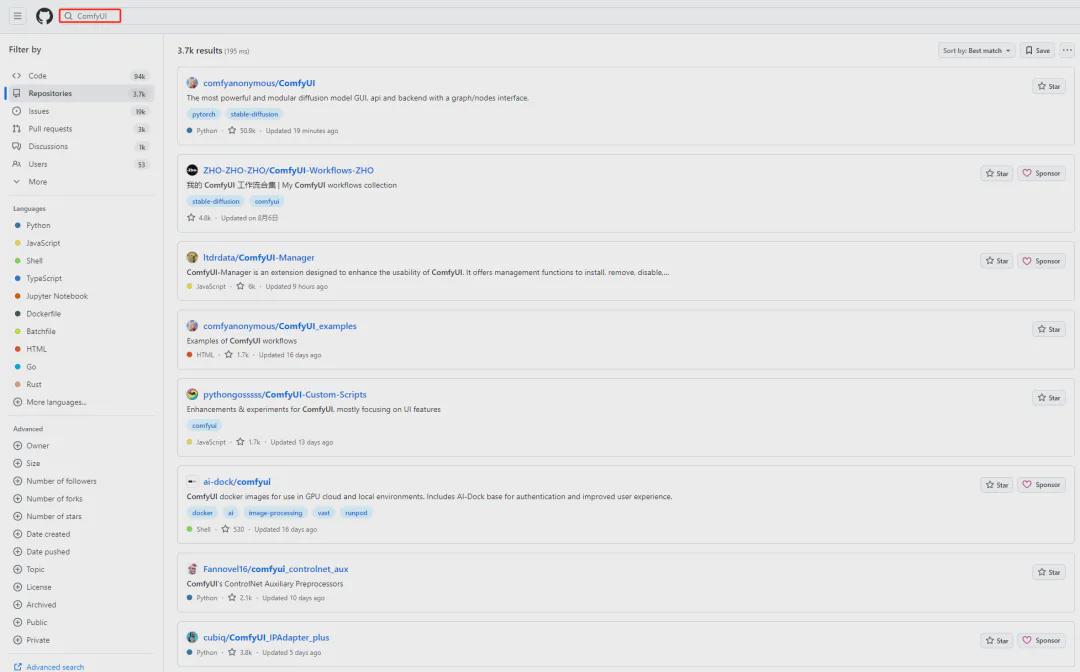
[Step 2]:Enter the keyword "ComfyUI" in the search box, and the plugins that come up are basically related to ComfyUI.
We can also sort the results of our search by using github's sorting feature, for example below I have chosen the Most stars (the most stars, which means the user has the most favorites) sort.
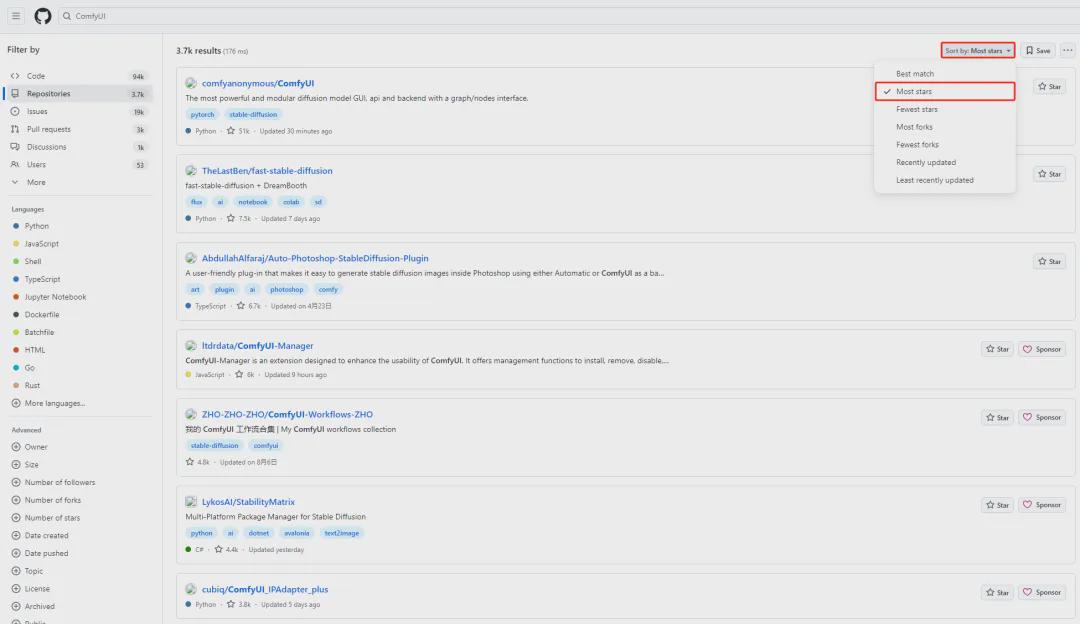
Step 3:Find the right plugin node according to our requirement scenario.
As the 4th plugin ltdrdata/ComfyUI-Manager in the picture above, see the name, this plugin is ComfyUI Manager. Clicking on it will take you to the main page of the plugin. Generally this page is the plugin's gitlib official home page.
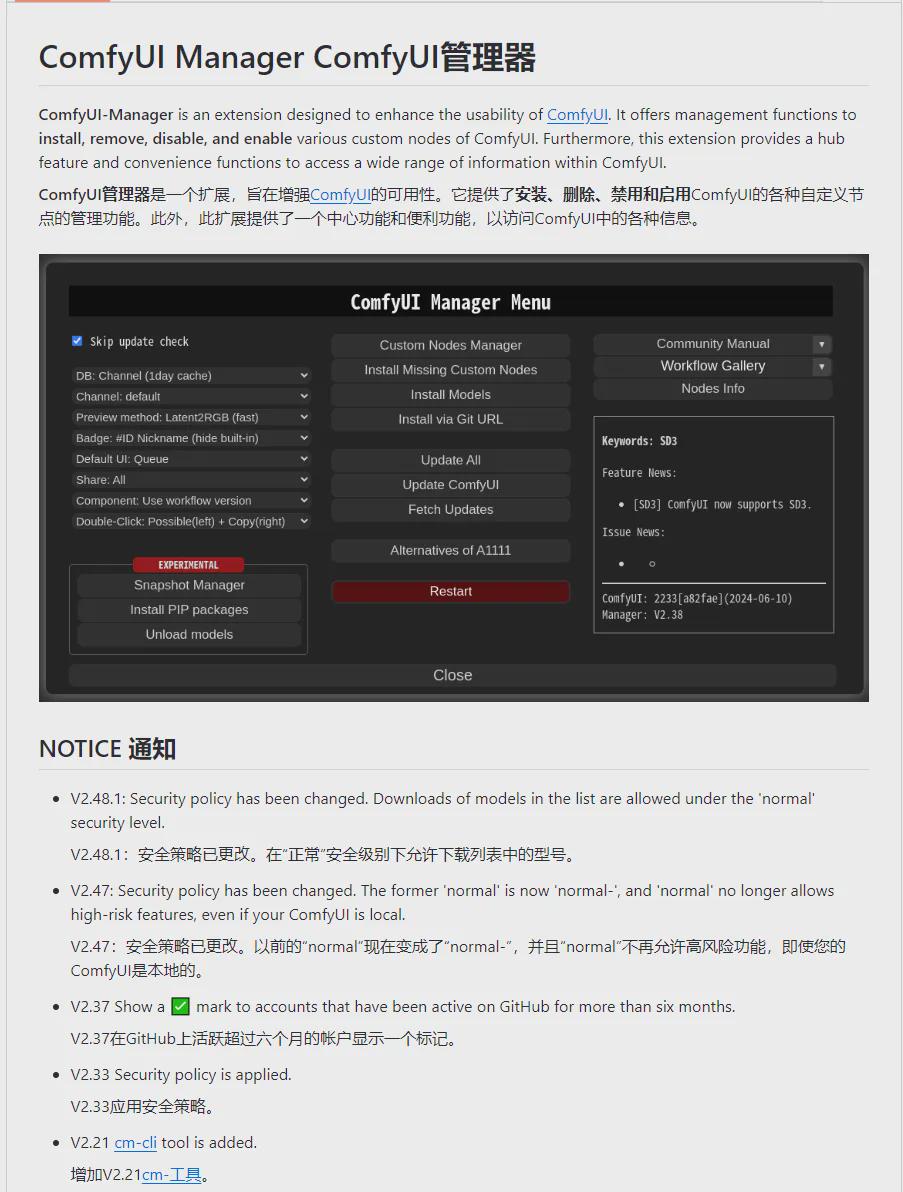
Many plugins are introduced in English, we can install an immersive translation plugin in our browser, which will automatically do the translation, and it is in English and Chinese.
Highlights:The use of ComfyUI plug-in partners must pay attention to the plug-in page details, generally in this page, will be detailed description of the functionality of the plug-in role, installation methods, precautions, as well as the history of the version and so on. Many plug-in installation problems can be found here to find the corresponding answers.
[Step 4]:Plug-in downloads
There are currently 2 main methods commonly used for plugin downloads.
Method 1: git download, by installing the git tool and using the git clone command to download to the \ComfyUI\custom_nodes directory, then restart ComfyUI.
Method 2: ManualDownload the plugin zip package.Download the zip package of the plugin manually from the homepage of the gitlib plugin website and unzip it into the \ComfyUI\custom_nodes directory, then restart ComfyUI.
emphasize: Regarding the installation of ComfyUI plugins, the above 2 methods are the most commonly used, but some plugins can not be used after installation in the above 2 ways, because many plugin nodes need to install additional dependencies in order to run, and may not be able to do so by relying solely on the dependencies of ComfyUI itself. Therefore, it is recommended to read the instructions on how to install the plugin on the github official page.
III. ComfyUI plugin download
Let's focus on demonstrating the download of the ComfyUI plugin. The ComfyUI-Manager plugin is used here as an example. Other plug-ins are installed similarly. As the autumn leaf installation package has been built in the ComfyUI-Manager plug-in, we here to the native ComfyUI installation package to build the ComfyUI environment as an example.
Way 1: Use git to download the plugin
【initial step]: Install the git tool
- Download the git tool at https://git-scm.com/download/win
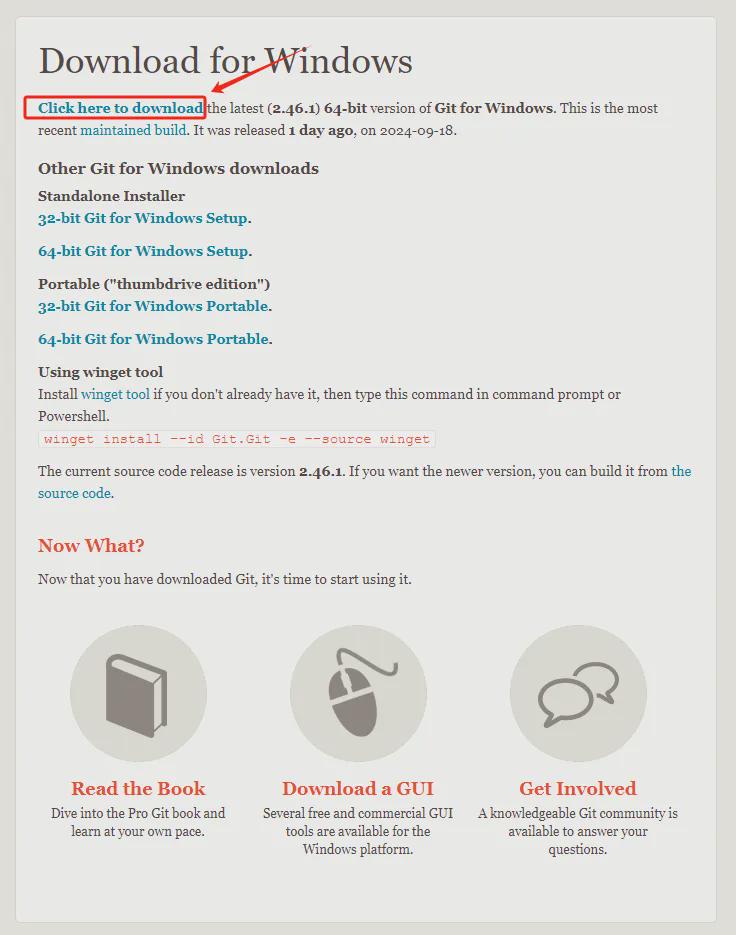
Everyone in accordance with the configuration of their computer to download the installation file, the general computer is 64-bit, in accordance with the arrow in the picture above to download the file, download is an exe file, click on the installation in accordance with the prompts to install can be, relatively simple, there is no particular complexity of the place.
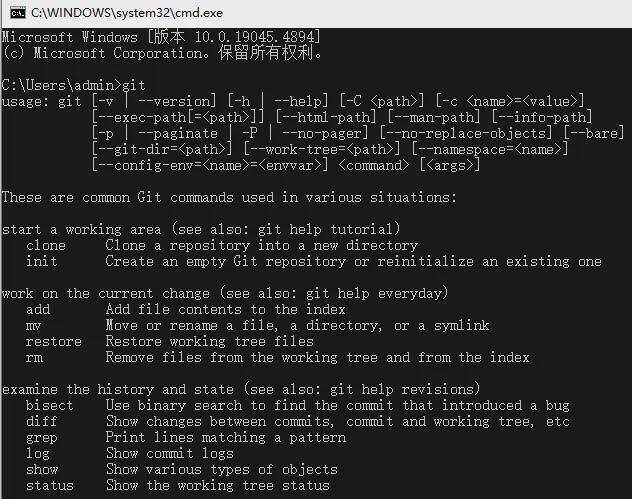
【second step]: Check if git is installed successfully
Open a command prompt window and type in the git command. The following figure shows the successful installation of git.
【third step]: Download of nodes
Open a command prompt window in the \ComfyUI\custom_nodes directory. Use the following command
- git clone https://github.com/ltdrdata/ComfyUI-Manager.git

There will be an extra folder ComfyUI-Manager in the \ComfyUI\custom_nodes directory after the download is complete.

Related notes: (1) Regarding the git address of the plugin, we can get it from the github plugin homepage.
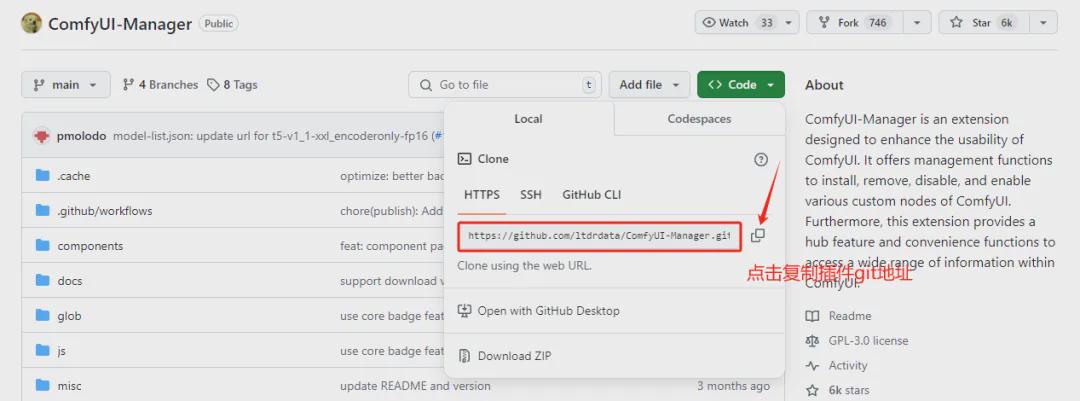
(2) Command format for git download plugin:git clone url address
【fourth step]: restart ComfyUI.
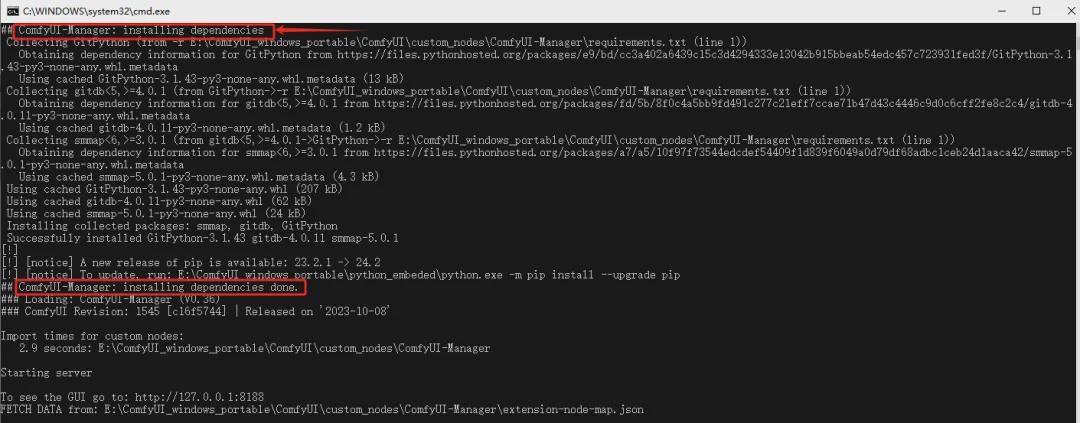
In the ComfyUI Launch Console, we can see that the ComfyUI-Manager plugin installs dependencies automatically.
【Step 5] Entering the operation interface of ComfyUI
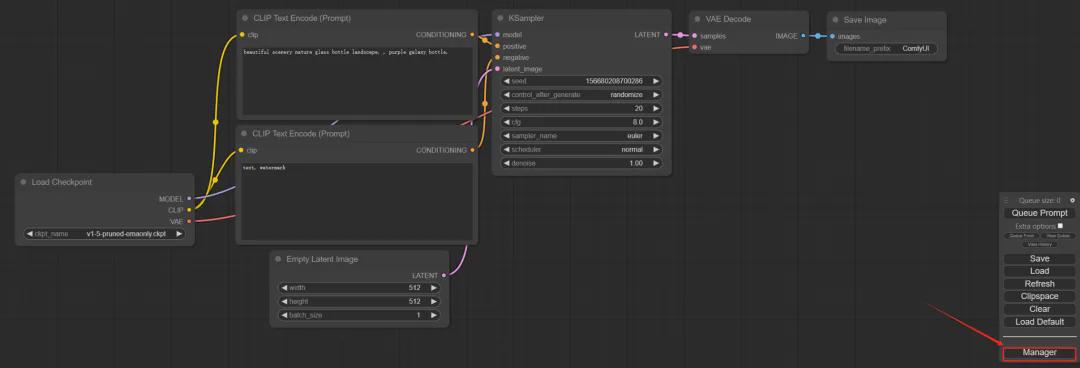
We can see that there is a Manager option inside the function menu on the right side. It means that our plugin has been installed successfully, click on the Manager option button, you can see the functional interface of the plugin manager. About this interface later we will introduce in detail, here will not expand.

Way 2: Manually download the plugin zip package
[First step]:Download the zip installer from the github plugin homepage
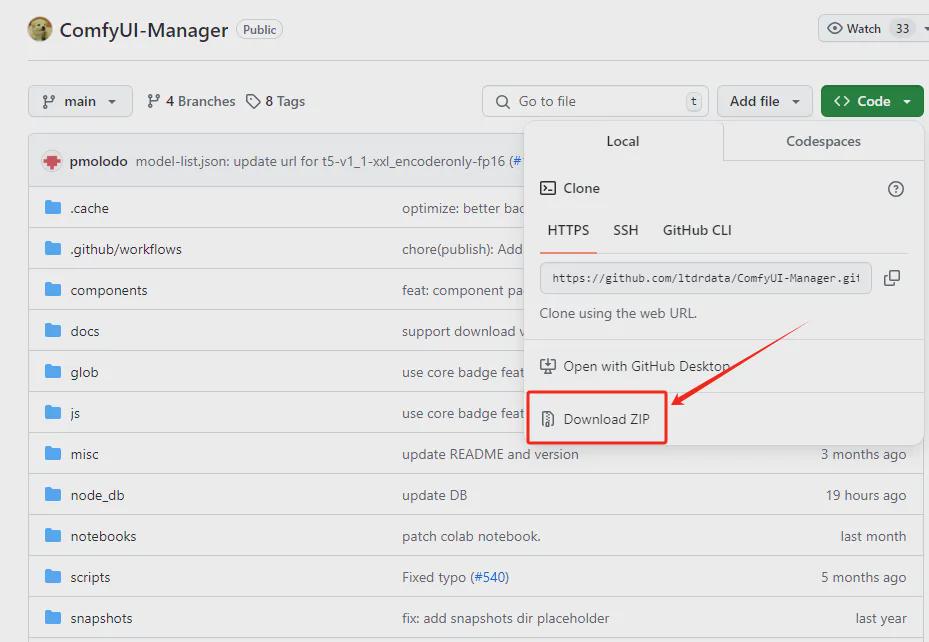
[Step 2]Unzip the zip package and place it under the \ComfyUI\custom_nodes directory.
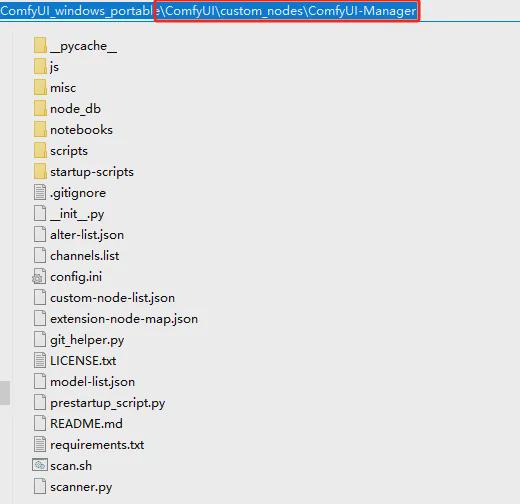
Be careful to place the files according to the directory above and never have nested folders.
【third step]: restart ComfyUI.
The latter steps are equivalent to Mode 1 above and will not be repeated here.
About ComfyUI plugin manager will be explained separately later, interested partners can keep attention.
Okay, that’s all for today’s sharing. I hope that what I shared today will be helpful to you.