Given that many people who are just getting startedAI PaintingThe guys want to play Flux, but the lack of computer configuration on the one hand, and the unfamiliarity of the workflow on the other hand, discourages many of them. Today, I would like to share with you some information on theLiblibAIHow websites experience Flux.
- LiblibAI Web site:: https://www.liblib.art/
I won't go into detail about the LiblibAI website here, so if you haven't learned about it, you can refer to my previous post.Stable Diffusion [Fundamentals] [Introduction to SD]: A Quick Start to SD Painting with LiblibAI
In the LiblibAI site provides WebUI and workflow 2 ways to use Flux, the way to use the Web UI and the previous way to use the SD Web UI does not have much difference, here will not expand the description.
Today we mainly share how to use LiblibAI's online workflow to experience Flux. we don't mention workflow is a big headache, don't have to, at present the official Flux workflow is more general, LiblibAI has integrated Flux online workflow function, you can directly run Flux online directly on top of LiblibAI workflow, we don't need to build our own workflow, greatly reducing the threshold of AI painters. workflow, we do not need to build their own workflow, greatly reducing the threshold of the use of AI painters.
I. A quick taste of Flux workflows
Flux One-Click Run Workflow Address
- https://www.liblib.art/modelinfo/ec6223dccd7b47658464eaf7b94d7dc5

Clicking on the "Run Workflow Online" button in the image above will bring you to theComfyUIof the workflow interface.
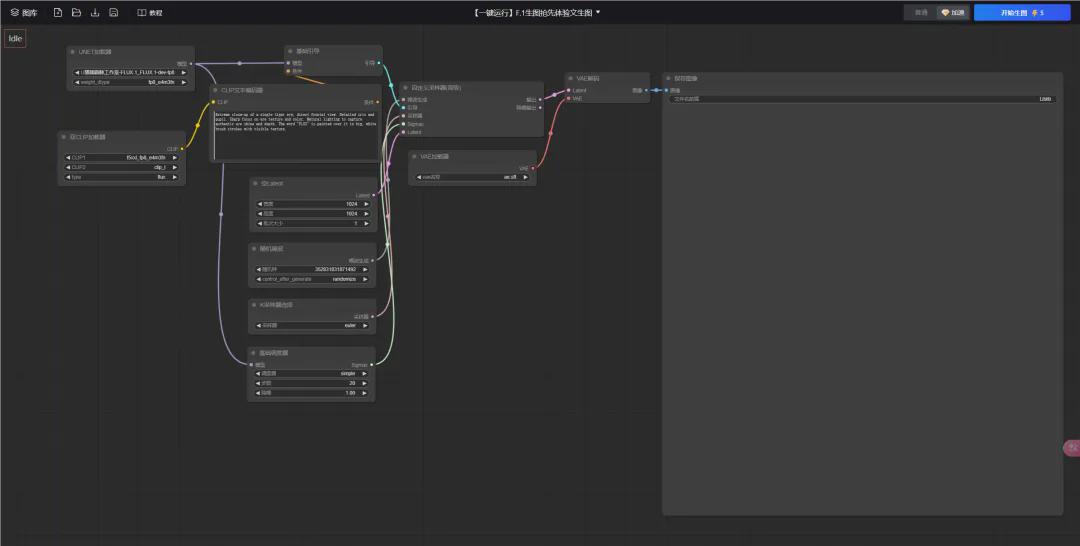
In general, we only need to enter the prompt in the CLIP text editor node box, and then directly click on the picture above the upper right corner of the "start generating" button, you can generate the corresponding picture. You see is not very convenient ah.
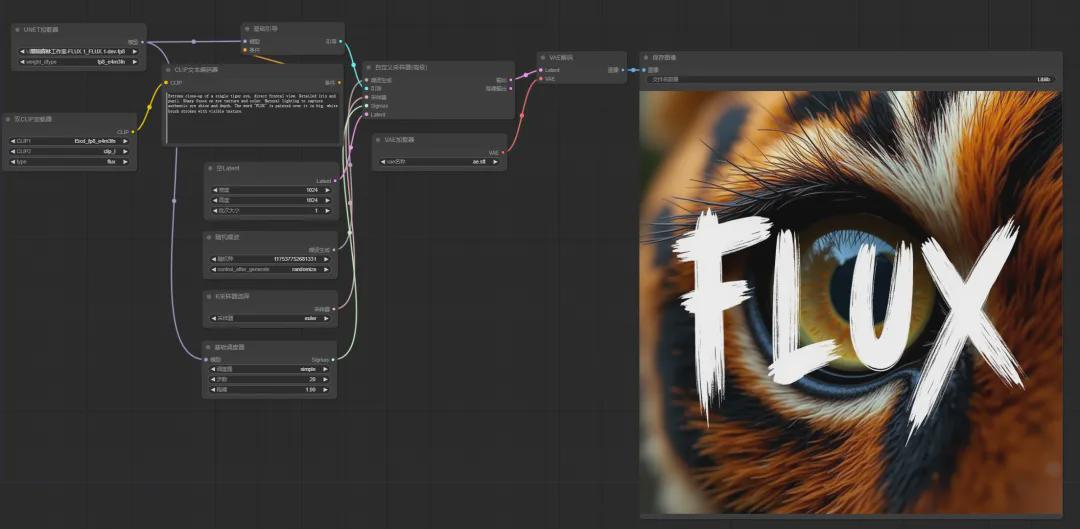
Below we give a brief introduction to workflow related nodes.
(1) UNET loader
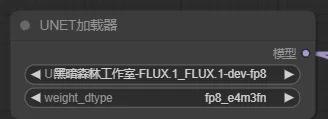
This node is mainly used to set up the Flux big model, about the UNET node, here is a little clarification, the UNET loader is used to load a specific UNET model individually, this node doesn't have any inputs, only an output of the model, which we can think of as a Checkpoint big model inside SD. Of course there is still a difference with Checkpoint node in workflow (Checkpoint node has 3 outputs: model, CLIP and VAE). In ComfyUI, UNet models exist in the \ComfyUI\models\unet directory.
When we click on the model's selection box, a selection box pops up where we can choose the desired Flux large model.
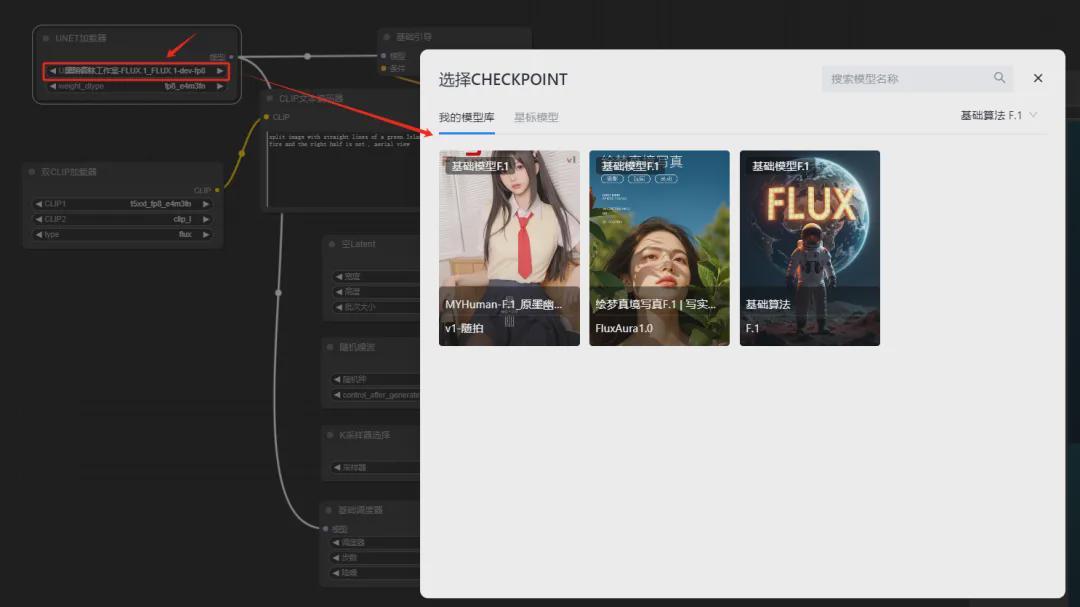
You can add Flux big models to my model library, so that the pop-up box will have our corresponding big models. The way to add Flux big model is as follows: Go to the detail page of Flux big model, click the "Add to Model Library" button as below, then you can add big model to my model library.

weight_type parameter: set to fp8_e4m3fn
(2) Dual CLIP loader
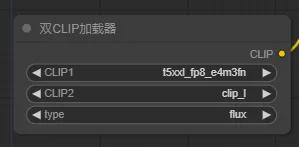
Here it is generally sufficient to keep the default parameters.
(3) CLIP Text Encoder
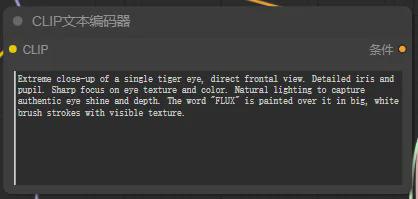
This node is mainly used for outputting cue words. It is also the node we use the most.
(4) Empty Latent
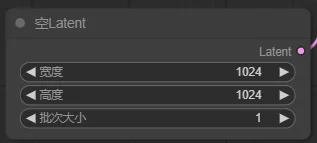
This node is mainly used for the image width and height settings. Here to note that Flux supports any resolution, if the generated image is not ideal, you can adjust the appropriate aspect ratio to try, the most commonly used personal aspect ratio is 1024 * 1536 (1536 * 1024).
(5) Sampler, Sampling Iteration Steps, Random Number Seeds
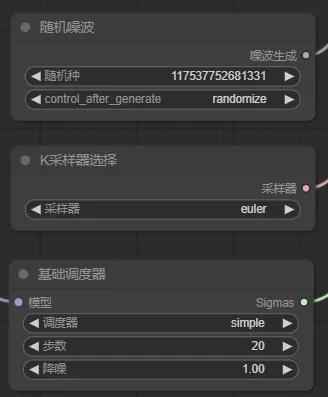
- Sampler recommendation: Euler, at present no special circumstances, it is recommended to use euler uniformly.
- Scheduler: recommended simple
- Number of steps: recommended between 20-30
- Control_after_generate: the way the random number is generated, it is recommended to randomize, i.e. generate a different random number each time.
(6) VAE Loader

Flux large model paired with VAE model, currently only ae.sft, just keep the default settings here.
II. How to add a loar node to a workflow
【initial step】Add LoRA loader node
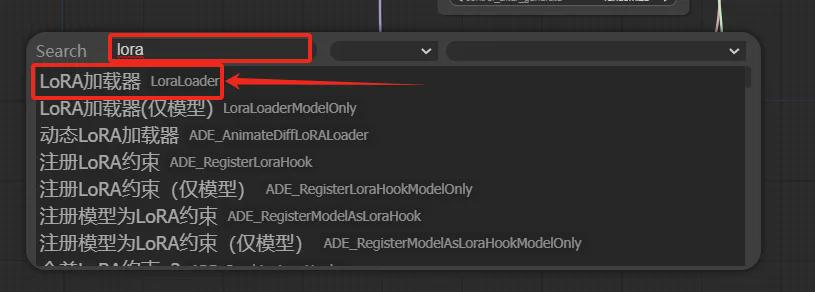
Double click the mouse in the blank space of ComfyUI interface, a search dialog box will pop up, enter lora keyword in the dialog box, you will find the loar node. Here we select the first node "LoRA loader" in the search result.
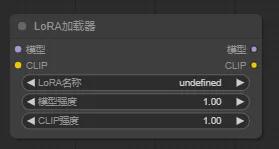
At this time, there will be an additional "LoRA Loader" node in the ComfyUI interface.
【second step】Select the lora model and set the weights of the lora model.
Adding a "LoRA loader" node does not automatically add a lora model. As you can see from the above figure, the default LoRA name value is "undefined", which means no LoRA model is added.
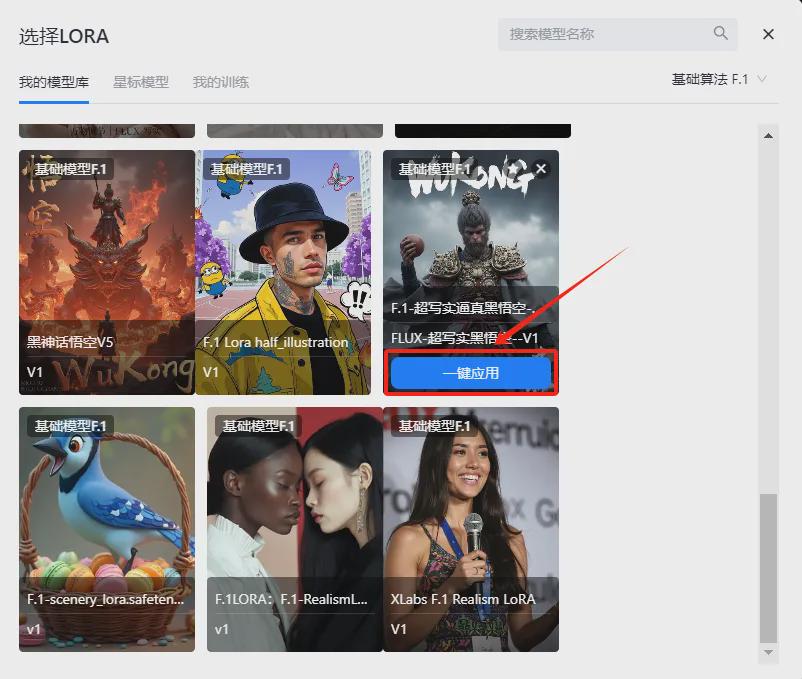
Click on the "LoRA Name" drop-down box, the My Model Library dialog box will pop up, you can select the Lora model I added in My Model Library, LoRA model added to My Model Library operation is the same as the above way to add Flux large model.

Here we take the "Ultra Realistic Black Goku" LoRA model as an example, select the LoRA model and click the "Apply with one click" button.
The loar model is then added to the "LoRA Loader" node.
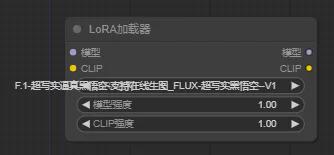
For different LoRAs we need to adjust the parameter value of model strength, which is also known as the weight parameter of the LoRA model.
For the CLIP intensity parameter, we just maintain the default value of 1.
【third step】Add the LoRA loader node to the Flux workflow.
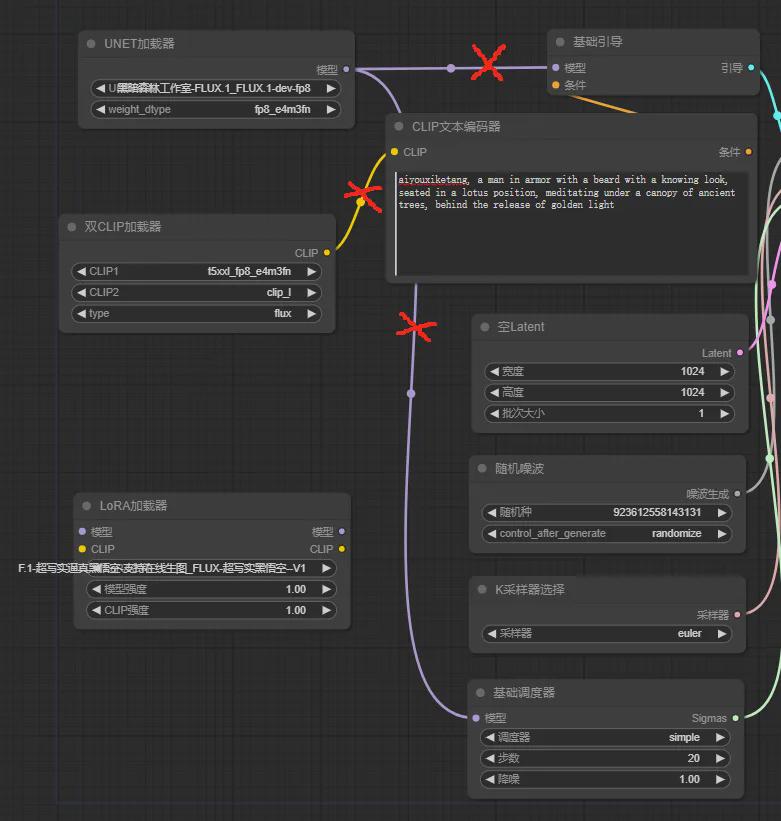
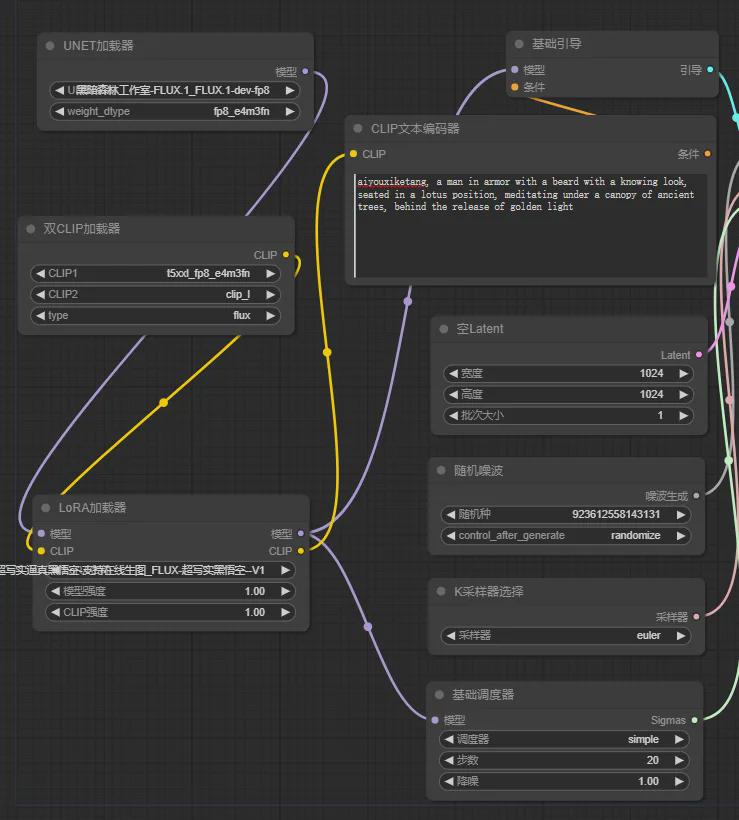
Let's adjust the connectivity between the nodes according to the following rules.
- Model output node of the UNET loader Connects to the model input node of the LoRA loader.
- CLIP output node of the dual CLIP loader connects to the CLIP input node of the LoRA loader
- The model output node of the LoRA loader connects both the model input node of the base bootstrap and the model input node of the base scheduler
- The CLIP output node of the LoRA loader connects to the CLIP input node of the CLIP text encoder.
In the process of adjusting node connections, the system will automatically delete the original node connections. The deleted node connections are shown in the following figure.
The final effect of the added LoRA loader node wiring is as follows.
[Step 4] Preparation of cue words and related parameter settings.
I won't expand on this here, but you can refer to the previous section.
[Step 5] Image generation.
Click the "Start Image Generation" button in the upper right corner to generate the corresponding image.
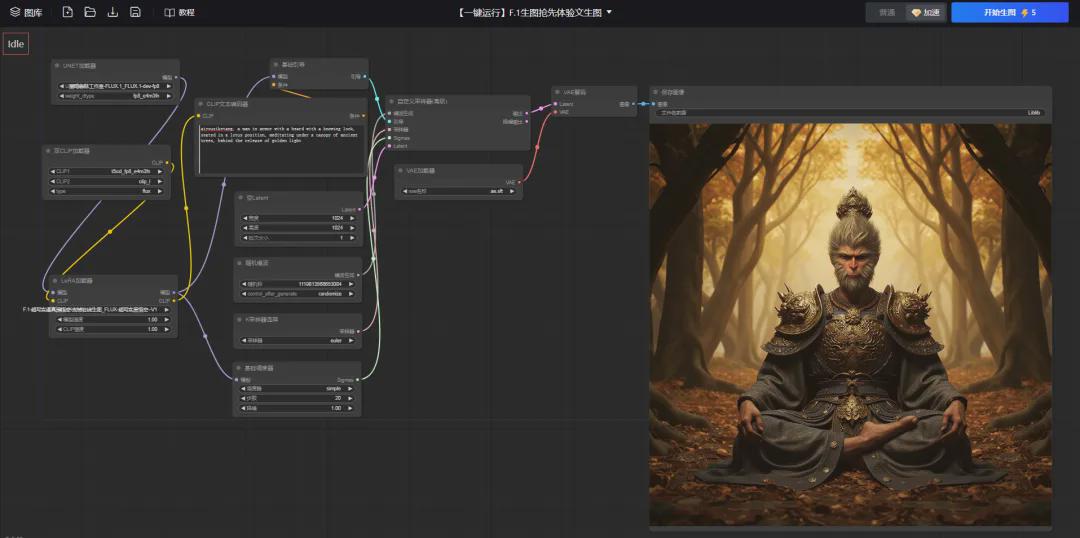
For the average average user, Flux's basic workflow and the addition of LoRA loader node workflow can meet most of the demand for the use of Flux to generate images scenarios.
Okay, that’s all for today’s sharing. I hope that what I shared today will be helpful to you.