I have shared with you beforeComfyUIThe native installation package builds the ComfyUI environment locally.
Today I will share with you another way to build the ComfyUI environment locally: using Qiuye's installation package.
1. Qiuye's installation packageInstallation Tutorial
- Qiuye installation package entrance: https://www.bilibili.com/read/cv31254871/
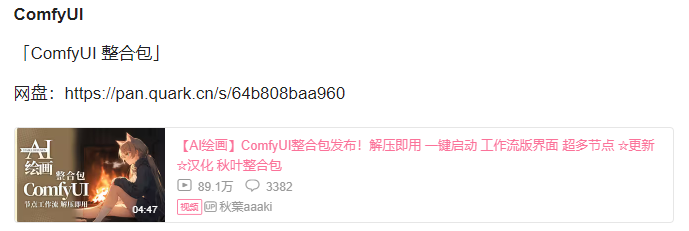
We get the installation package from the network disk address in the above picture: https://pan.quark.cn/s/64b808baa960.
Below we will provide a detailed step-by-step description on how to install using Qiuye's installation package.
【Step 1】Download the relevant files in the installation package of Qiuye Da Lao to your local computer, and focus on downloading the following two files to your local computer. The latest version is V1.4.7.
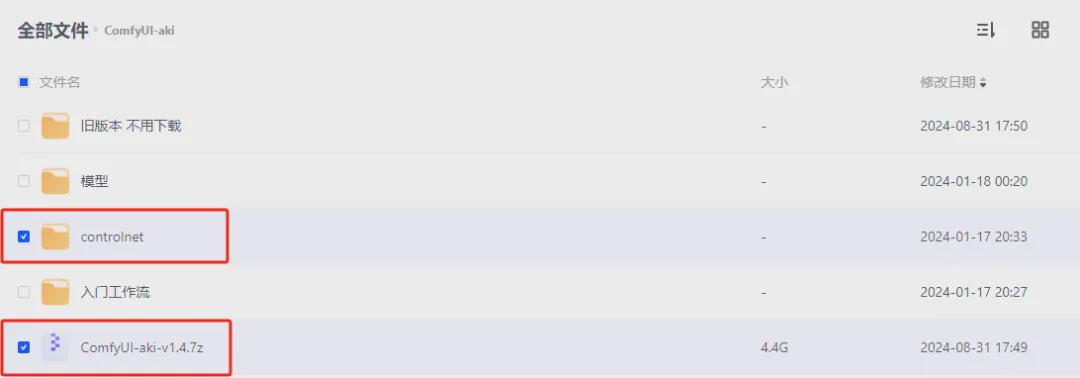
【Step 2】Unzip the ComfyUI-aki-v1.4.7z file to your local computer. The unzipped folder is ComfyUI-aki-v1.4.

【Step 3】Download the model
Commonly used model download websites:
- Domestic LiblibAI:https://www.liblib.art/
- Foreign C Station:https://civitai.com (requires scientific Internet access)
- Foreign Huggingface: https://huggingface.co/ (requires scientific Internet access)
We put the downloaded model into the corresponding directory:
- Large Model:\ComfyUI-aki-v1.4\models\checkpoints
- Loar Model:\ComfyUI-aki-v1.4\models\loras
- VAE Model:\ComfyUI-aki-v1.4\models\vae
- embeddings:\ComfyUI-aki-v1.4\models\embeddings
- ControlNet:\ComfyUI-aki-v1.4\models\controlnet
- Clip Node:\ComfyUI-aki-v1.4I\models\clip
- Unet Node:\ComfyUI-aki-v1.4\models\unet
Here we take the most commonly used large model majicMIX realistic as an example
- LiblibAI: https://www.liblib.art/modelinfo
- /bced6d7ec1460ac7b923fc5bc95c4540

Download it locally and place it in \ComfyUI-aki-v1.4\models
\checkpoints directory.

【Step 4】Enter the ComfyUI-aki-v1.4 directory. There is a file called "AI绘世开器.exe" under the directory. Just click it.
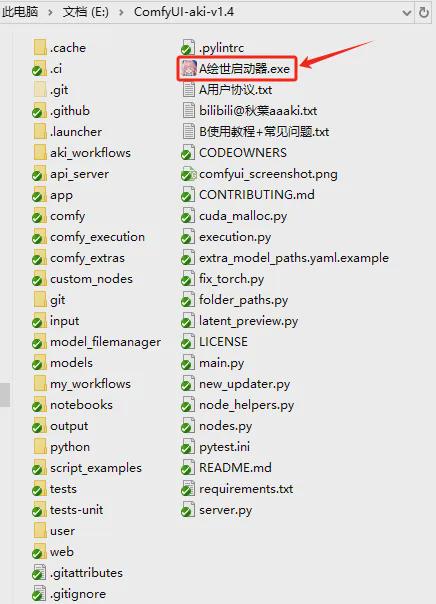
A progress box for launching the application will appear in the middle. Just wait for the installation to complete, and finally you will enter the "HuiShi" one-click startup interface.
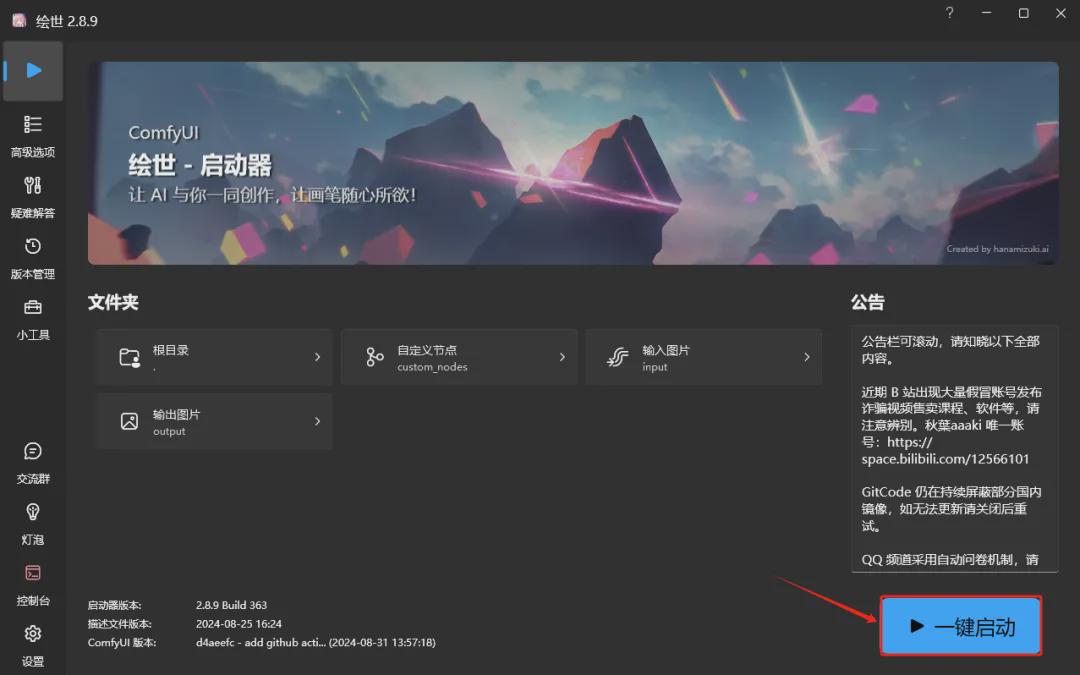
【Step 5】Click the "One-click start" button in the picture above, and you will see the startup progress in the console interface below. Please wait patiently until you see the ComfyUI address information in the console.
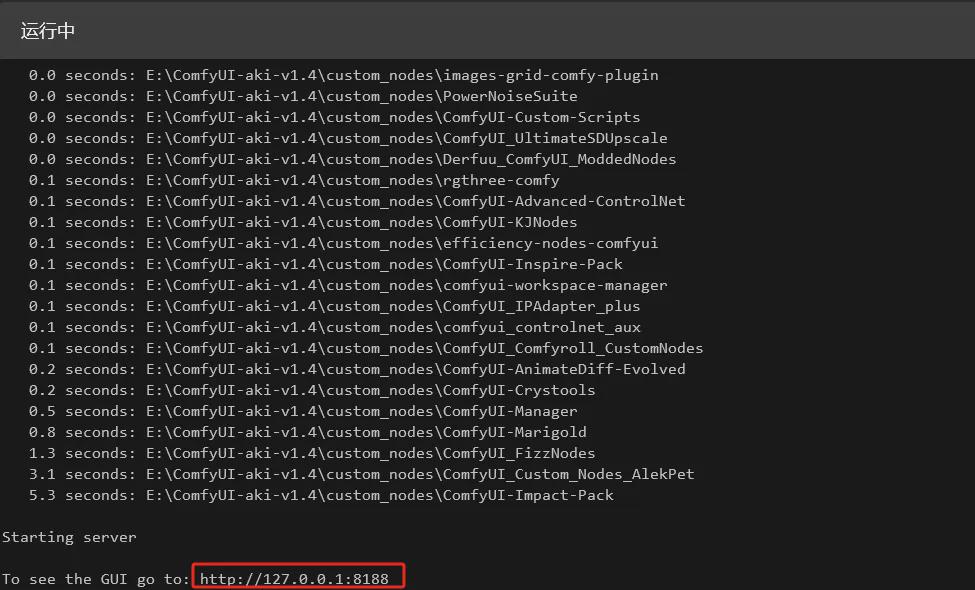
At this time, a ComfyUI management interface will automatically open in the browser. If it is not open, directly enter http://127.0.0.1:8188 in the browser.
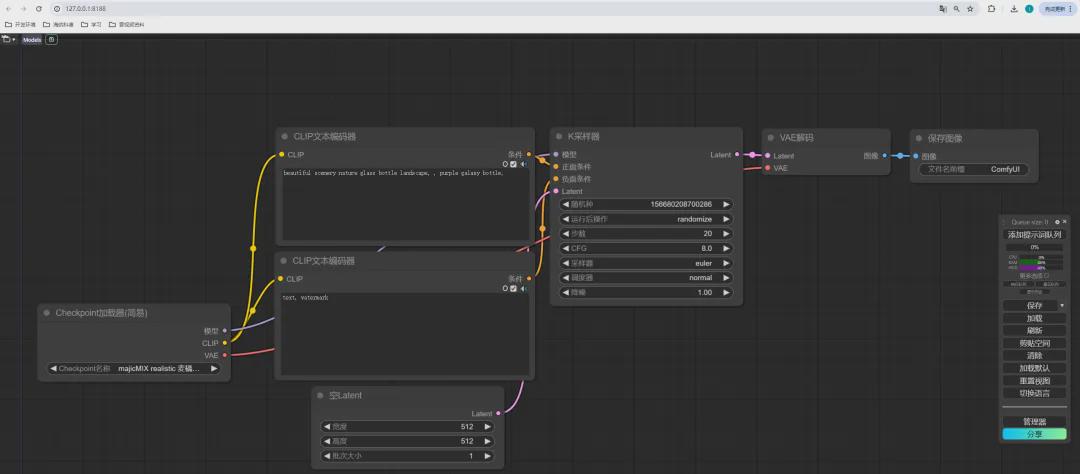
【Step 6】Image generation
We enter the prompt word, adjust the relevant parameter settings, click the "Queue Prompt" button, and then we can generate the picture.
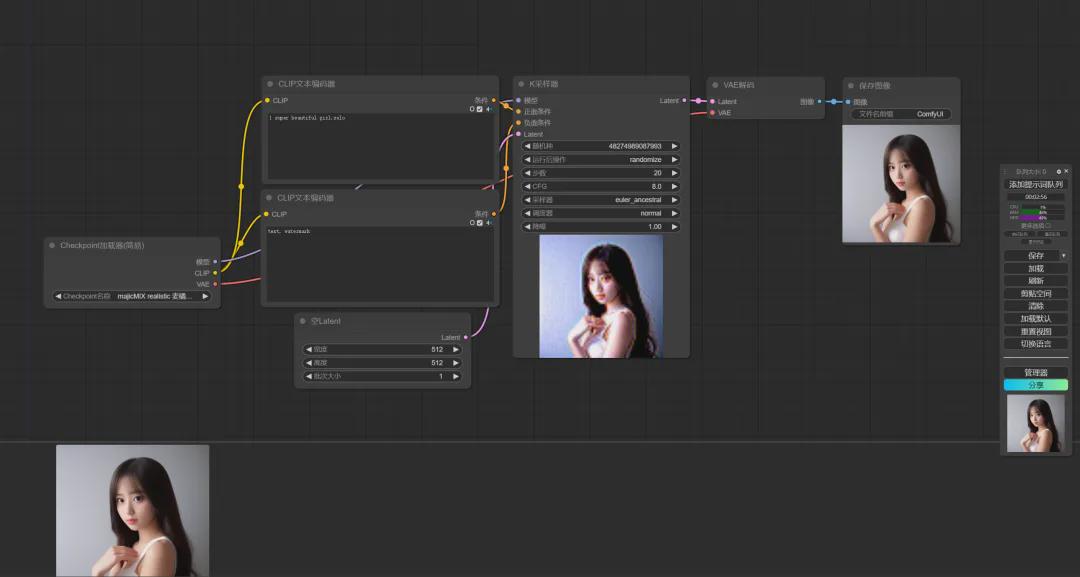
In the console we can see the progress information of image generation.

At this point, the construction of the ComfyUI environment using Qiuye's installation package is basically completed.
2. Description of ComfyUI startup error related issues
【Error 1】:AnimateDiff plugin

reason:The AnimateDiff plug-in is a plug-in for generating GIF animations. The model required by the AnimateDiff plug-in is not found. This error has no effect on our use of ComfyUI unless the AnimateDiff plug-in is needed.
Solution 1:Download the relevant model from the website https://github.com/Kosinkadink/ComfyUI-AnimateDiff-Evolved
Place the model (for example: mm_sd_v15_v2) in one of the following locations:
- ComfyUI/custom_nodes/ComfyUI-AnimateDiff-Evolved/models
- ComfyUI/models/animatediff_models
Place the Motion LoRA model in one of the following locations:
- ComfyUI/custom_nodes/ComfyUI-AnimateDiff-Evolved/motion_lora
- ComfyUI/models/animatediff_motion_lora
Solution 2:In the ComfyUI-aki-v1.4\custom_nodes directory, directly delete the plug-in ComfyUI-AnimateDiff-Evolved.
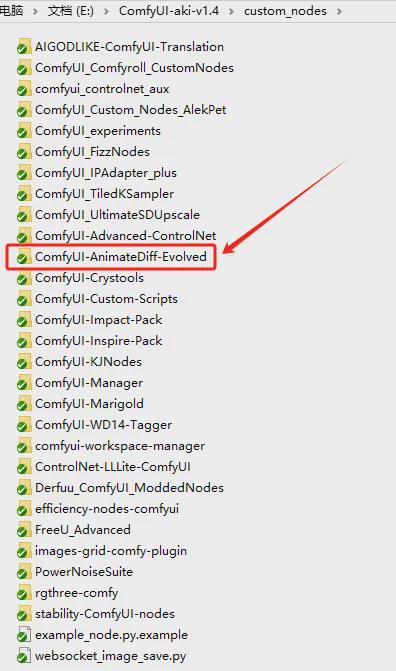
【Error 2】:getaddrinfo failed
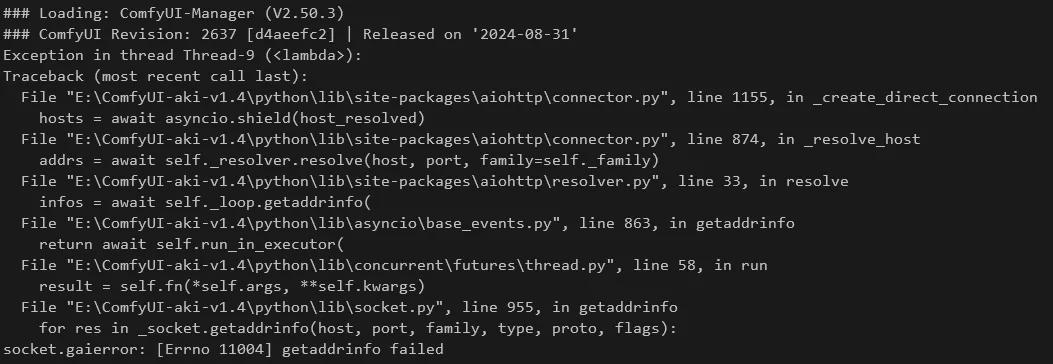
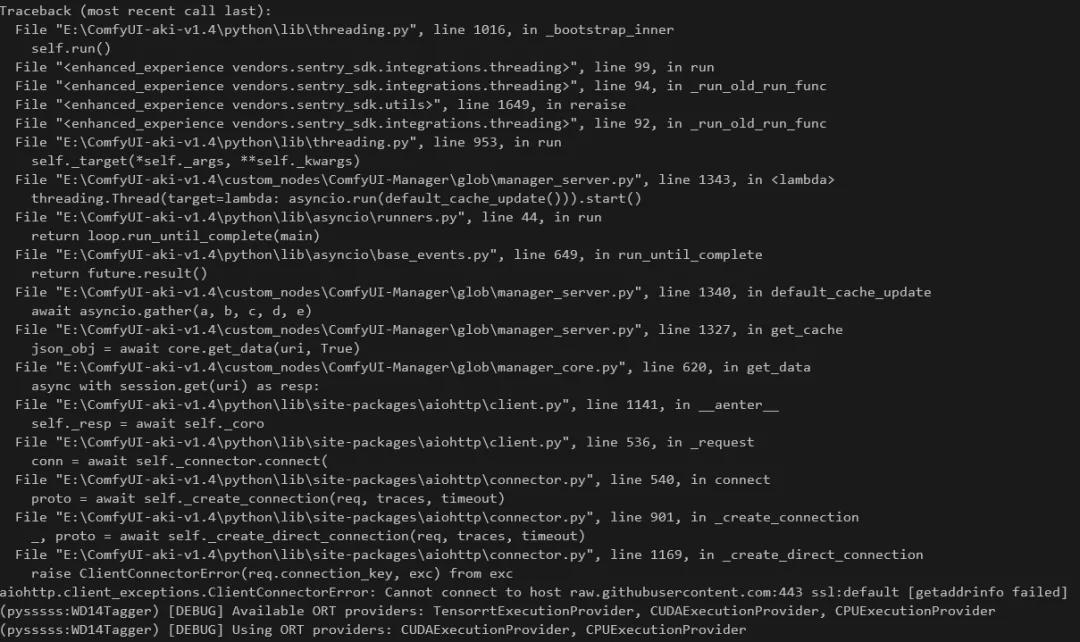
reason:Cannot connect to host raw.githubusercontent.com:443, which means that the address raw.githubusercontent.com cannot be accessed. Let's verify it.
Use cmd to open the command line.

The dns domain name resolution cannot find this host.
Processing:
You can find the IP address that can be used for this domain name through the link below.
- https://www.ipaddress.com/website/raw.githubusercontent.com/
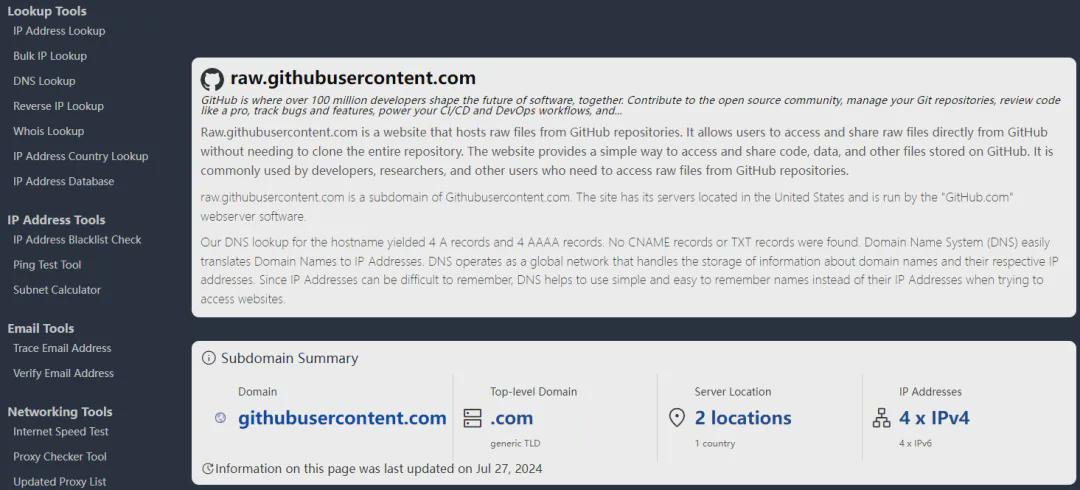
In the middle of the page we can see the available IP addresses.
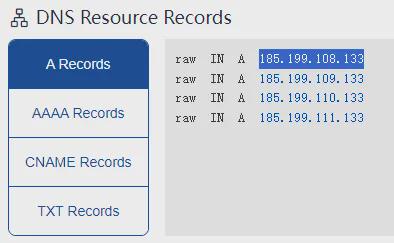
Let's verify whether these IP addresses are available. Here we take 185.199.108.133 as an example.
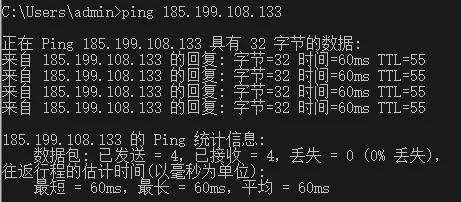
It can be accessed. The next step is to modify the local hosts file.
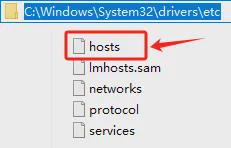
Open the file and add a line of information.
- 185.199.108.133 raw.githubusercontent.com
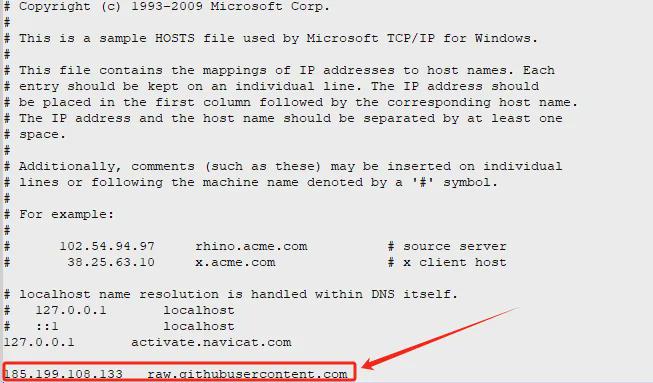
Restart ComfyUI and the console interface will not report errors.
Okay, that’s all for today’s sharing. I hope that what I shared today will be helpful to you.
The model and workflow are placed in the network disk, and those who are interested can take them!
https://pan.quark.cn/s/b3df771404e2