I have shared some experiences with you before.Flux Modelway.
Flux [Basics]: Share some websites where you can experience the Flux.1 model online
Flux [Basics]: Local deployment and installation tutorial of ComfyUI Flux.1 workflow
Today we will share how to deploy locallyComfyUI Flux.1 dev GGUF workflow.
1. First acquaintance with GGUF
GGUF stands for GPT-Generated Unified Format, a binary file format designed for large language models. It was proposed by Georgi Gerganov, the founder of llama.cpp, and is used to efficiently store and exchange pre-training results of large models. This format optimizes the data structure and encoding method, significantly improves the storage efficiency of model files, and ensures fast loading performance.
On the official website of XLabs-AI on Github, GGUF is also the first choice for low-memory usage.
- https://github.com/XLabs-AI/x-flux-comfyui

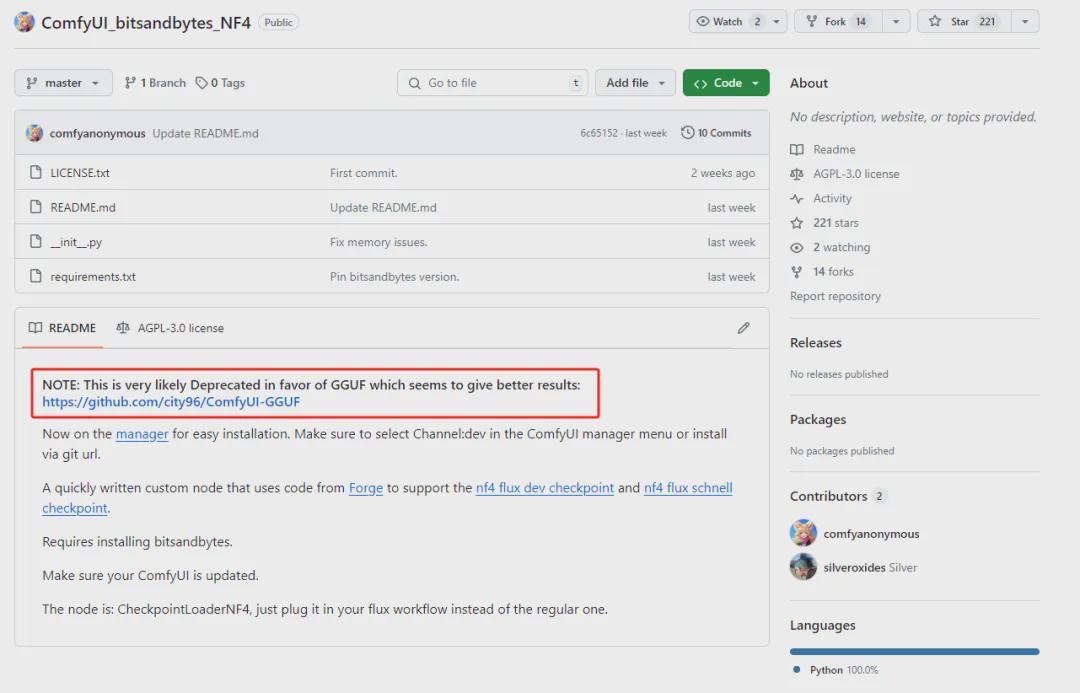
In addition, many friends have heard of or used another way to use low video memory: Flux.1 dev NF4, which is currently abandoned.
- https://github.com/comfyanonymous/ComfyUI_bitsandbytes_NF4
2. Flux.1 dev GGUF workflow construction
We will take the following typical ComfyUI Flux.1 dev GGUF workflow as an example to explain in detail (the network disk address can be obtained at the end of the workflow article).
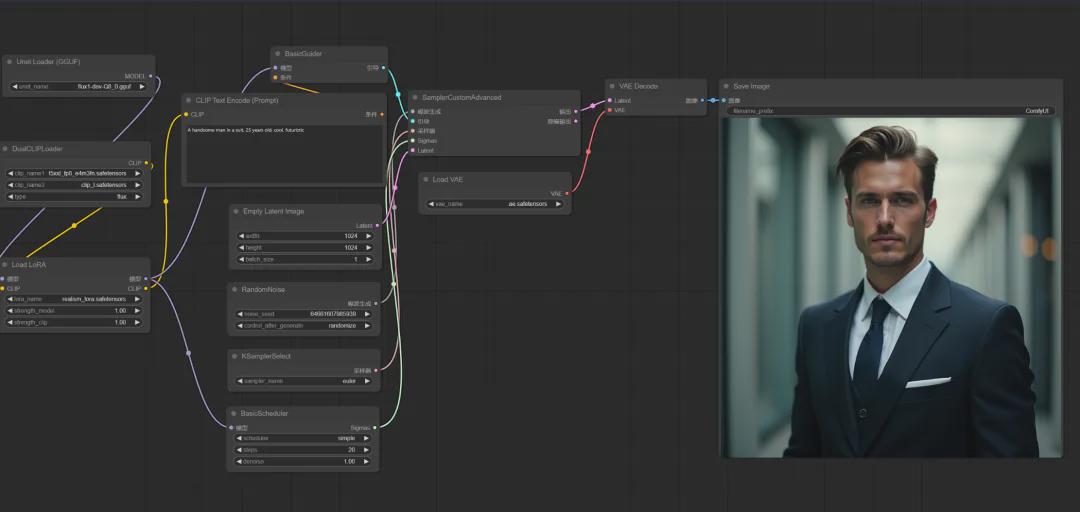
Related instructions: If ComfyUI is not the latest version, you need to update ComfyUI to the latest version first.
1. Plug-in installation
- Plugin address: https://github.com/city96/ComfyUI-GGUF
Search for ComfyUI-GGUF via the Plugin Manager.

Simply click the install button to complete the installation.
You can also use the git command to install it locally in the \ComfyUI\custom_nodes directory.
- git clone https://github.com/city96/ComfyUI-GGUF
After the installation is complete, restart ComfyUI.
2. Download the flux1-dev GGUF model (you can also get the network disk address at the end of the article)
- https://huggingface.co/city96/FLUX.1-dev-gguf/tree/main
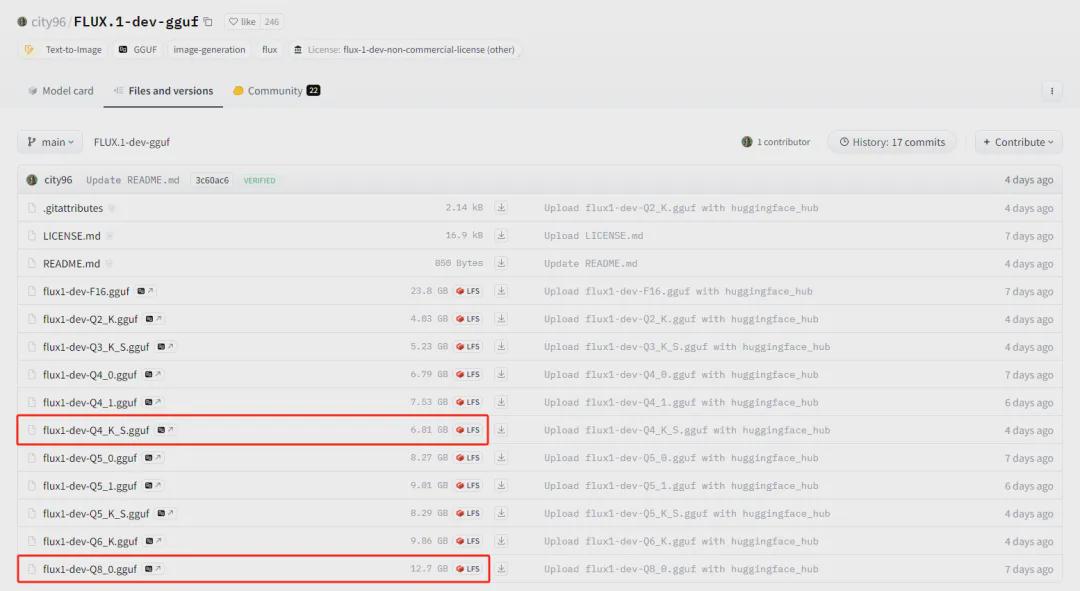
Place the downloaded large model in the ComfyUI\models\unet directory.
- For dev version, recommended: flux1-dev-Q8_0.gguf
- For channel version recommendation: flux1-dev-Q4_K_S.gguf

3. Download CLIP model
- https://huggingface.co/comfyanonymous/flux_text_encoders/tree/main

Download t5xxl_fp8_e4m3fn.safetensors(4.89 GB) and clip_l.safetensors(246 MB) files and place them in \ComfyUI\models\clip directory.
4. Download the VAE model
- https://huggingface.co/black-forest-labs/FLUX.1-dev/tree/main
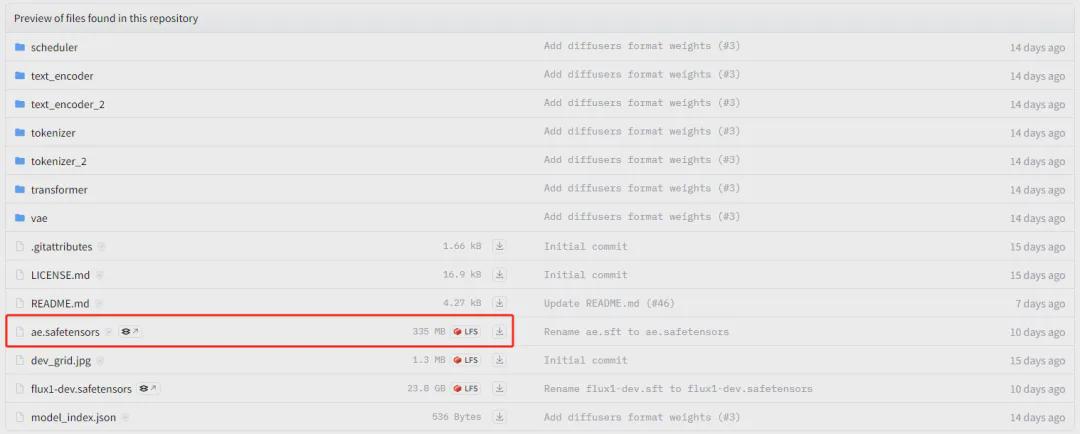
Download the ae.safetensors(335M) file and place it in the \ComfyUI\models\vae directory.
5. Download the LORA model
- https://huggingface.co/XLabs-AI/flux-lora-collection/tree/main
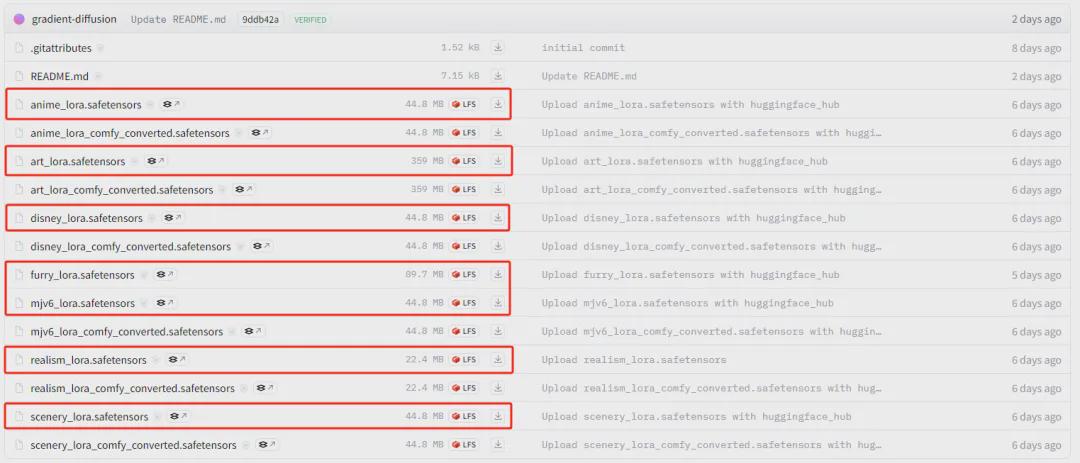
Currently, Flux.1 has released 7 loars, including animation, art, Disney, MJV6, plush, realistic, and landscape. Download the required loar model files and place them in the ComfyUI\models\loras directory.
6. Use workflow
Click ComfyUI to start the script file, and click the "load" button on the main interface to load the workflow file.
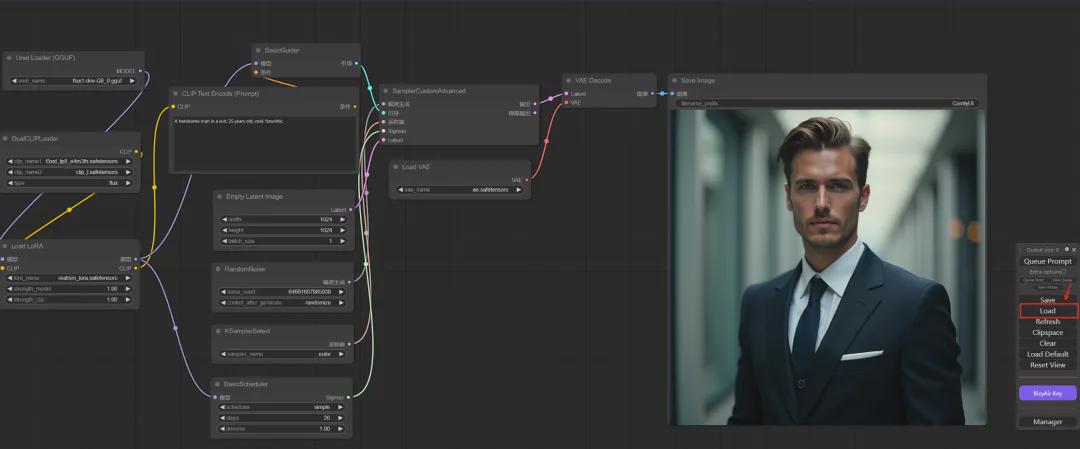
At this point, the ComfyUI workflow of Flux.1 dev GGUF can be applied.
Related Notes: The main difference between Flux.1 dev and Flux.1 dev GGUF workflows.
Using the Load Diffusion Model node in the Flux.1 dev workflow
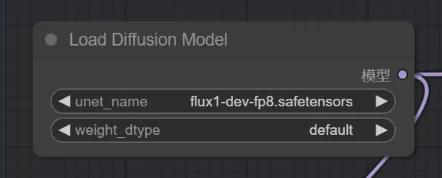
Flux.1 dev GGUF workflow using Unet Loader (GGUF) node

Okay, that’s all for today’s sharing. I hope that what I shared today will be helpful to you.
The model and workflow are placed in the network disk, and those who are interested can take them!
https://pan.quark.cn/s/b3df771404e2