Flux has become very popular recently, and the portraits have become more realistic and delicate. Can you tell that these pictures are generated by AI?

You can even precisely control the text you generate, such as writing on your hands and paper: I am not real.

Whether it is a single person or multiple people, it is difficult to find flaws in facial lighting, skin texture, and hair.

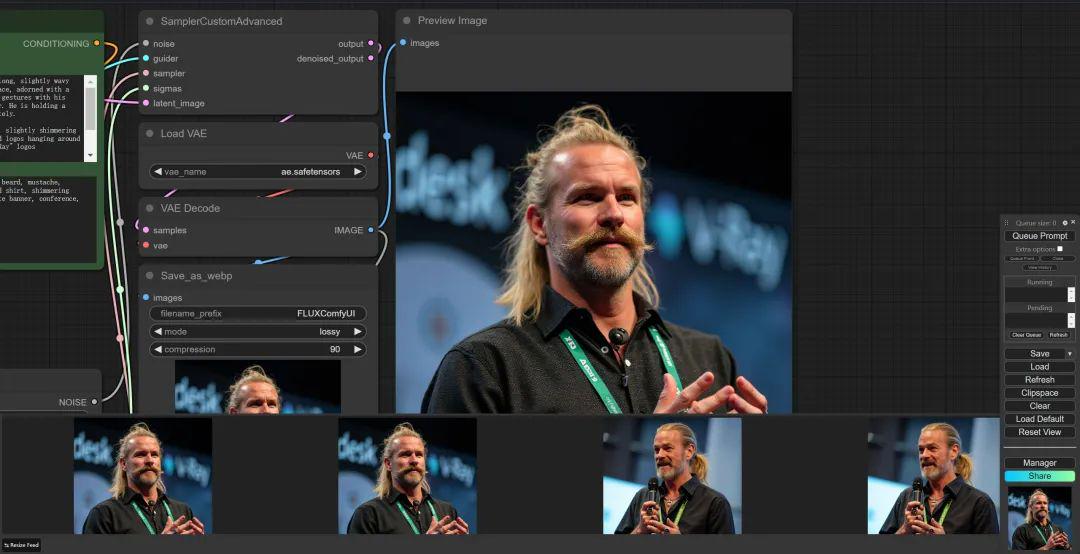
Such realistic pictures can be easily generated using Flux:
todayStep-by-step instruction, teach you how to use Flux.
First experience with Flux
Robin Rombach, a former core member of Stability AI, founded a new company: "Black Forest Labs" and received $32 million in financing.
Flux is their work. The Black Forest Labs Flux.1 model family includes the following three variants:
- Flux.1 [pro]: This is the top version of Flux.1, providing state-of-the-art image generation performance, but the model is not open source;
- Flux.1 [dev]: open source model, but not commercially available;
- Flux.1 [schnell]: This is the fastest model in the Flux.1 model family, optimized for local development and personal use.
Currently, ComfyUI has integrated Flux, and the experience can be deployed on ComfyUI.
So today's tutorial is divided into two parts, ComfyUI installation and Flux installation.
1. Installation of ComfyUI
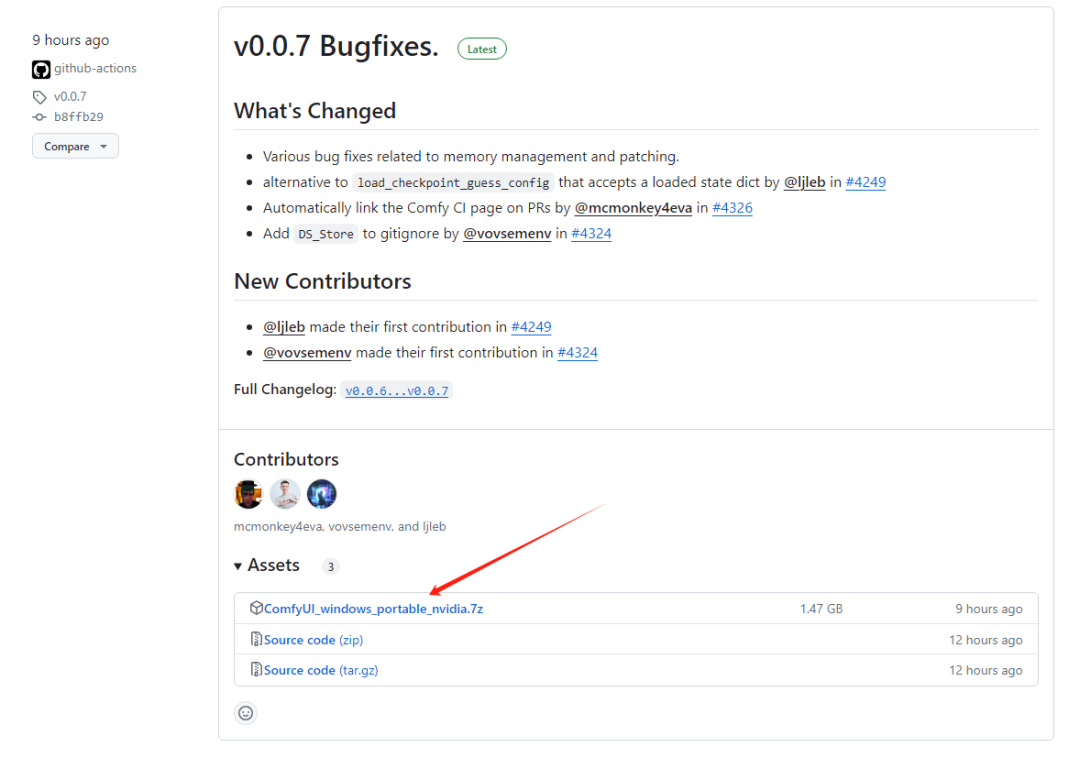
The installation of ComfyUI is very simple. Open the releases address:
https://github.com/comfyanonymous/ComfyUI/releases
You can see the latest startup package and download it.
You can see these files, double-click run_nvidia_gpu.bat to start ComfyUI.
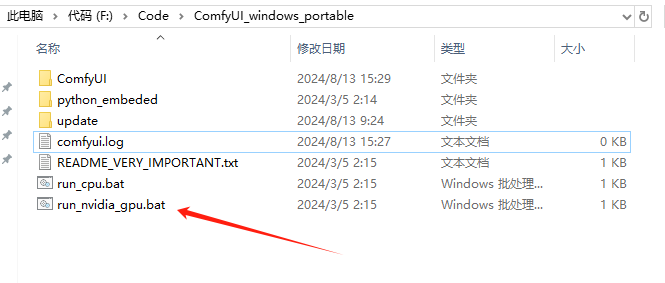
If you don't have an N card, you can use run_cpu.bat to start ComfyUI using only the CPU.
After running successfully, it will automatically open the usage page, like this:
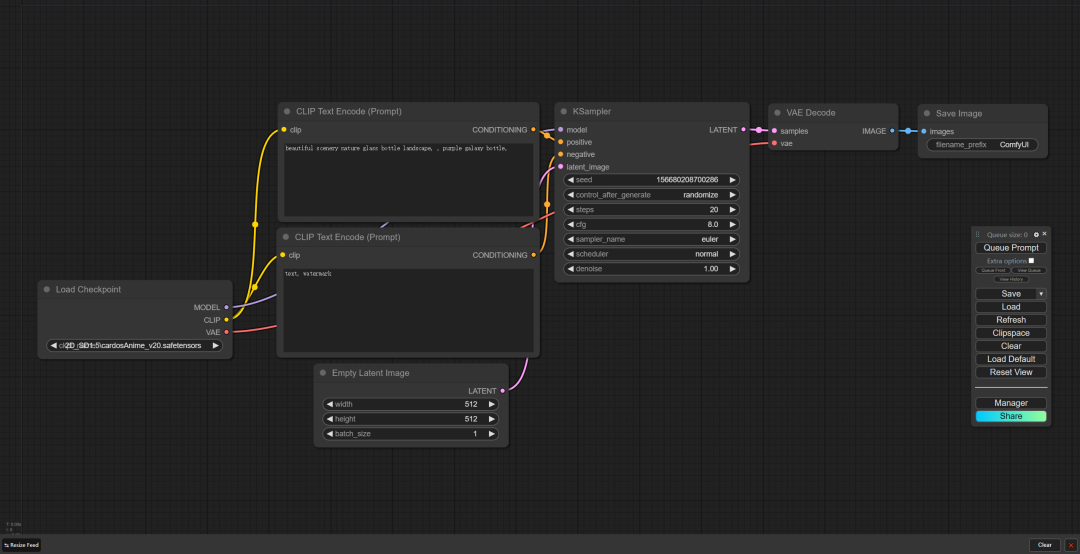
To use ComfyUI, you must install a plug-in, ComfyUI-Manager.
The installation method is very simple. We open a computer and enter the root directory of the ComfyUI project:
terminal
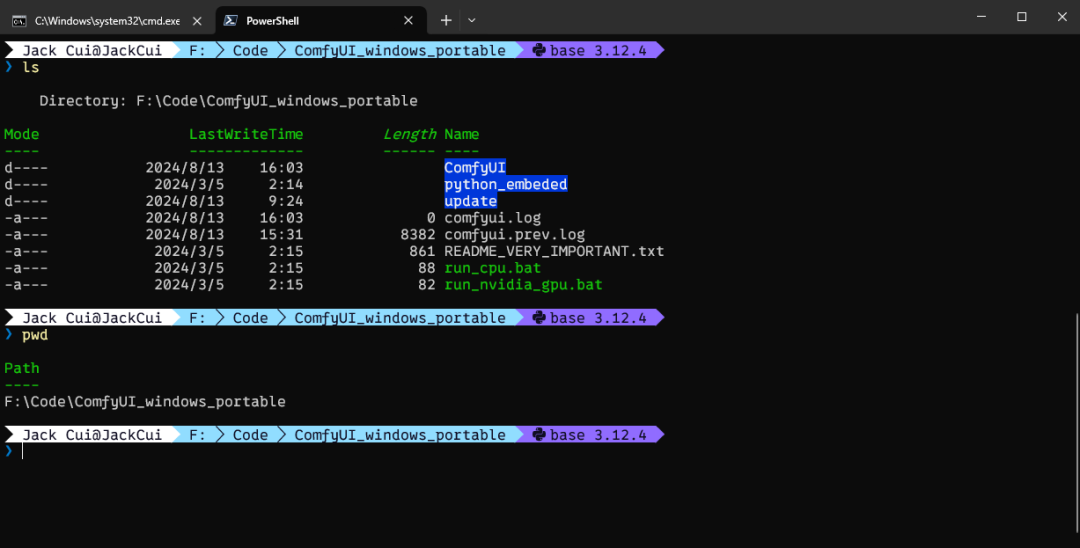
You can see that my ComfyUI is stored in the directory. Then we go to the custom_nodes directory and use the command:
F:\Code\ComfyUI_windows_portable
cd .\ComfyUI\custom_nodes\
Like this:
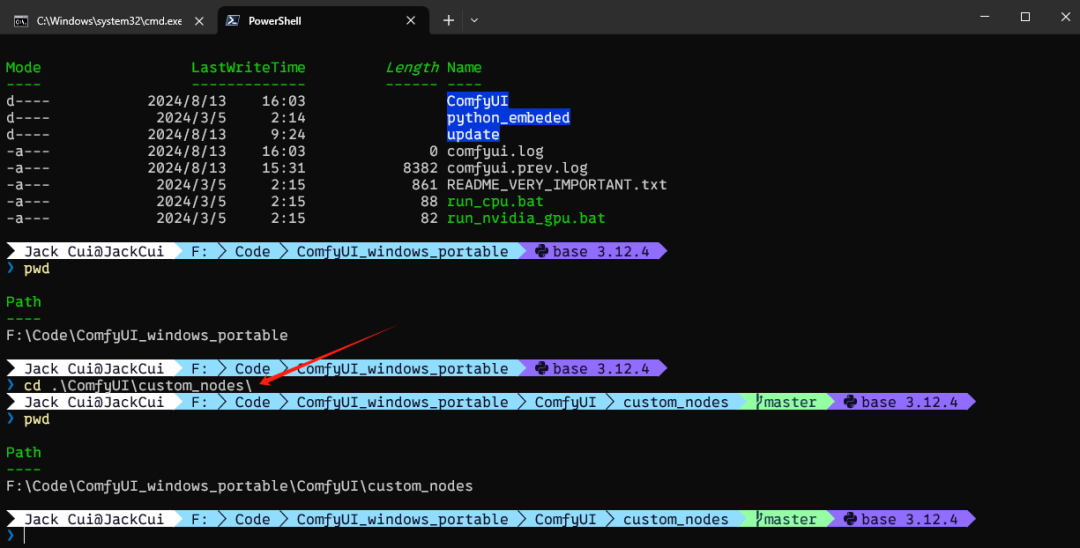
Then clone the ComfyUI-Manager project locally and use the command:
git clone https://github.com/ltdrdata/ComfyUI-Manager.git
Then restart ComfyUI and you can see the Manager in the lower right corner:
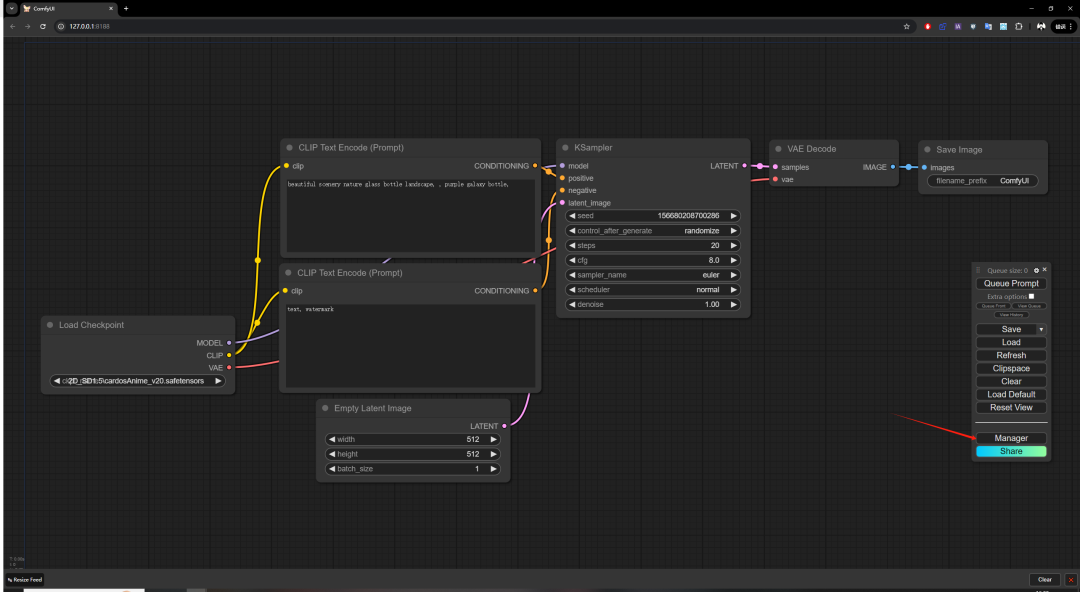
This means that ComfyUI is ready.
2. Flux
ComfyUI has provided a deployment tutorial for Flux. This is a demo:
https://comfyanonymous.github.io/ComfyUI_examples/flux/
We need to download 4 things in total:
- t5xxl_fp16.safetensors: placed in the ComfyUI/models/clip/ directory
- clip_l.safetensors: placed in the ComfyUI/models/clip/ directory
- ae.safetensors: placed in the ComfyUI/models/vae/ directory
- flux1-dev.safetensors: placed in the ComfyUI/models/unet/ directory
Download t5xxl_fp16.safetensors and clip_l.safetensors:
https://huggingface.co/comfyanonymous/flux_text_encoders/tree/main
t5xxl is divided into fp16 and fp8. If your memory exceeds 32GB, use fp16. If not, use fp8.
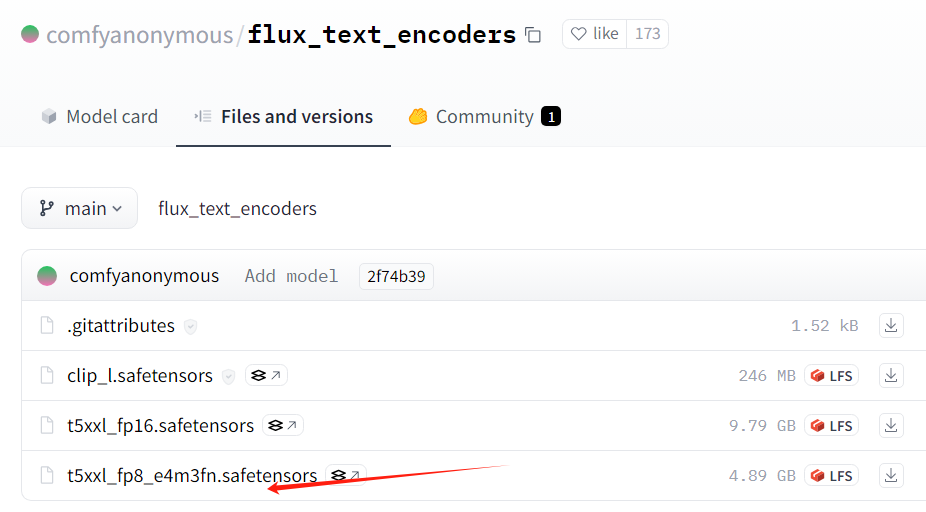
ae.safetensors and flux1-dev.safetensors download address:
https://huggingface.co/black-forest-labs/FLUX.1-dev/tree/main
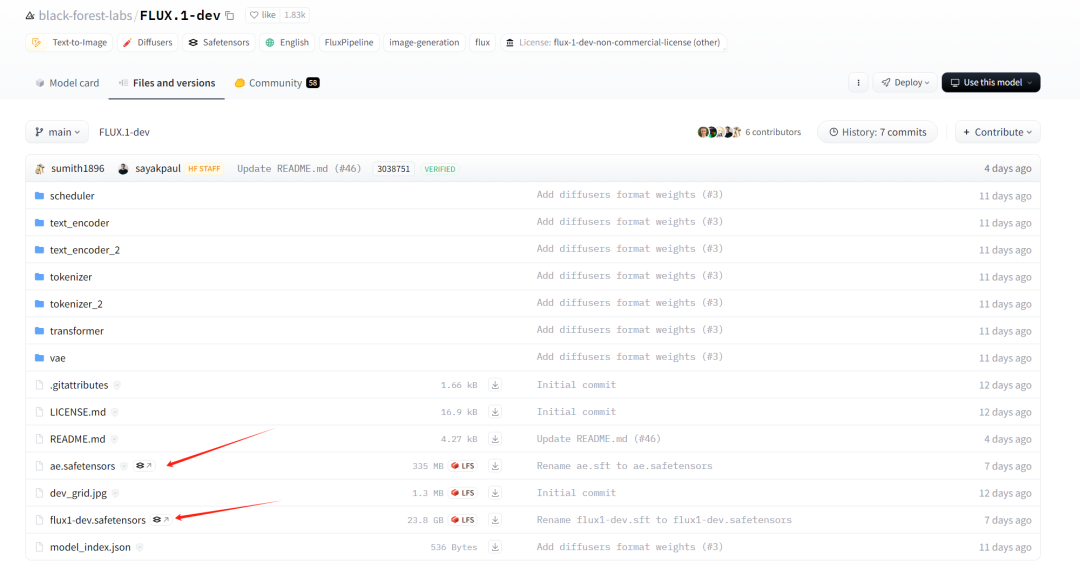
If the GPU performance is insufficient or the video memory is insufficient, you can use the quantized version of the fp8 model, which will be much faster. Download address:
https://huggingface.co/Kijai/flux-fp8/tree/main

Just put these 4 models into the corresponding directories.
Finally, let's download an official picture:
https://comfyanonymous.github.io/ComfyUI_examples/flux/flux_dev_example.png
Be sure to use this link, download the image.
We open ComfyUI and drag this picture into ComfyUI:
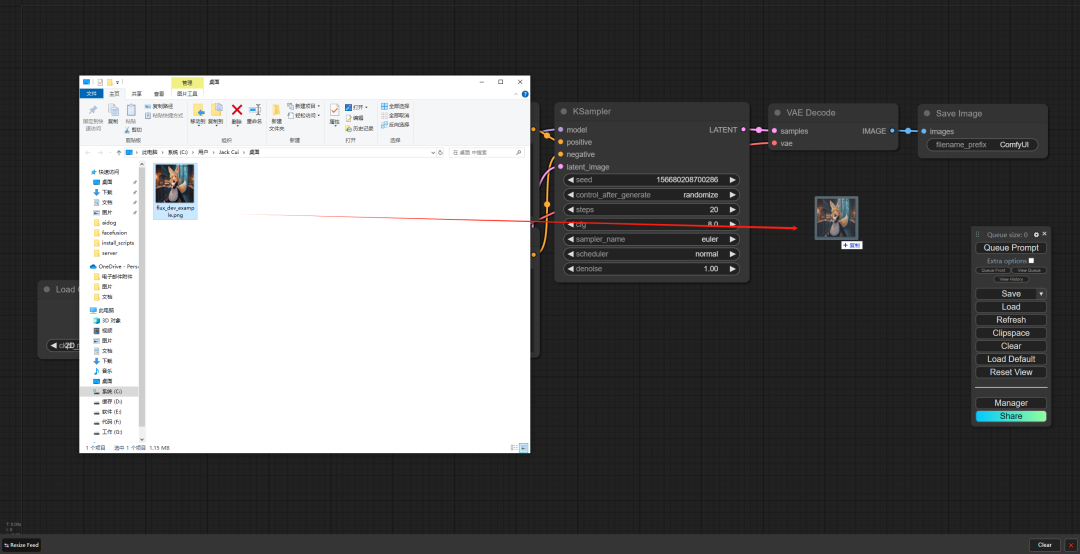
You will find that you have opened the entire node workflow of Flux:
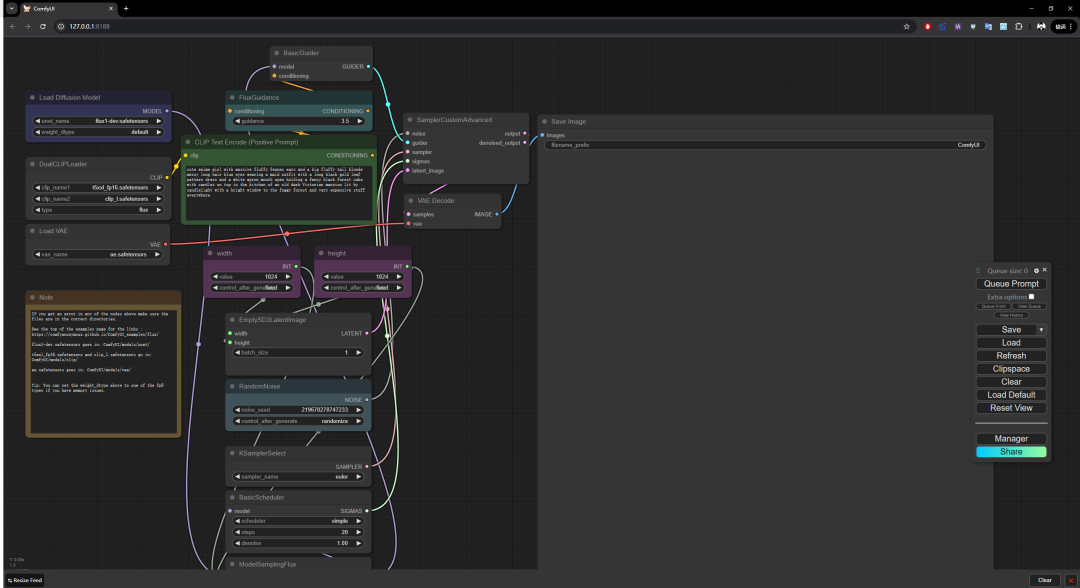
This is because the image not only stores the information of the image itself, but also the information of each node in the workflow.
We click the Queue Prompt to run the entire workflow:
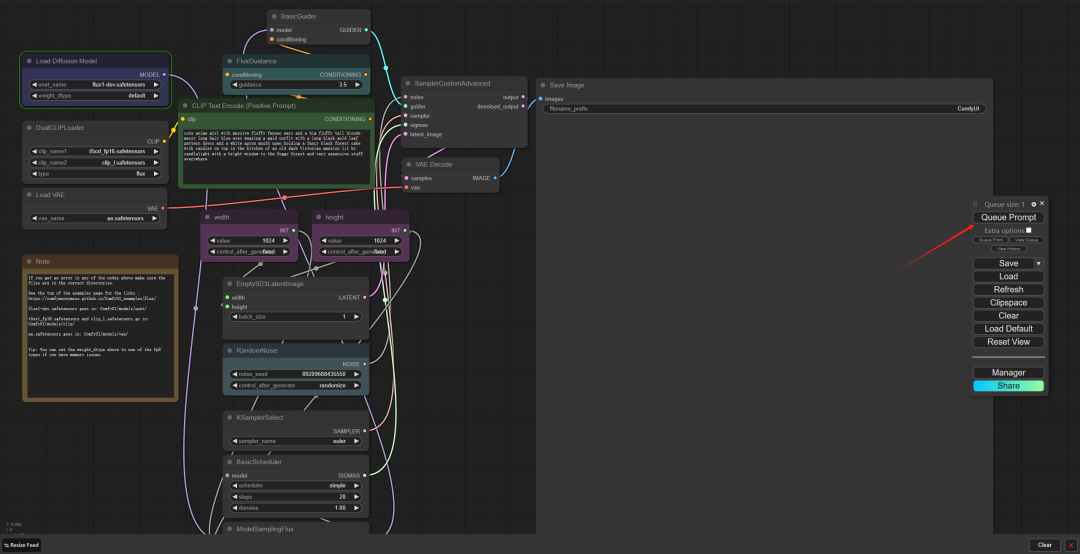
Wait a moment and you will see the generated image:
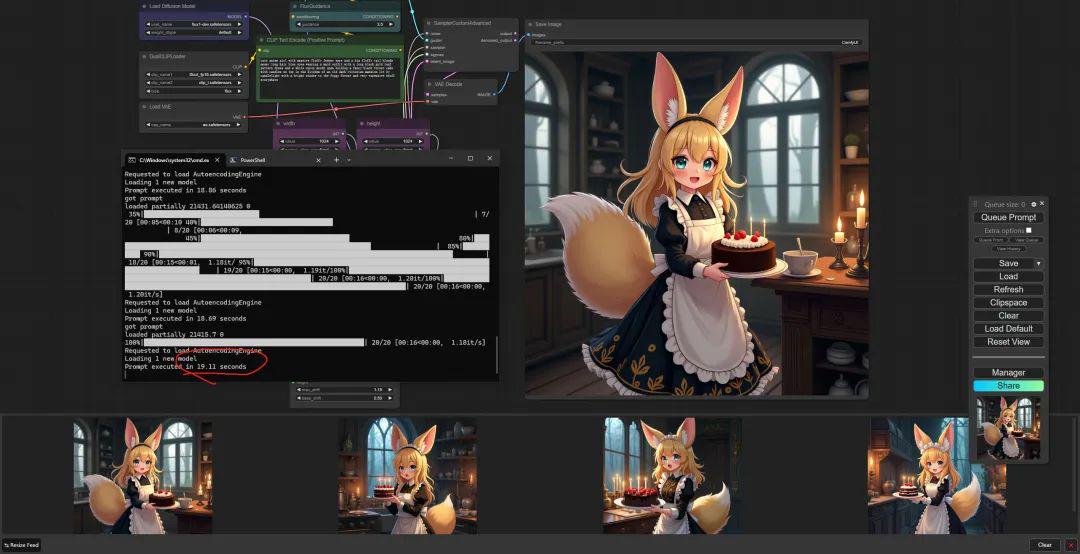
I have an RTX 4090. After loading the model, I only run the Clip Text Encode part. For a 1024*1024 image, it takes about 20 seconds to run one image.
This is the official workflow of ComfyUI. You can also use Flux workflows published by other authors, such as this one:
https://openart.ai/workflows/shark_better_98/realism-no-lora/3EhdlEU8Edh3xgjYsIQD
This is a realistic character workflow, we choose to download:

A json file will be downloaded, which contains the workflow information.
Let's drag the json file into ComfyUI:
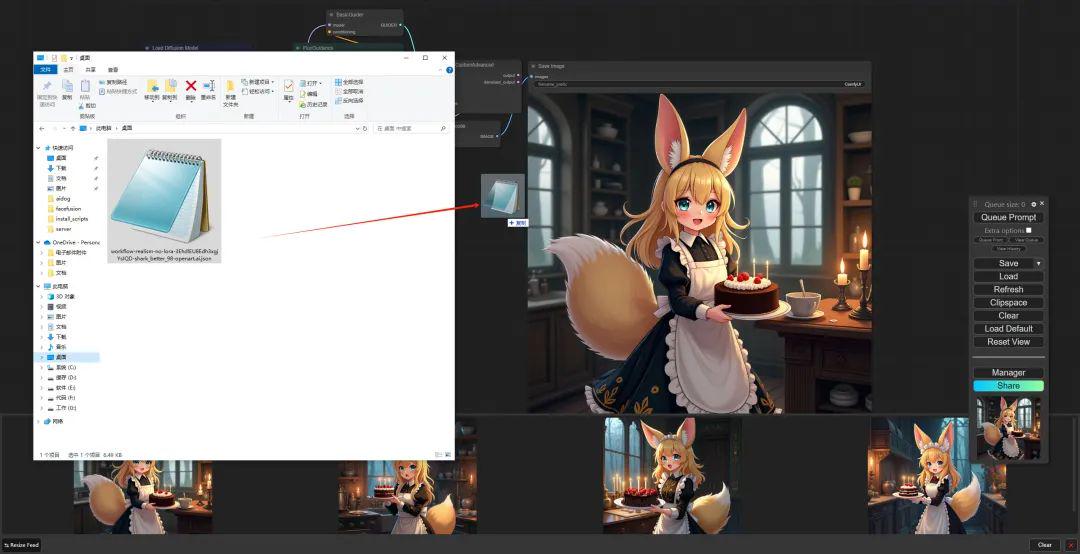
The workflow is updated:
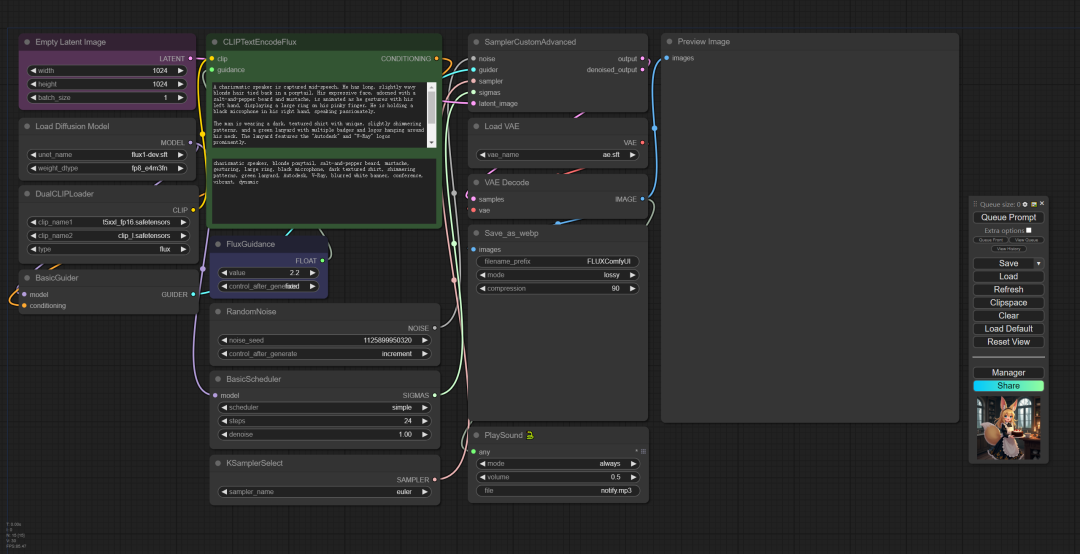
If some nodes areRed, in an error state, like this:
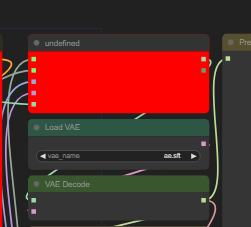
That means you need to install the corresponding plug-in. Click Manager -> Install Missing Custom Nodes to install the missing nodes:
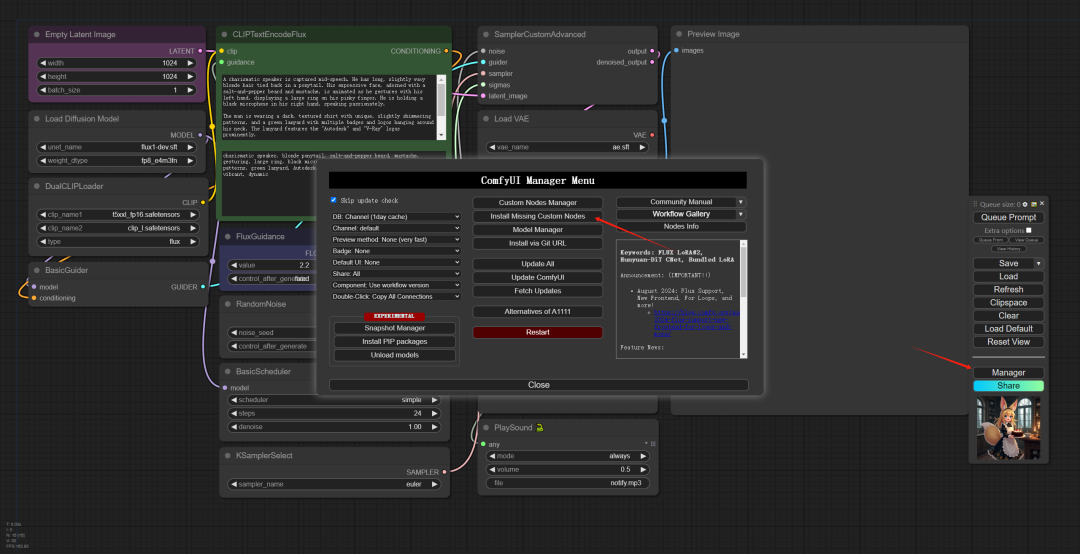
This can solve most of the red nodes. If there are still red errors, it means that the Manager tool does not include this. You can install it through the URL. For example, the ComfyUI-Saveaswebp node cannot be installed through the Manager.
Then you can go to Github and search for the address of ComfyUI-Saveaswebp:
https://github.com/Kaharos94/ComfyUI-Saveaswebp
You can select Manager->Install via Git URL to install this tool:
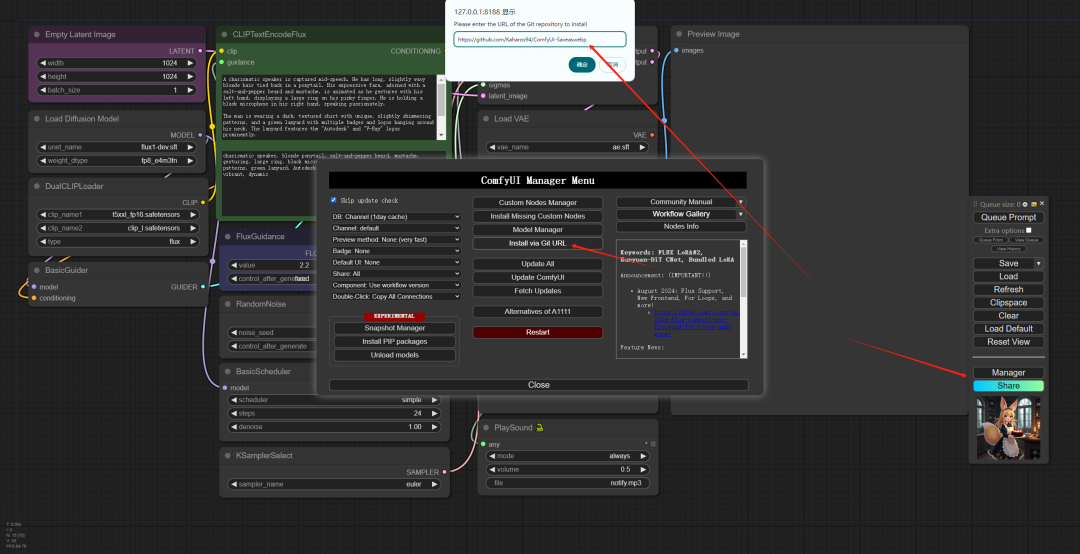
If it prompts that it is unsafe, you can directly open custom_nodes\ComfyUI-Manager\config.ini
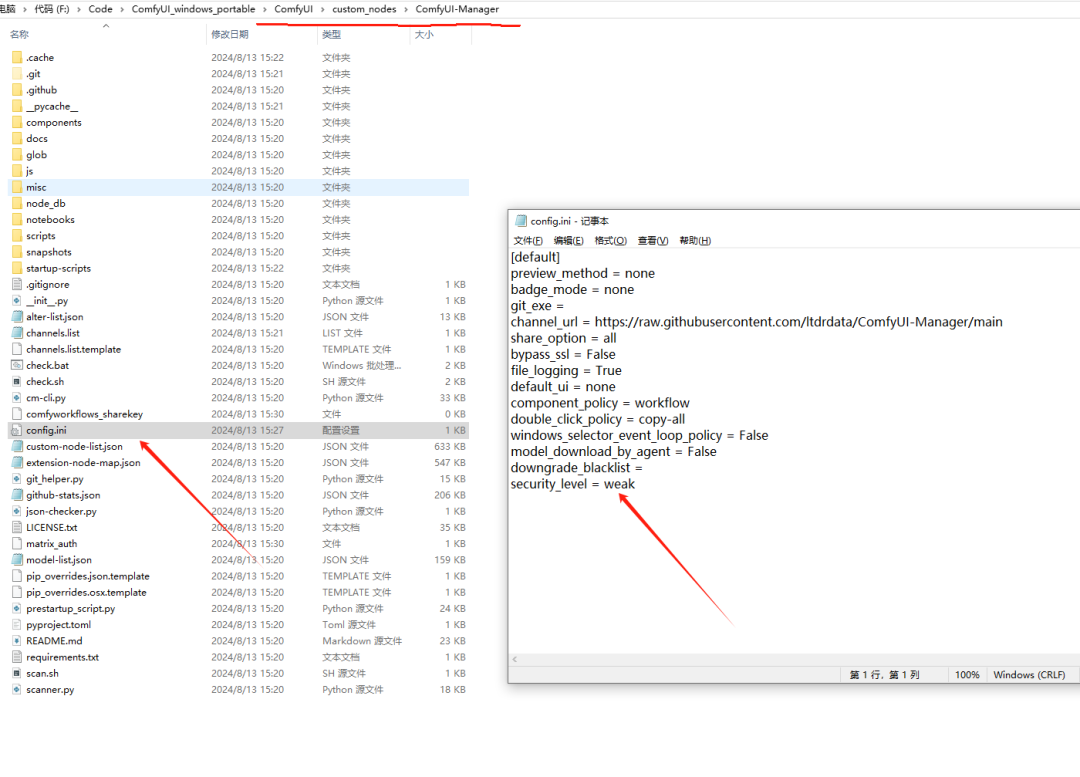
Just change security_level = weak.
After all configurations are completed, click Queue Prompt to run the workflow.
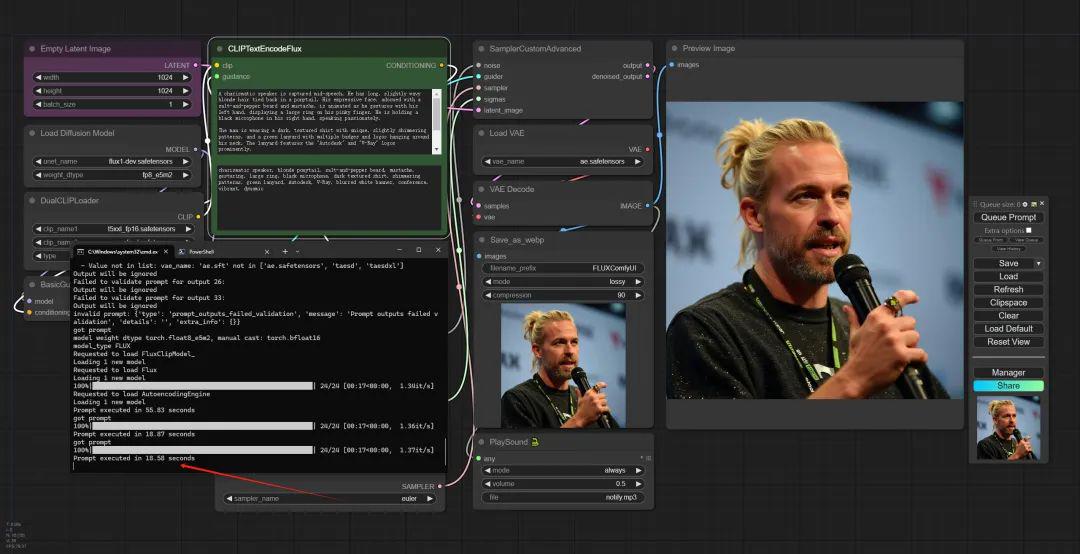
The effect is still very amazing!
The final generated image can also be combined with the video generation method to further generate AI video.
If many people like the content of this issue, I will continue to release some tutorials on how to make Flux combined with AI videos.