This tutorial is the latest SD in 2024 ComfyUIGetting Started, designed for beginners, details how to build a controlNet workflow. Through step-by-step guidance, you can easily master the advanced functions of SD ComfyUI and improve yourAI Drawingprecision and creativity.
We areWebUIControlNet is used through plugins, which contain preprocessors and models. In comfyui, we build preprocessors and models separately. Let's see how to build them.
First we load our default workflow
1. Preprocessor
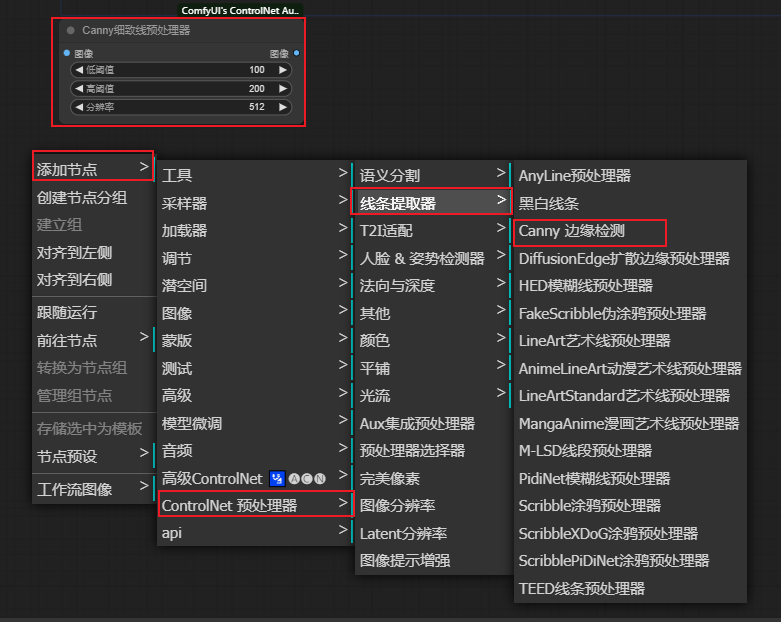
We can add our preprocessor in the blank area as follows

Another way is to install the preprocessor plug-in to add our preprocessor node
Controlnet Preprocessor Plug-in:
- Plugin address: https://github.com/Fannovel16/comfyui_controlnet_aux.git
- If after installation, running ComfyUI shows that the plugin cannot be imported
- Please run the "install.bat" file in the "ComfyUI\custom_nodes\comfyui_controlnet_aux" directory
With this plugin, it is easier to manage and add our preprocessors
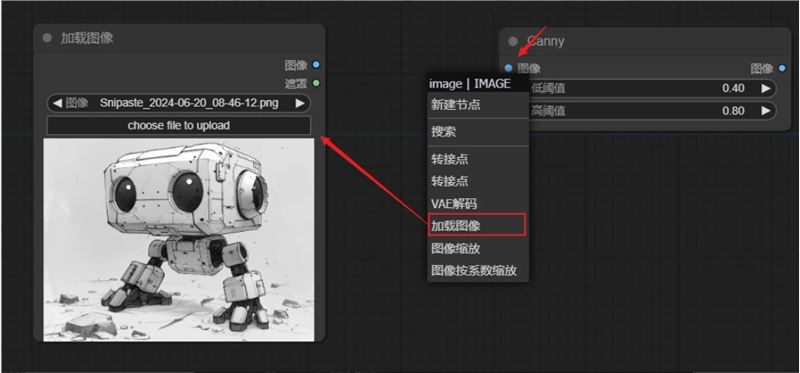
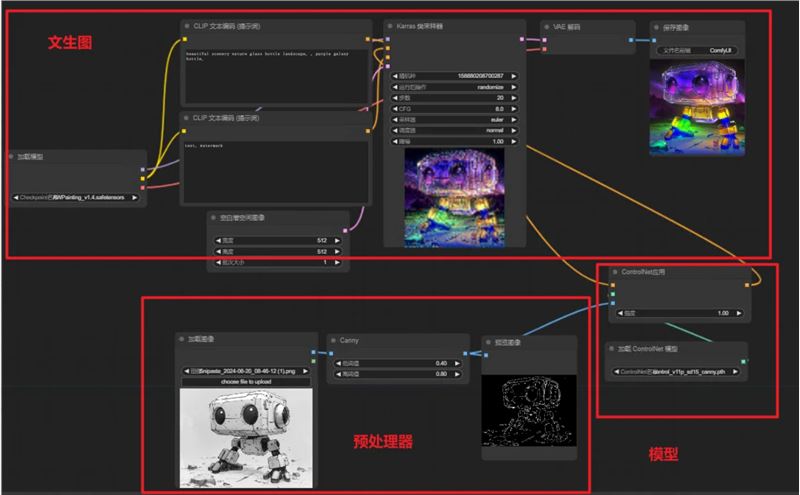
With the preprocessor node, we drag the load image from the left side of the node
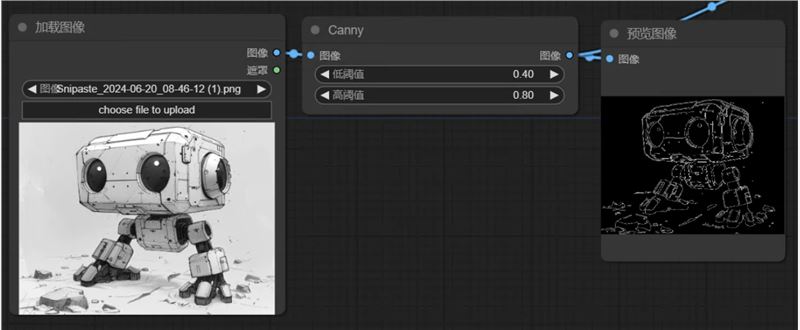
Pull out the preview image on the right, and our preprocessing is now complete. The effect after running corresponds to the 💥 button in our webui
2.ControlNet Model
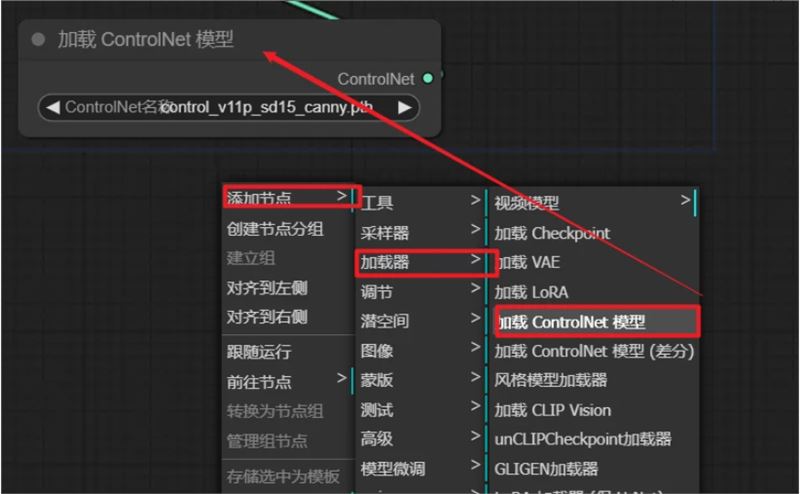
Then we sort out the logic. After the image is processed by the canny preprocessor, we should send it to the canny model corresponding to the controlnet. So we load it as shown belowControlNetModel, remember to select the model corresponding to canny.
We see a node on the right side of the loaded controlnet model. Drag it out and select the controlnet application. Does this look familiar to you? It is very similar to the controlnet control strength in WebUI. The image node on the right receives the node after canny preprocessing.
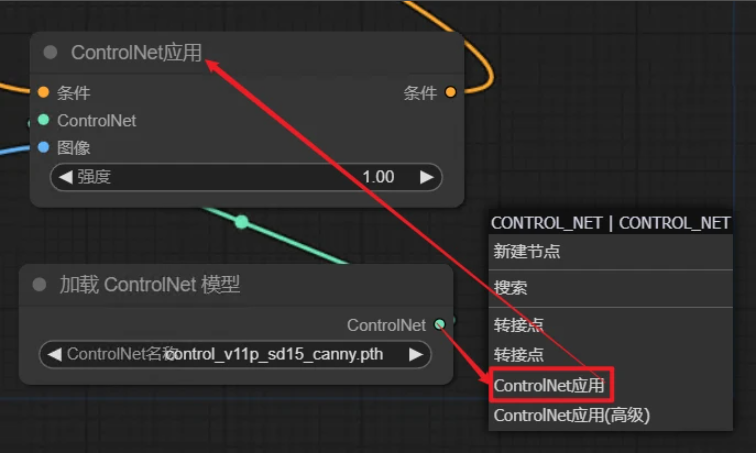
We are looking at the conditions on the right. The ControlNet application will process the conditions and add the control information currently extracted by ControlNet. So we need to connect them to the output conditions of the "CLIP Text Encoder" node.
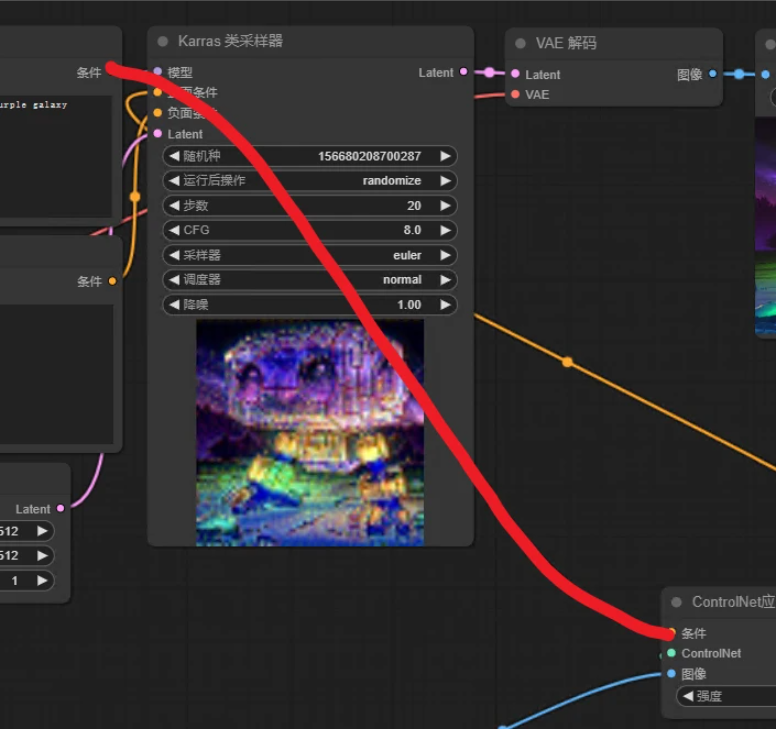
The output condition on the left is linked to the positive condition of the K sampler (positive prompt word)
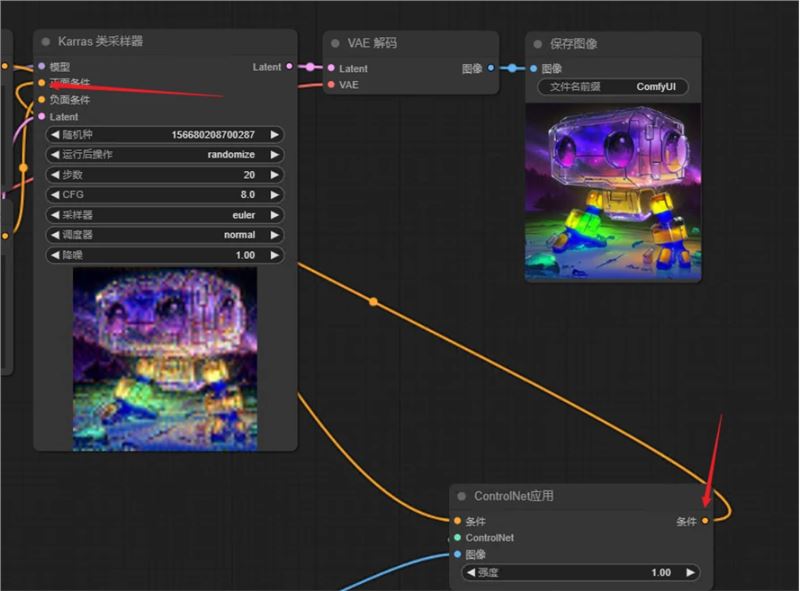
The above connections complete the most basic Contnet workflow. The following is the complete workflow.
Multiple controlnet links
We just need to connect another "Controlnet application" in series after the "Controlnet application", and the rest should be connected to the Controlnet model or the Controlnet preprocessor.

Supplement: The controlnet application that comes with comfyui is relatively simple. If you want to use advanced Controlnet
We can install this extension in the manager
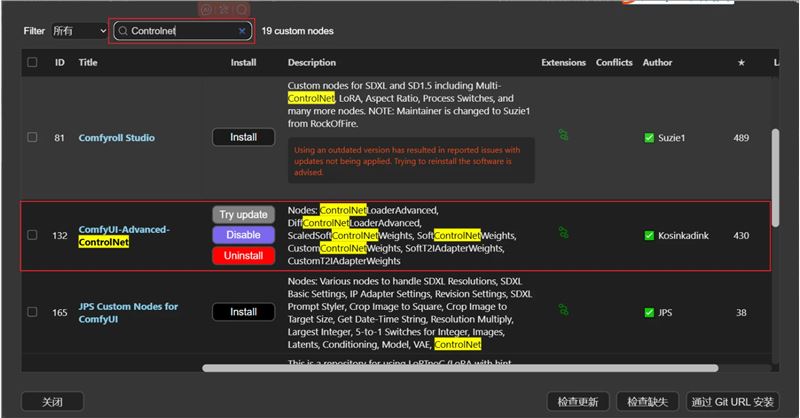
After the installation is complete, we can use the more feature-rich controlnet application. Does this look more similar to the WebUI?
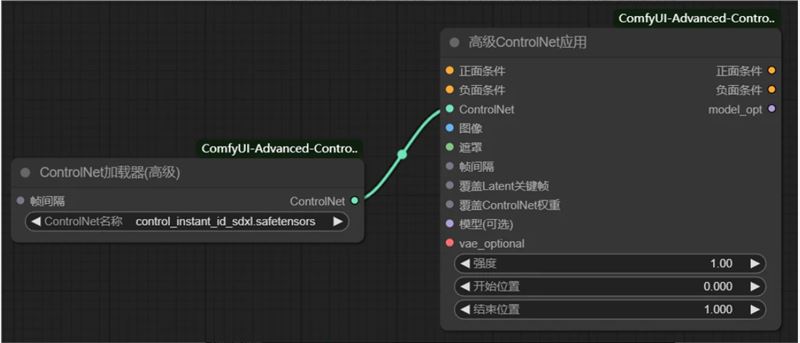
- Strength: This is what we use to control the weight.
- Start time: When we are drawing, when does Controlnet start controlling?
- End time: When we are drawing, when does Controlnet end control?