Stable Diffusion Quick Start: Image-to-Image
This article isStable DiffusionbeginnerA detailed tutorial on how to generate images from text is provided to guide you on how to use the text-to-image function and start your AI art creation journey.
Compared with the raw images in Midjourney, the raw images in Stable Diffusion are much more powerful. In addition to image control, they also include graffiti, partial redrawing, graffiti redrawing, uploading redraw masks, and batch processing.
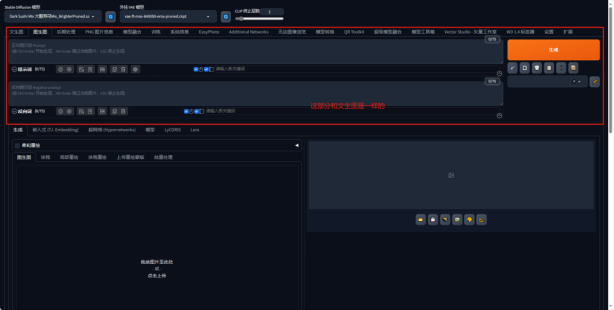
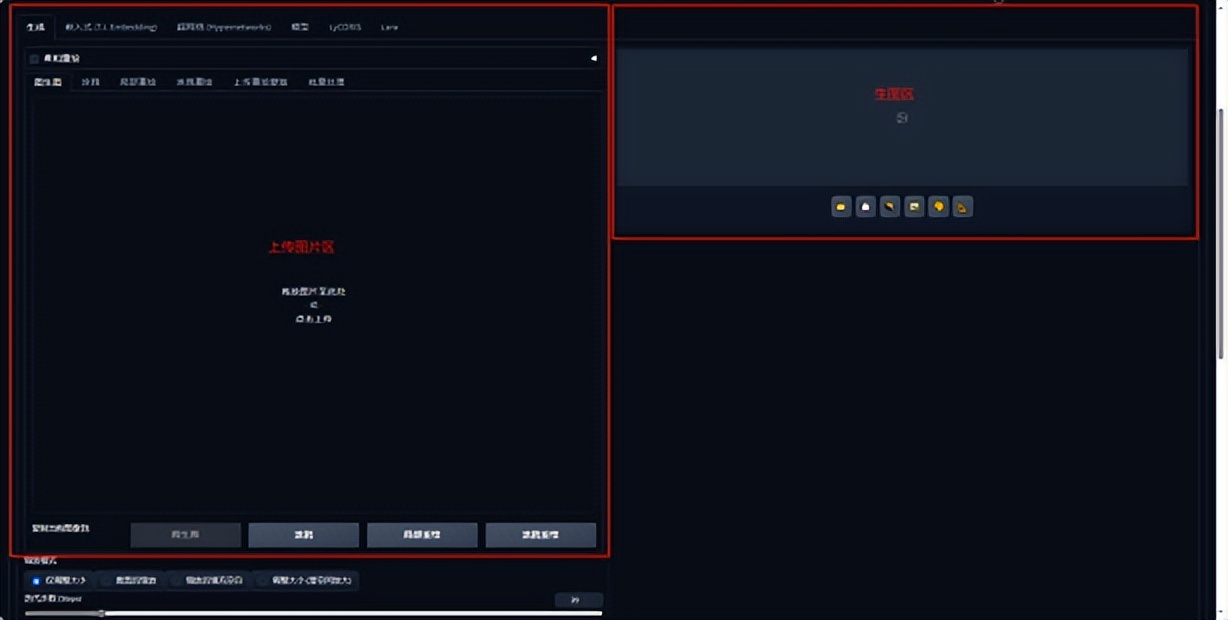
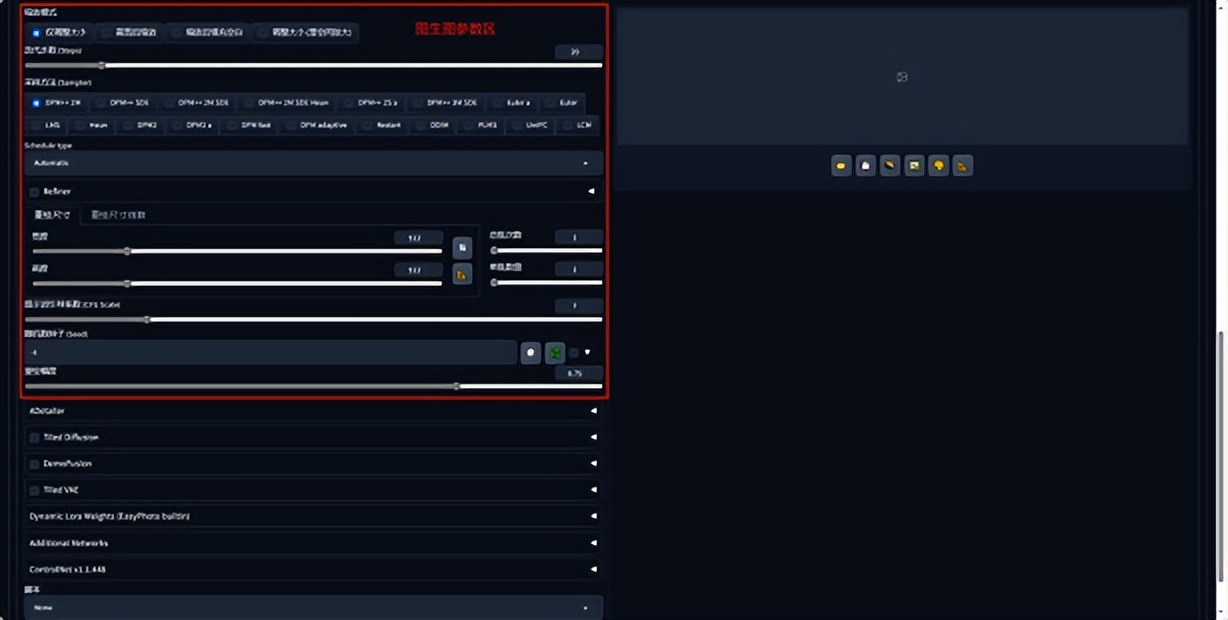
1. Introduction to the image generation interface
2. First experience with image generation
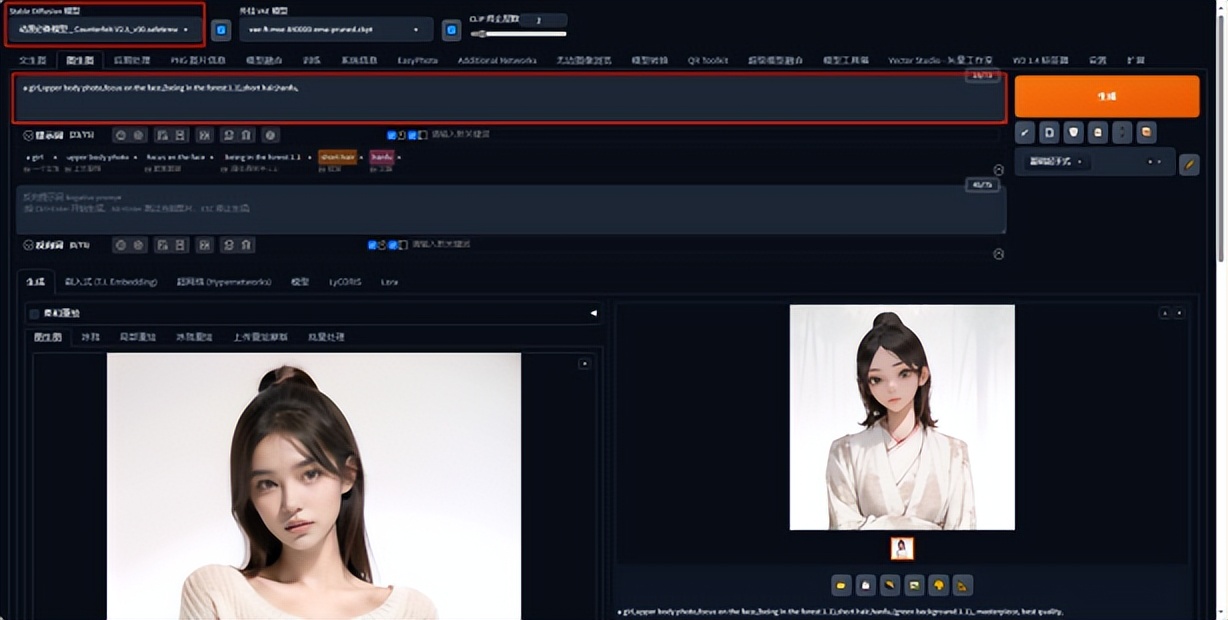
We can upload our pictures in the picture material area, select the large model we like, and only provide some text descriptions without setting the picture raw image parameters. It is easy to get a comic style picture with a posture similar to the original picture. This is the simplest use of the picture raw image.
3. Detailed explanation of image generation parameters
(I) Zoom mode
The scaling mode function actually refers to the way in which the images in the material area are loaded. Each loading method will affect the output image size result.
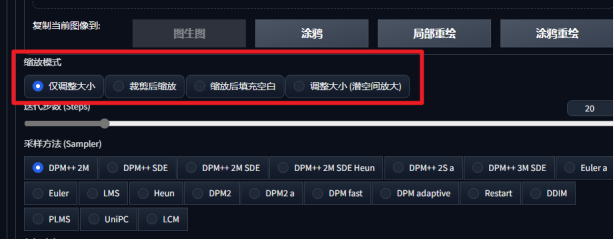
The four image processing methods are explained as follows:
Just Resize
o Force-scale the image to the size you want. Unless the height and width match, you will get an incorrect aspect ratio.
Crop and Resize
o Crop the image to your desired ratio so that the entire target resolution is filled by the image and the excess is cropped.
Resize and Fill
o Fill the newly sized element based on the last pixel of the image. Scale the image proportionally and fill in the missing parts.
Latent upScale
o Similar to stretching, but with high randomness when collecting noise. This is a shortcut option often used for image super-resolution, use with caution on low video memory.

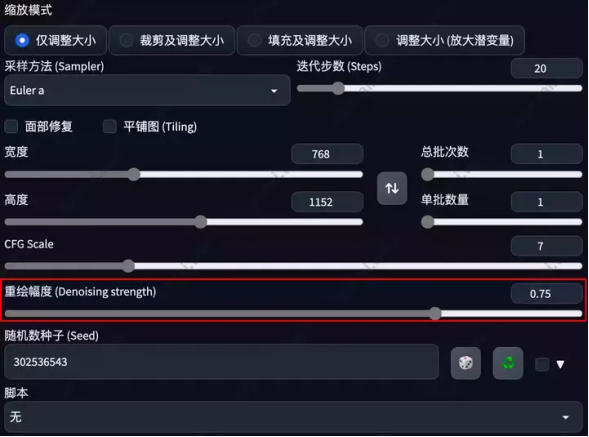
(II) Redrawing intensity (the core of the image generation)
Determines how much the algorithm affects the image content. Range is 0-1.
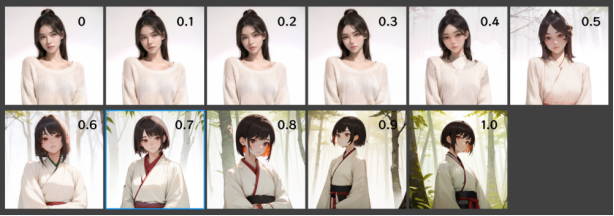
The larger the value of this parameter is, the greater the difference with the original image is; the smaller the value is, the closer it is to the original image.
We can intuitively feel the impact of the redrawing intensity on the original image through a set of pictures: the lower the redrawing intensity, the more similar the generated image is to the original image. The higher the redrawing intensity, the more different the generated image is from the original image.
(III) Redraw size
Click the triangle ruler to automatically adjust it to the same size as the material image

(IV) Sampling steps
It is basically the same as the Vincent diagram. It is worth noting that by default, when the redraw intensity is low, the actual number of sampling steps will decrease. The specific formula is sampling steps * redraw intensity = actual sampling steps.
4. Graffiti Usage
The parameters are the same as the original image. The difference is that there is an additional brush on the right side of the source image.
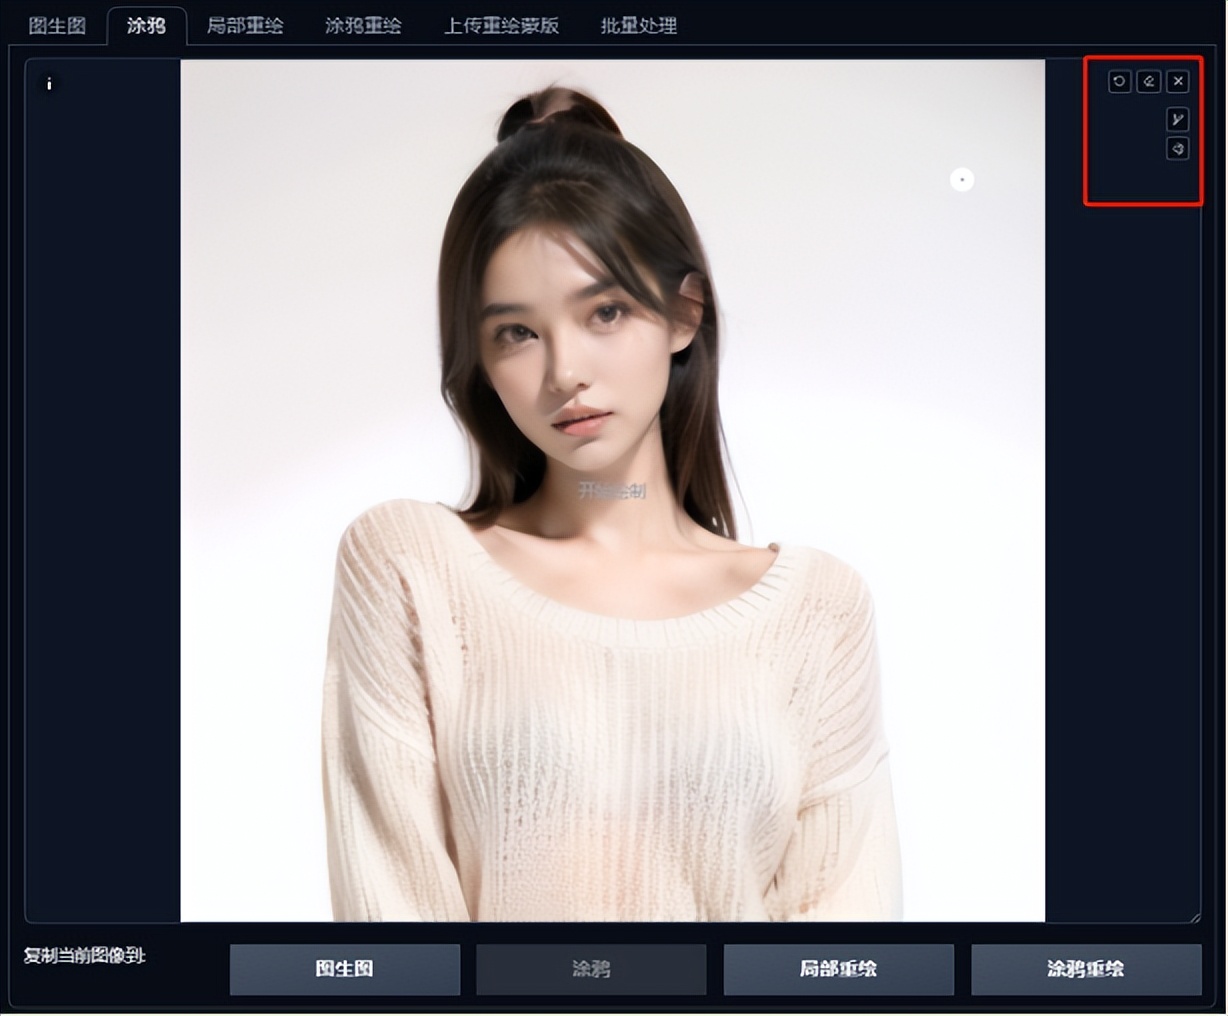
We can select the brush to draw a circle on the girl's head and add the text description: flower. The graffiti function changes the area we draw into a flower.
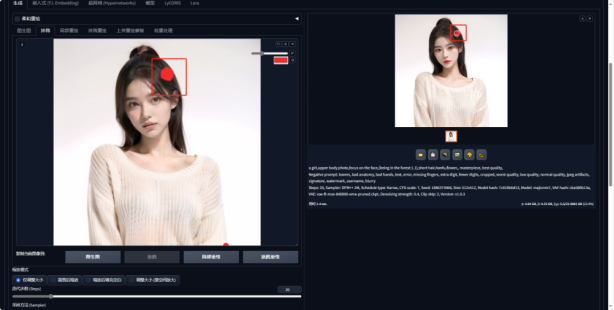
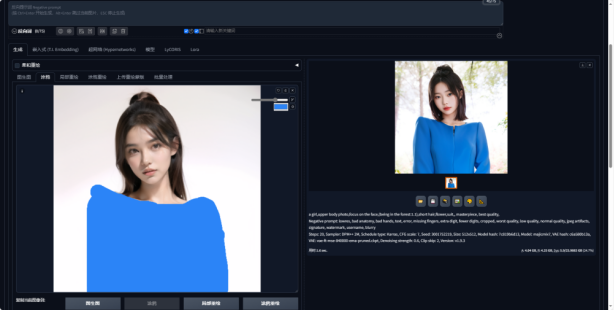
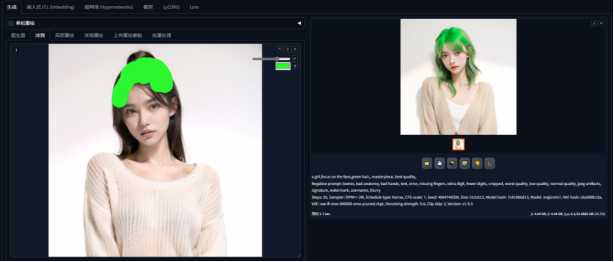
It can be seen that the graffiti function is quite powerful. In fact, graffiti is very suitable for simple drawings combined with text prompts to realize your own ideas:
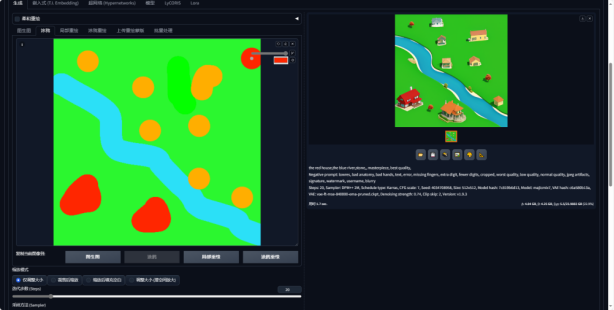
5. Partial redraw: only change the part of the image you want to change (strong controllability)
You can see that this function has some more parameters:
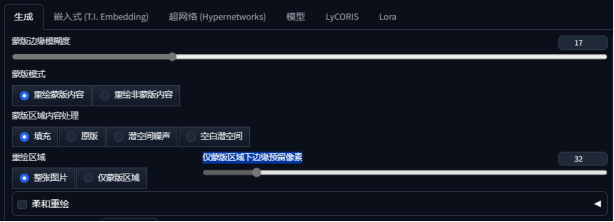
1. Mask Fuzziness: Add a Gaussian blur to your masked area
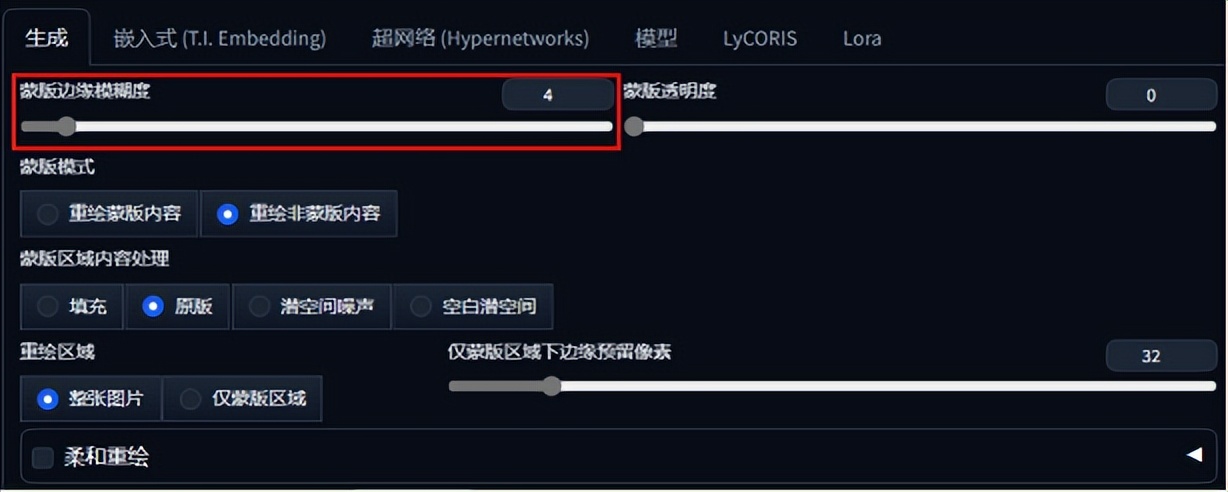
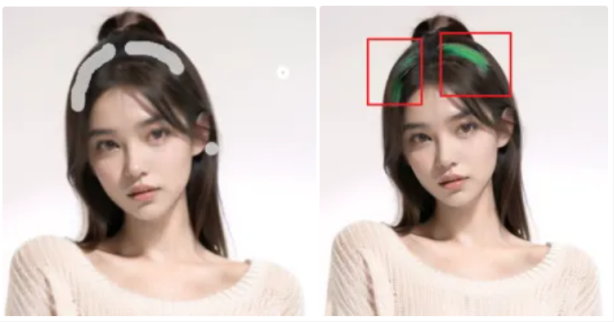
If it is too low, you can see that the color is very hard.
If it is too high, you will find that the effect is not visible
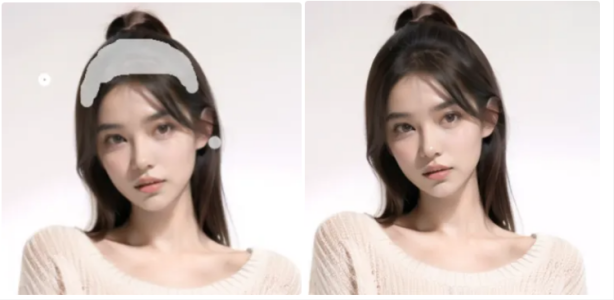
Therefore, this parameter requires you to debug several times during use.
2. Mask Mode
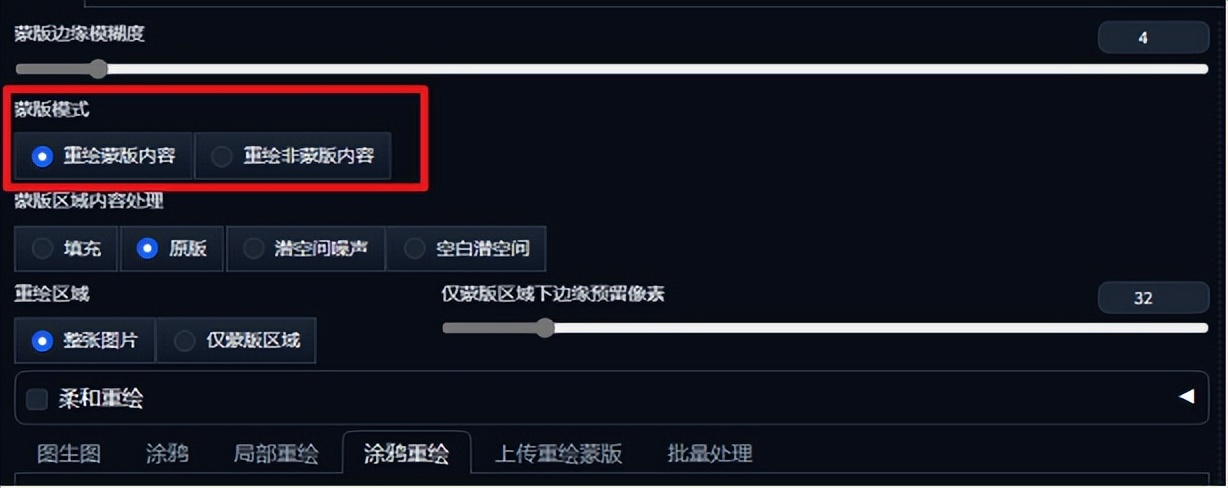
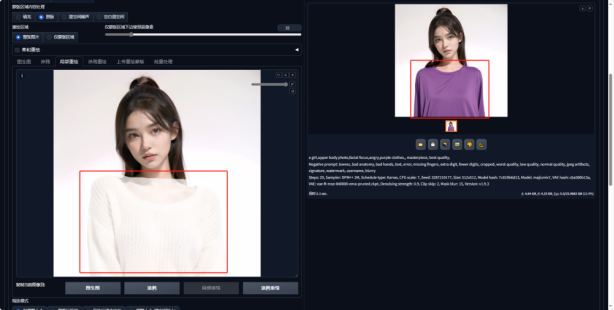
Redraw the mask content: This means that AI only changes your mask content and keeps everything else.
From the effect of the figure below, you can see that only the mask area is redrawn
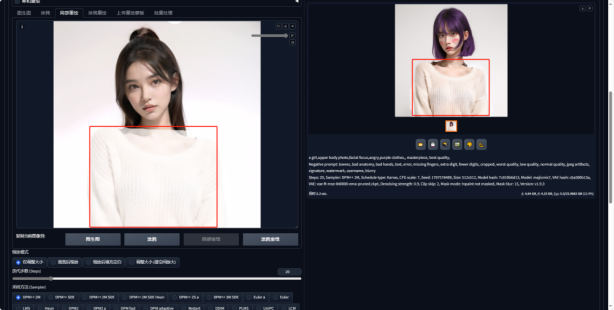
Redraw non-masked content: This means that AI only changes the unmasked content and retains the masked content
The effect in the picture below shows that the clothes remain unchanged, but other parts have been redrawn.
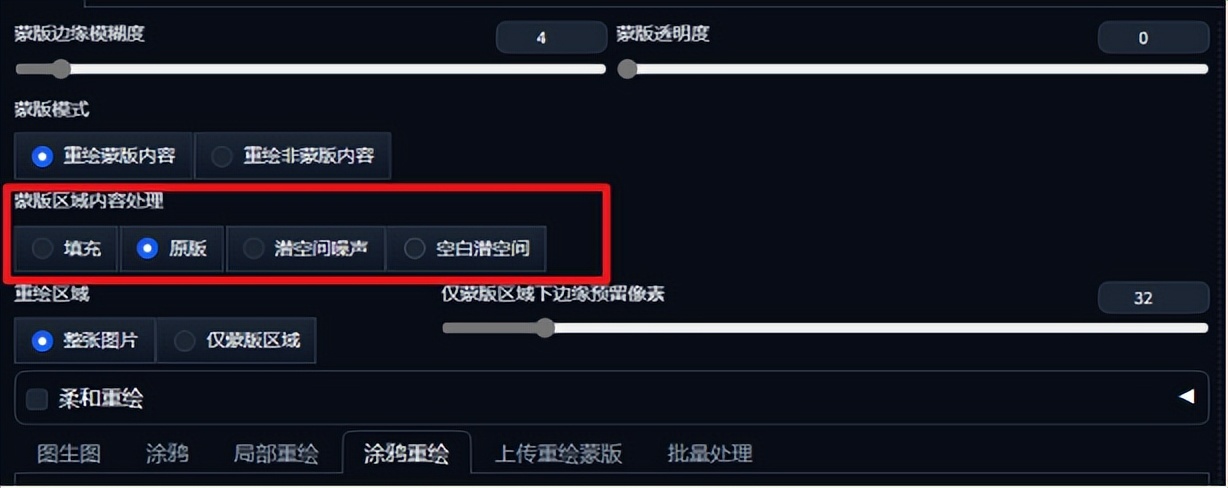
3. Mask area content processing
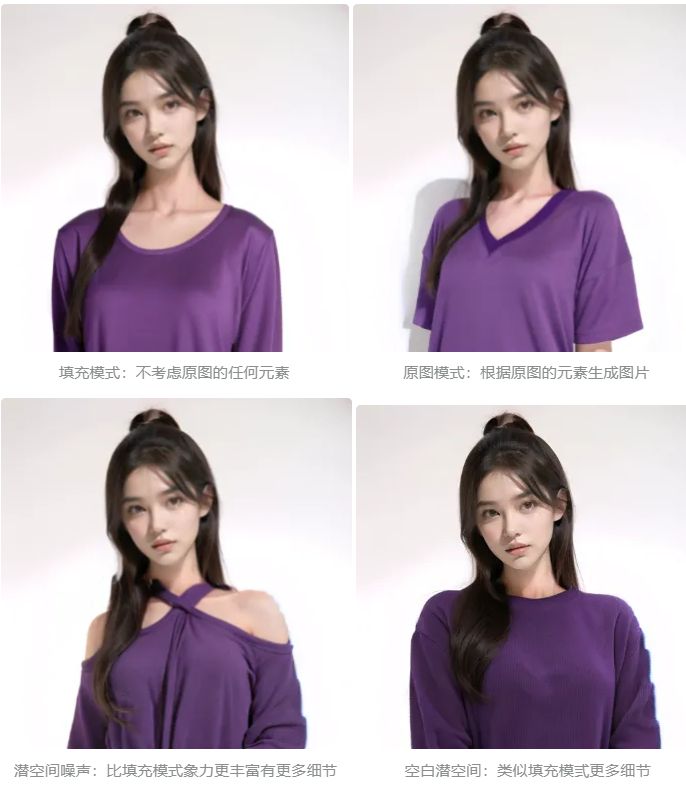
4. Redraw area
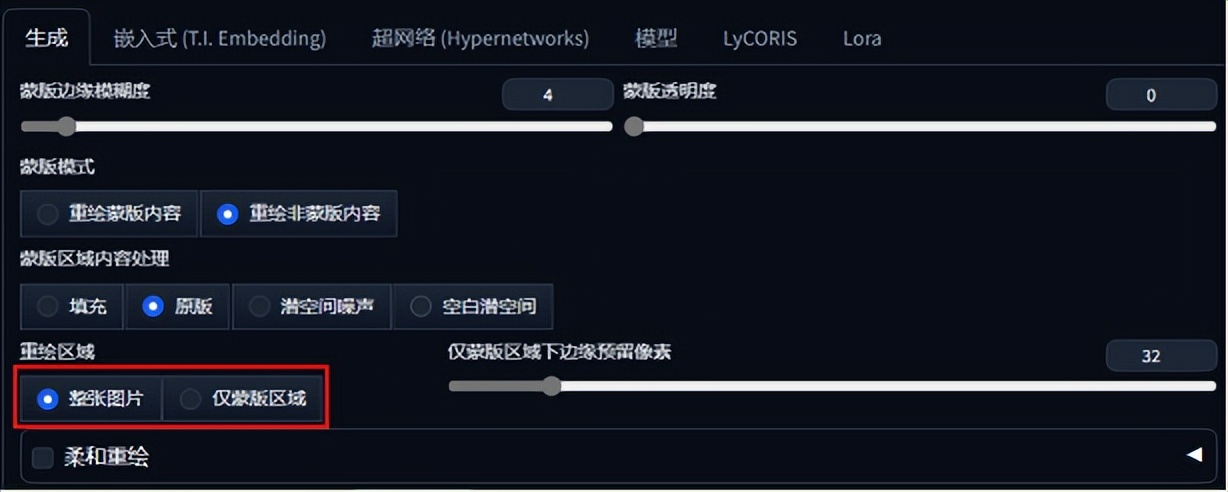
Whole image: Pixels are concentrated in the whole image, and the pixel accuracy of the masked area will be less.
Mask area only: Pixels are concentrated only in the mask area, and the pixel accuracy in the mask area will be very high
In actual experience, the difference is not that big, so just use the default.
5. Only reserve pixels at the bottom edge of the mask area
Let the mask refer to the values of the surrounding pixels
The lower the value: the fewer elements are near the reference mask.
The higher the value: the more elements near the reference mask
This setting is the default.
6. Graffiti Redraw (combination of the first two functions)
It is to increase the transparency of the mask based on local redrawing
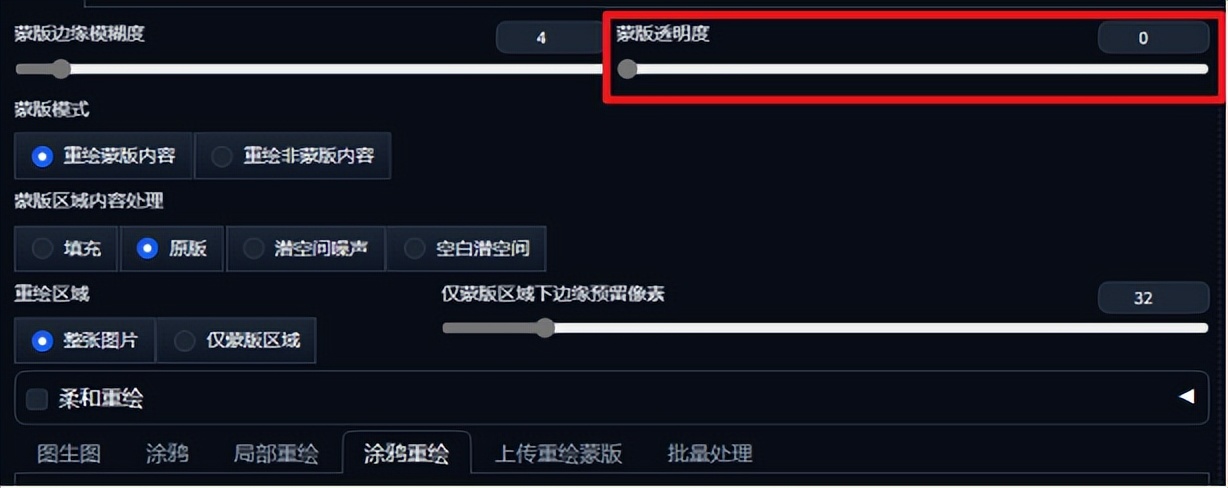
Mask transparency:
The higher the value, the more transparent the mask is and the blurrier the image is.
The lower the value, the clearer the mask and the more accurate the output image.
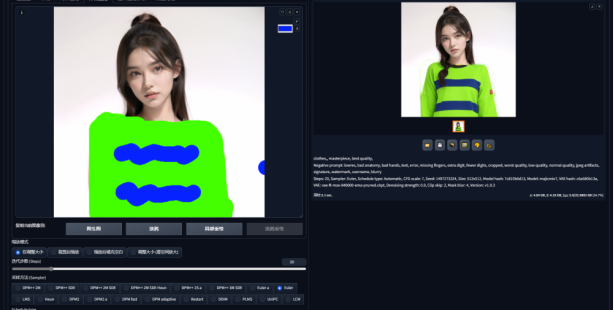
Advantages of partial drawing graffiti mask:
· With masking function
The brush color determines the color of the image.
· You can use multiple colors when graffiti
From the effect, we can see that this function can not only identify the mask but also redraw the color of the brush.
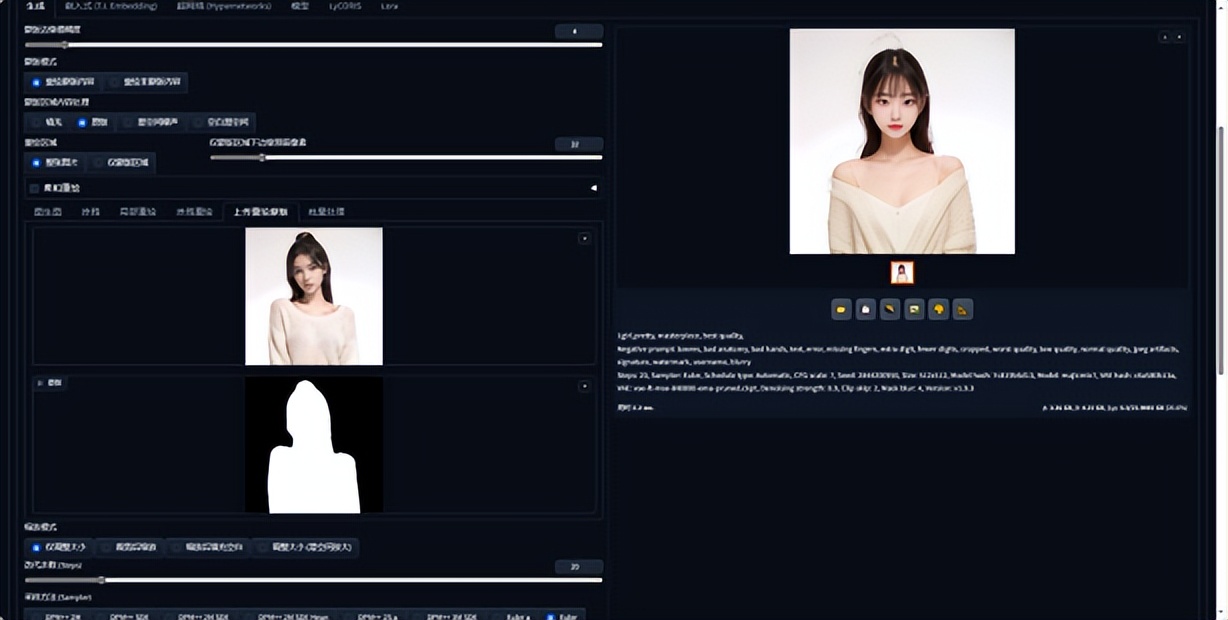
7. Upload the redraw mask
Let’s prepare a mask first.
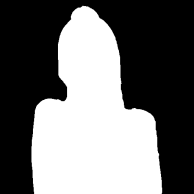
Import the mask and modify the prompt words: 1girl, pretty. Select Redraw Mask Contents and you can see that only the white mask area has been changed.
If you choose to redraw the non-masked content, change the prompt word: sea. It can be seen that only the scene outside the mask is redrawn, and the characters are not changed.
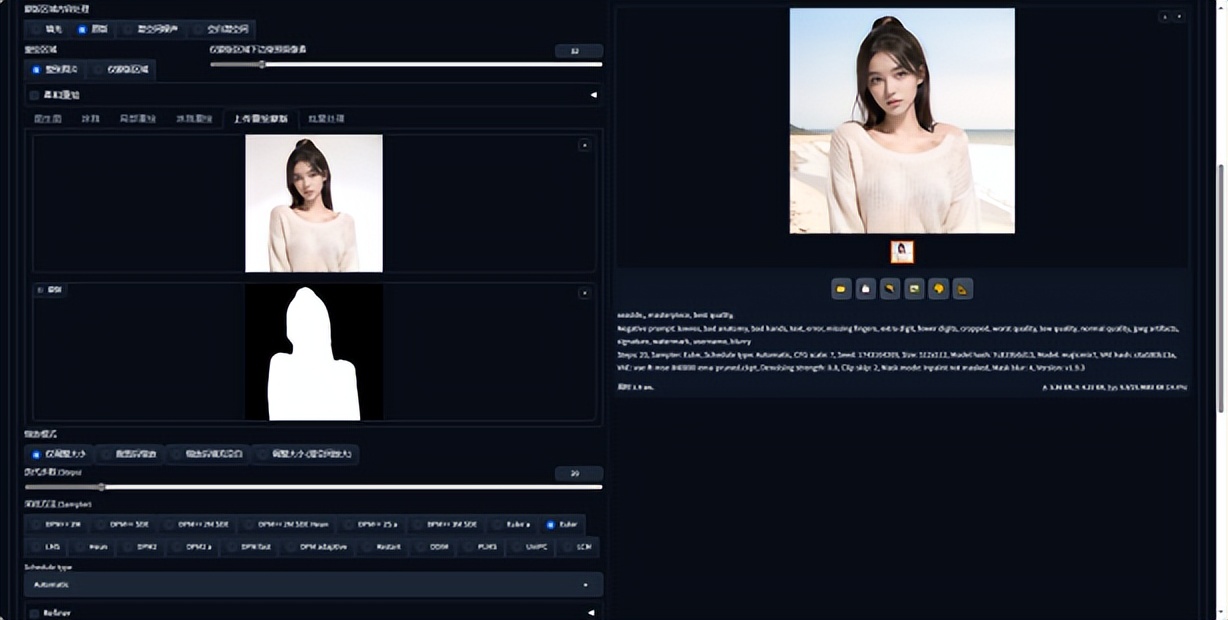
The above is the upload redraw mask function, which is often used when changing models' clothes.
8. Batch Upload
Process images in a directory on the server host Export images to an empty directory instead of the output directory specified in the settings Add a redraw mask directory to enable the redraw mask feature
You need to prepare 2-3 documents:
· Input folder (all the pictures you want to modify are placed in this folder)
Output folder (must be an empty folder)
Mask file for sale (if there is a mask, this folder is needed)
Batch redrawing can be achieved.
IX. Conclusion
In today's article, I introduced the role of image redrawing in Stable Diffusion, the functional analysis of various tools and parameters, and the learning ideas about image redrawing. Compared with the one-step formation of text-generated images, image-generated images are more fragmented, and we need to constantly modify and adjust local details to get the pictures we want.