Hello everyone, I was introducingTencent's open source Hunyuan-DiT Wenshengtu large modelI set a flag: to publish an articleDeployment TutorialBecause my graphics card is 16G, which just meets the minimum video memory requirement. Some friends have left messages expressing their interest in this before, so today, it is here!
It should be noted that the computer graphics card required for this deployment must have a video memory of 11G or more. If you want to experience multiple rounds of conversations, the video memory must be 32G or more.
This tutorial will not go into details about the installation of graphics card drivers and Cuda. If you are interested, you can read my previous article:
《Ubuntu22.04 installs NVIDIA driver (hematemesis version)》
《Install CUDA and cuDNN on Ubuntu 22.04》
In addition, this tutorial is based on Linux system (Ubuntu) testing, so if you are using Windows or Mac system, some commands may not be applicable and need to be adjusted by yourself. If you only want to see the final effect, you canGo directly to the end of the article.
Project environment:
- Python: 3.8
- GPU: NVIDIA 4060Ti 16G
- GPU Driver: 535.154.05
- Cuda: 12.2
1. Build environment and install dependencies
1. Clone the project
$ git clone https://github.com/tencent/HunyuanDiT $ cd HunyuanDiT2. Create a new conda environment
$ conda env create -f environment.ymlThis project uses conda to install dependencies. The corresponding configuration file is environment.yml. If you have not installed conda before, you can install it throughMiniconda official tutorial [1]Install
If you get the following error after executing the above command, it is probably because you are using the default source of conda, and the slow access in China causes a timeout failure (if you installed the dependencies normally, you can skip the following steps to step 3)
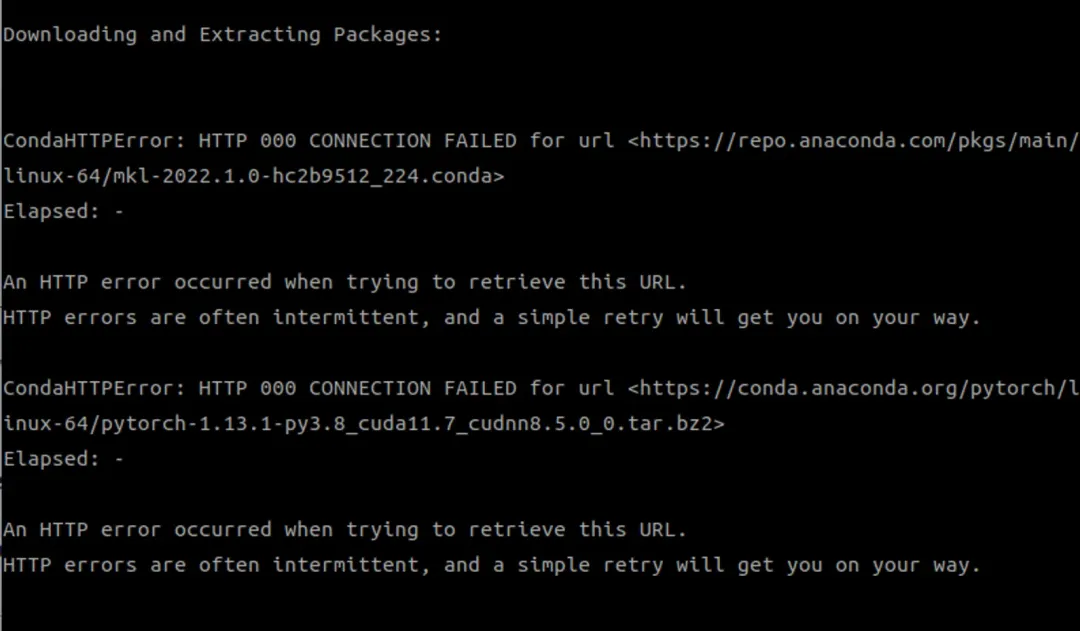
You can view the configuration through the conda config command
$ conda config --show ... channel_alias: https://conda.anaconda.org channel_priority: flexible channel_settings: [] channels: - defaults client_ssl_cert: None client_ssl_cert_key: None custom_channels: pkgs/main: https://repo.anaconda .com pkgs/r: https://repo.anaconda.com pkgs/pro: https://repo.anaconda.com # default source custom_multichannels: defaults: - https://repo.anaconda.com/pkgs/main - https://repo.anaconda.com/pkgs/r local: debug: False default_channels: - https://repo.anaconda.com/pkgs/main - https://repo.anaconda.com/pkgs/r default_python: 3.11 ssl_verify: True ...There are two ways to modify the source. The first is to modify it through the conda config command, for example:
# needs to be replaced with the corresponding source address conda config --add channels https://mirrors.xxxThe second method is to modify the ~/.condarc file. However, if you have not set up a mirror source before, this file may not exist. You need to generate it through this command.
$ conda config --set show_channel_urls yesI used the second method. After the configuration file is generated, there is only one line, show_channel_urls: true, which needs to be replaced with the following:
channels: - defaults show_channel_urls: true default_channels: - https://mirrors.tuna.tsinghua.edu.cn/anaconda/pkgs/main - https://mirrors.tuna.tsinghua.edu.cn/anaconda/pkgs/r - https://mirrors.tuna.tsinghua.edu.cn/anaconda/pkgs/msys2 custom_channels: conda-forge: https://mirrors.tuna.tsinghua.edu.cn/anaconda/cloud msys2: https://mirrors. tuna.tsinghua.edu.cn/anaconda/cloud bioconda: https://mirrors.tuna.tsinghua.edu.cn/anaconda/cloud menpo: https://mirrors.tuna.tsinghua.edu.cn/anaconda/cloud pytorch : https://mirrors.tuna.tsinghua.edu.cn/anaconda/cloud pytorch-lts: https://mirrors.tuna.tsinghua.edu.cn/anaconda/cloud simpleitk: https://mirrors.tuna.tsinghua.edu.cn/anaconda/cloud deepmodeling: https://mirrors.tuna. tsinghua.edu.cn/anaconda/cloud/Then execute this command to clear the index cache and ensure that the new image source is used.
$ conda clean -i Will remove 1 index cache(s). Proceed ([y]/n)? yFinally, execute the first command
$ conda env create -f environment.yml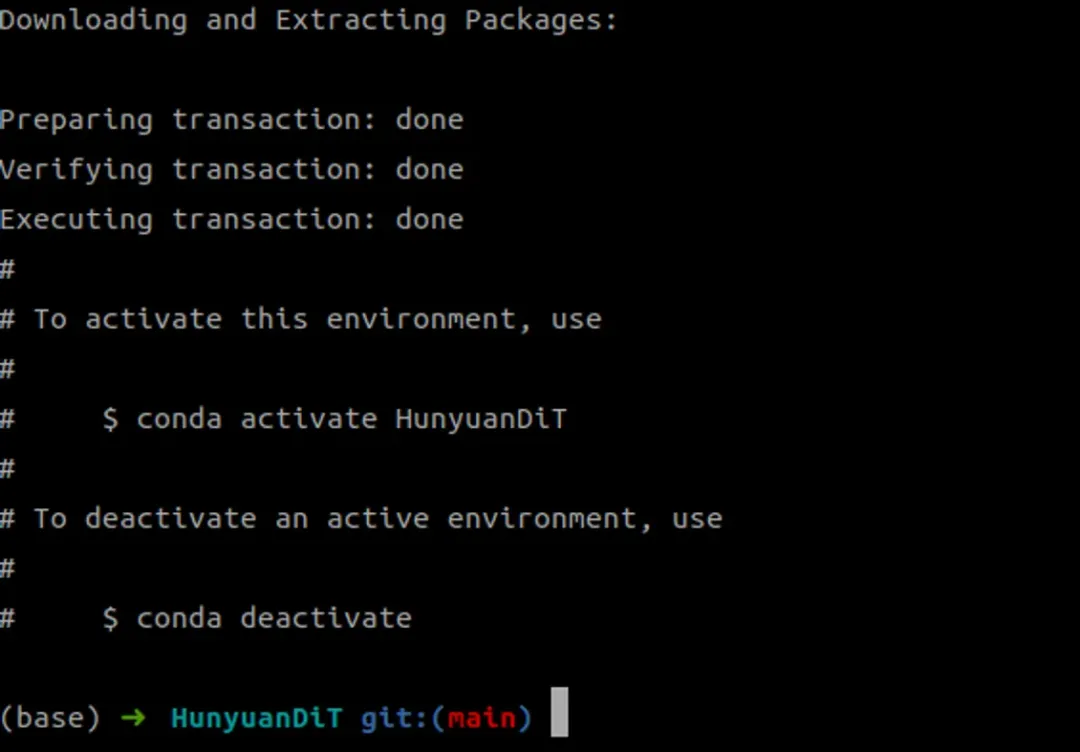
3. Activate the conda environment
$ conda activate HunyuanDiT4. Installation dependencies
The newly installed conda environment actually only has relatively basic dependencies, not the dependencies required by the project
$ pip list Package Version ------------------ ------- pip 24.0 setuptools 69.5.1 torch 1.13.1 typing_extensions 4.11.0 wheel 0.43.0So we also need to install project dependencies through the pip command
$ pip install -r requirements.txtThe official also mentioned that flash attention can be installed for acceleration, but CUDA version 11.6 and above is required (if you find this troublesome, you can choose not to install it, because it seems to have no effect, as mentioned below)
$ pip install git+https://github.com/Dao-AILab/flash-attention.git@v2.1.2.post32. Download the model
Before downloading the model, you first need to install huggingface-cli[2]
$ pip install "huggingface_hub[cli]"Then create a ckpts folder in the project root directory, which is the directory where we store the model, and use the huggingface-cli above to download the model
$ mkdir ckpts $ huggingface-cli download Tencent-Hunyuan/HunyuanDiT --local-dir ./ckptsDownloading Models

Note: If you encounter this error during the download process: No such file or directory: 'ckpts/.huggingface/.gitignore.lock', you can ignore this error and re-execute the above download command
Although I did not encounter the above error, I encountered the following error: ChunkedEncodingError, as shown below
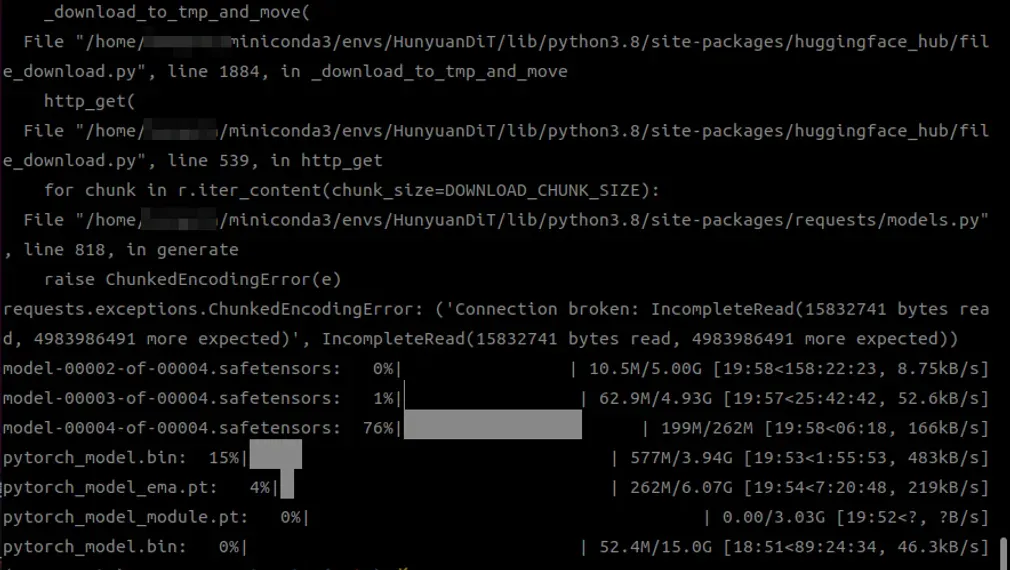
This is actually because the model to be downloaded is too large, and the connection was interrupted halfway through the download. I took a look and found that the model size required for Hunyuan-DiT is a total of 41G, which is really shocking.
I also searched for some methods on the Internet, such as changing the source (hf-mirror), but the effect was not obvious. In the end, I still used huggingface-cli to download slowly, because this tool supports breakpoint resumption, that is, if the download fails in the middle, it can be restored from the original progress. It took about a few hours.

Online search method (for reference only):https://padeoe.com/huggingface-large-models-downloader/
Mirror site address:https://hf-mirror.com/
3. Start UI interface
I thought downloading the model was difficult enough, but I didn’t expect that launching its UI program would be equally difficult.
If you use a Sock proxy, you may be prompted with a missing dependency. The error and solution are as follows:
$ python app/hydit_app.py ... raise ImportError( ImportError: Using SOCKS proxy, but the 'socksio' package is not installed. Make sure to install httpx using `pip install httpx[socks]` # Note the colon $ pip install "httpx[socks]"The second error is as follows:
This is because the working mode of the graphics card has become exclusive mode. Exclusive mode is a GPU working mode that allows a single computing process to monopolize a GPU resource, thereby improving computing efficiency. In other words, other programs cannot seize the GPU (it is speculated that the previous running of other programs was modified)

Restore the default mode with this command:
$ nvidia-smi -g 0 -c 0 Compute mode is already set to DEFAULT for GPU 00000000:01:00.0. All done.The third error is port conflict
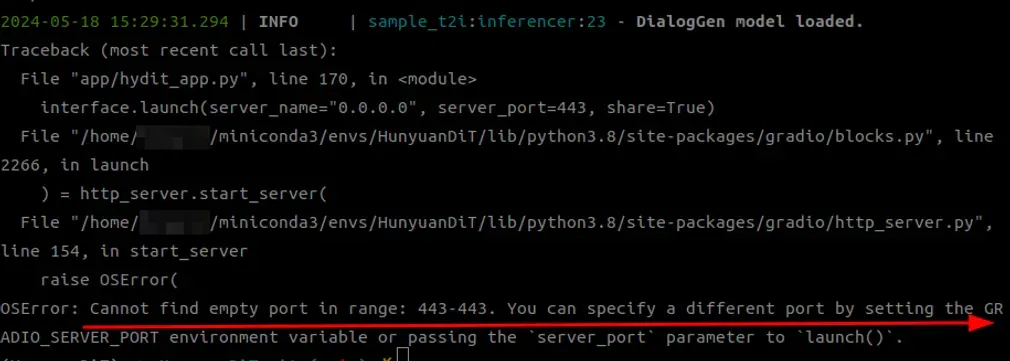
After looking at the source code, I found that the code has fixed port 443. I changed the code directly, for example, to port 8099. I tried setting environment variables but it didn't work (I suggest setting share to False so that it won't be published online).

Finally, the goddess of victory finally waved to me!
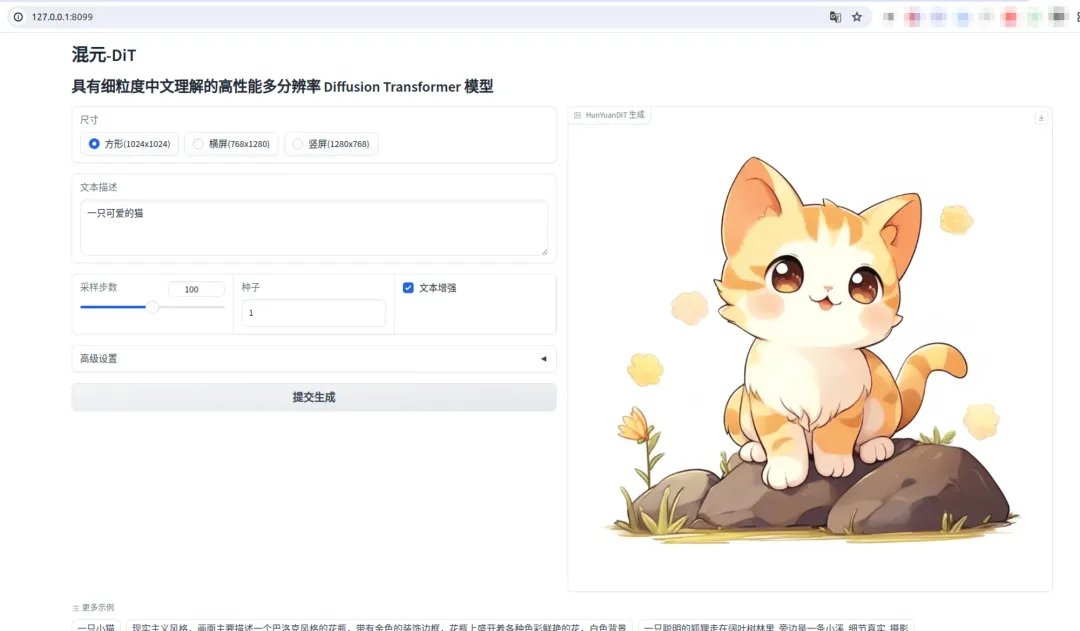
4. Wenshengtu Experience
Although the UI interface can be seen above, there are several problems with the Wensheng map:
4.1 Cuda is not available
Before deployment, my computer could recognize Cuda, that is, inputting torch.cuda.is_available() returned True, but this time it suddenly could not recognize it.
>>> import torch >>> torch.cuda.is_available() /home/xxx/miniconda3/envs/HunyuanDiT/lib/python3.8/site-packages/torch/cuda/__init__.py:88: UserWarning: CUDA initialization : CUDA unknown error - this may be due to an incorrectly set up environment, eg changing env variable CUDA_VISIBLE_DEVICES after program start. Setting the available devices to be zero. (Triggered internally at /opt/conda/conda-bld/pytorch_1670525541702/work/ c10/cuda/CUDAFunctions.cpp:109.) return torch._C._cuda_getDeviceCount() > 0 FalseBecause of this problem, this error was reported when the Wensheng figure was drawn.
RuntimeError: CUDA unknown error - this may be due to an incorrectly set up environment, eg changing env variable CUDA_VISIBLE_DEVICES after program start. Setting the available devices to be zero.I tried various things afterwards, but nothing worked. Finally, it got better after restarting the computer.
4.2 Video Memory Exceeds Limit
The error message is as follows:

This is because DialogGen, a prompt word enhancement model, is enabled by default. However, using this model requires at least 32G of video memory, so my video memory is maxed out.
Solution:
# does not enable python app/hydit_app.py --no-enhance4.3 Installing flash-attention
I actually didn't install it at first, but I found that Vincent was extremely slow! It took 226 seconds to download one picture!
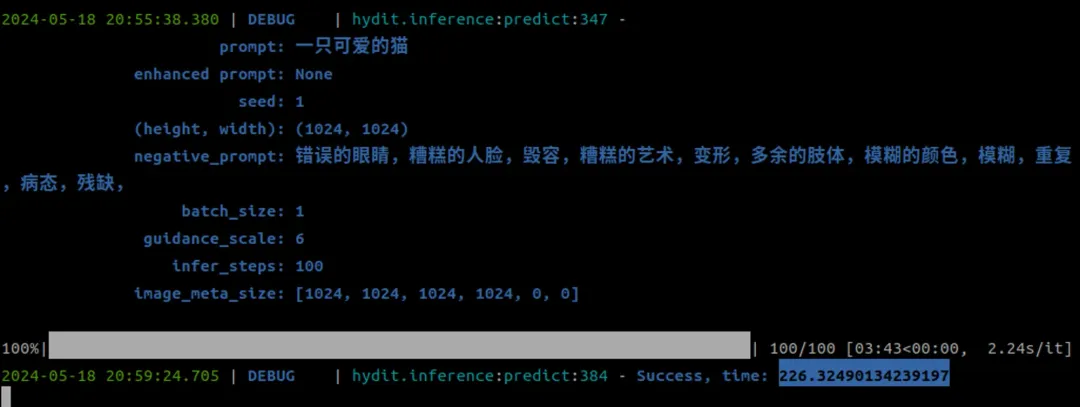
Then I thought about whether I could install flash-attention to increase the speed, but when I installed it, I got an error again.
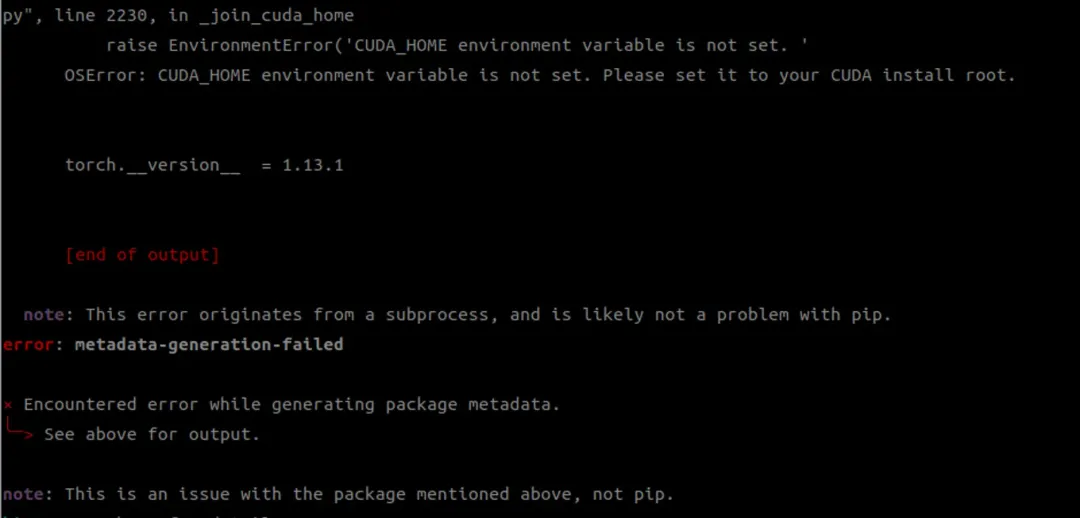
This is because I did not install Cuda Tookit before, so I did not configure the CUDA_HOME environment variable. I installed it later through runfile.
# needs to be replaced with the version suitable for you wget https://developer.download.nvidia.com/compute/cuda/12.2.0/local_installers/cuda_12.2.0_535.54.03_linux.runIf you have already installed the graphics driver like me, remember to uncheck the driver installation
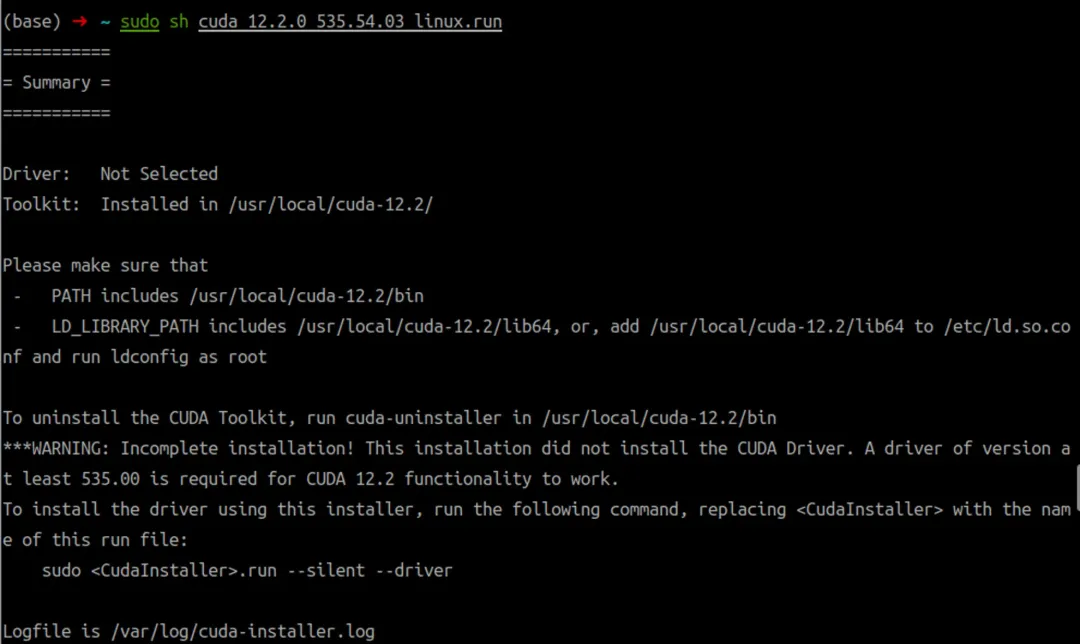
Finally configure the environment variables
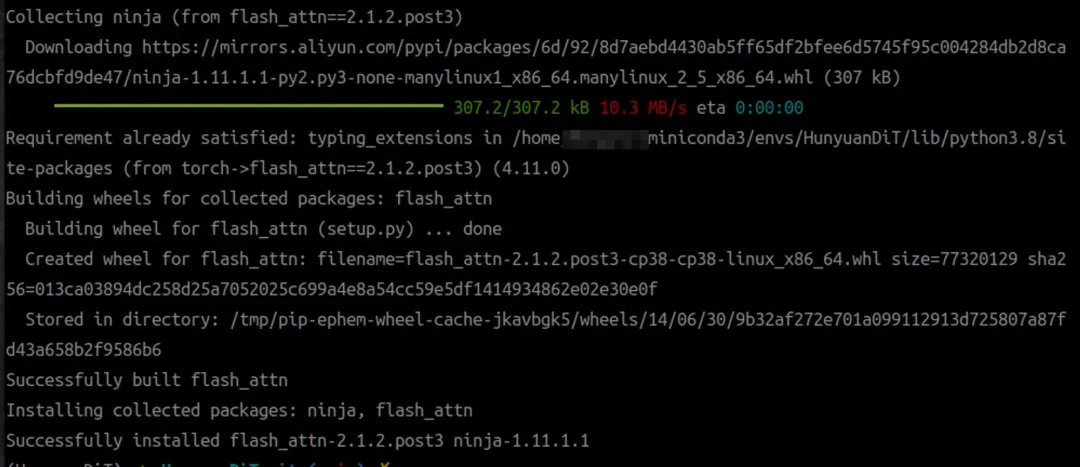
export PATH=/usr/local/cuda-12.2/bin${PATH:+:${PATH}} export LD_LIBRARY_PATH=/usr/local/cuda-12.2/lib64${LD_LIBRARY_PATH:+:${LD_LIBRARY_PATH}} export CUDA_HOME=/ usr/local/cuda-12.2It took about half an hour to build successfully.
5. Wenshengtu Effect
1. Prompt: Draw a pig wearing a suit

2. Prompt word: Realistic style. The picture mainly describes a Baroque-style vase with a golden decorative border, and various colorful flowers blooming on the vase, with a white background.

3. Prompt: Please draw the image of "worrying about the sky" (feeling that the card drawing failed)

4. Please draw "Suddenly, a spring breeze came and thousands of pear trees blossomed"

5. Prompt: A cat in boots is holding a bright silver sword, wearing armor, with a firm look in his eyes, standing on a pile of gold coins. The background is a dark cave, and the image is dotted with light and shadow of gold coins.

6. Prompt: A detailed photo captures the image of a statue that resembles an ancient pharaoh, with an unexpected pair of bronze steampunk goggles on its head. The statue is dressed retro-chic, with a crisp white t-shirt and a fitted black leather jacket that contrasts with the traditional headdress. The background is a simple solid color that highlights the intricate details of the statue's unconventional clothing and steampunk glasses.

7. Prompt: A cute girl with blue hair, red eyes, bullets tied around her waist and a gun in her hand

What do you think of Hunyuan-DiT’s Wenshengtu effect?
6. Summary
The deployment process of Hunyuan-DiT was much more complicated than I thought. It took more than a day. The most time-consuming part was the download of the model and the inexplicable unavailability of Cuda. Although the images generated by Hunyuan-DiT looked good, its generation speed was really disappointing. Under the same graphics card configuration, Stable diffusion only takes 5-15 seconds to generate an image, while Hunyuan-DiT takes about 220 seconds for each image. I don't know if there is a problem with my installation or it is just so slow. Friends who have deployed can also tell me your running time.
If you think this tutorial is helpful to you, please like and support it. Your likes are my motivation to keep updating!
References
[1] Miniconda official tutorial: https://docs.anaconda.com/free/miniconda/index.html
[2] huggingface-cli: https://huggingface.co/docs/huggingface_hub/guides/cli